18
Footage Save Folder
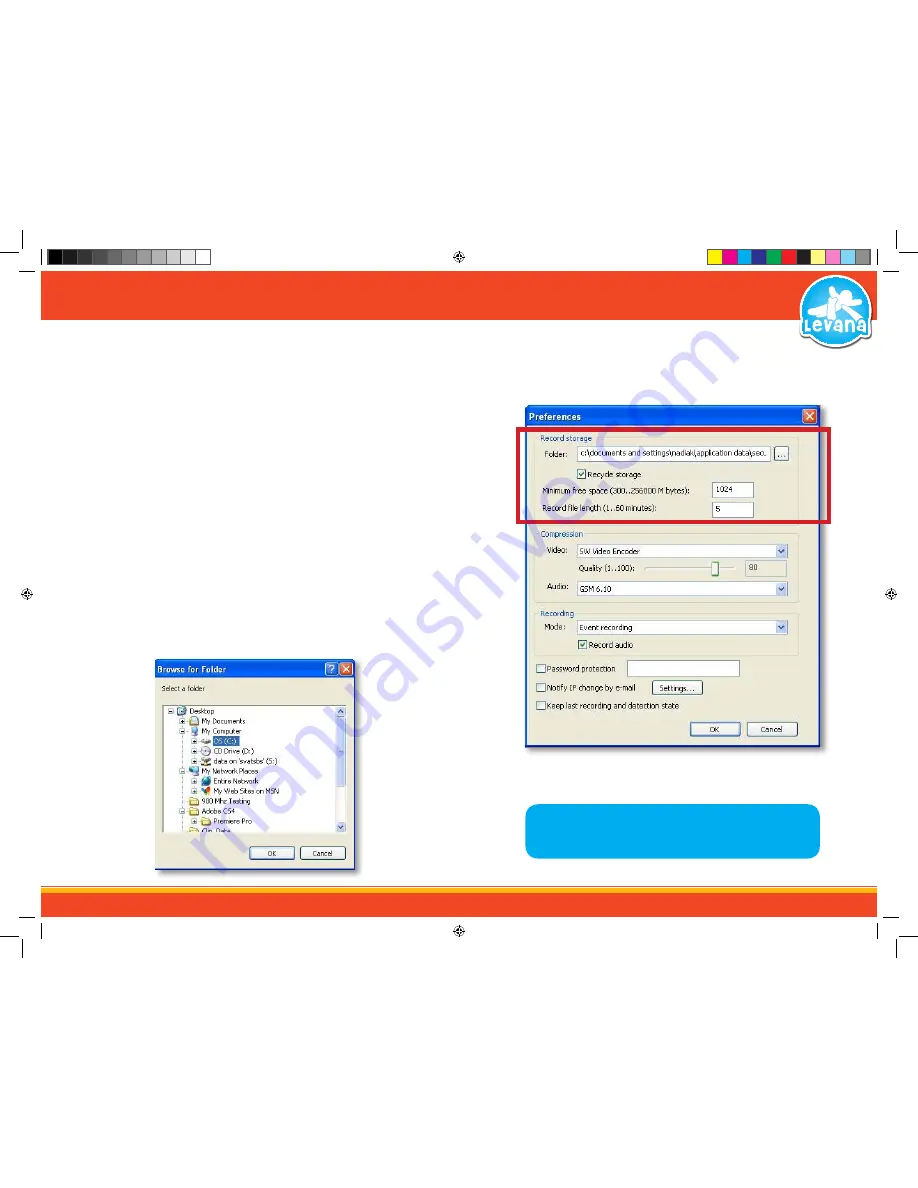
Picking folder to save footage to:
1. Go to “Options”
→
“Preferences” in the upper menu bar and in the record storage section of the
preferences box, choose the folder that you would like the recorded data to be stored by clicking
the […] box.
2. Once you click that box a list of folders will pop up. Find the folder you would like the footage to
save to and double click it.
3. Set the minimum free space, this is to leave space for the software program to operate. The
default value is 1024MB or 1GB. Depending on the size of your hard drive you may want to set this
value to something more like 20000MB.
4. If you want to overwrite over the old footage once the available storage space is used up check the
“Recycle Storage” check box.
5. The ”Record file length” setting breaks up the file length into a number of minutes that you
specify. This can be used to delete sections of video that you no longer require. It is
suggested to leave this at the default value (5 minutes).
6. To save changes and exit the preferences box select OK. To exit without saving select Cancel.
7. Within the preferences box the options to set the record mode and record audio are
available. There are two types of record modes to choose from: Round-the-clock recording and
Event recording. For directions on how to set the record mode and record audio see
RECORDING MODE.
Record Storage Section
File List
STEP 6 - THE BASICS
NOTE: For more information on the preferences box, please see the
SOFTWARE - IN DEPTH section.
LV-TW500 Manual.indd 18
14/10/2010 11:38:23 AM


