8 / 27
1.7 Buttons and Operations
There are 11 push buttons on the front panel. The operations described in below.
(1)
The “B” is the Bank Select Button.
You can select to the required bank number
by press the “B” button.
The current accessed bank will be displayed at the 7-Segment LED.
The bank select were from 1 to 8 and go back to 1 cycling. It will increase the bank
number from the current selected bank to the next bank
if you pressed the “B” button
once.
(2)
The “1”, “2”, “3”, “4”, “5”, “6”, “7”, “8”, “9”, “0” are the port number select buttons
You can select to the required port number by
-
Press the 2 digit port number to switch the port directly. For example if you
are in port 1 now, press “0” then “6” will switch to the port 6 immediately.
-
Press the port number and wait for 2 seconds to switch the port. At this case,
you can only press single digit to select to the destination if the port number is
between port 1 to port 9.
(3) If you pressed the invalid operation, the system will stay at the previous selected port.
(4)
RESET
: Press the “5” and “0” button simultaneously will restart the firmware of the
KVM switch.
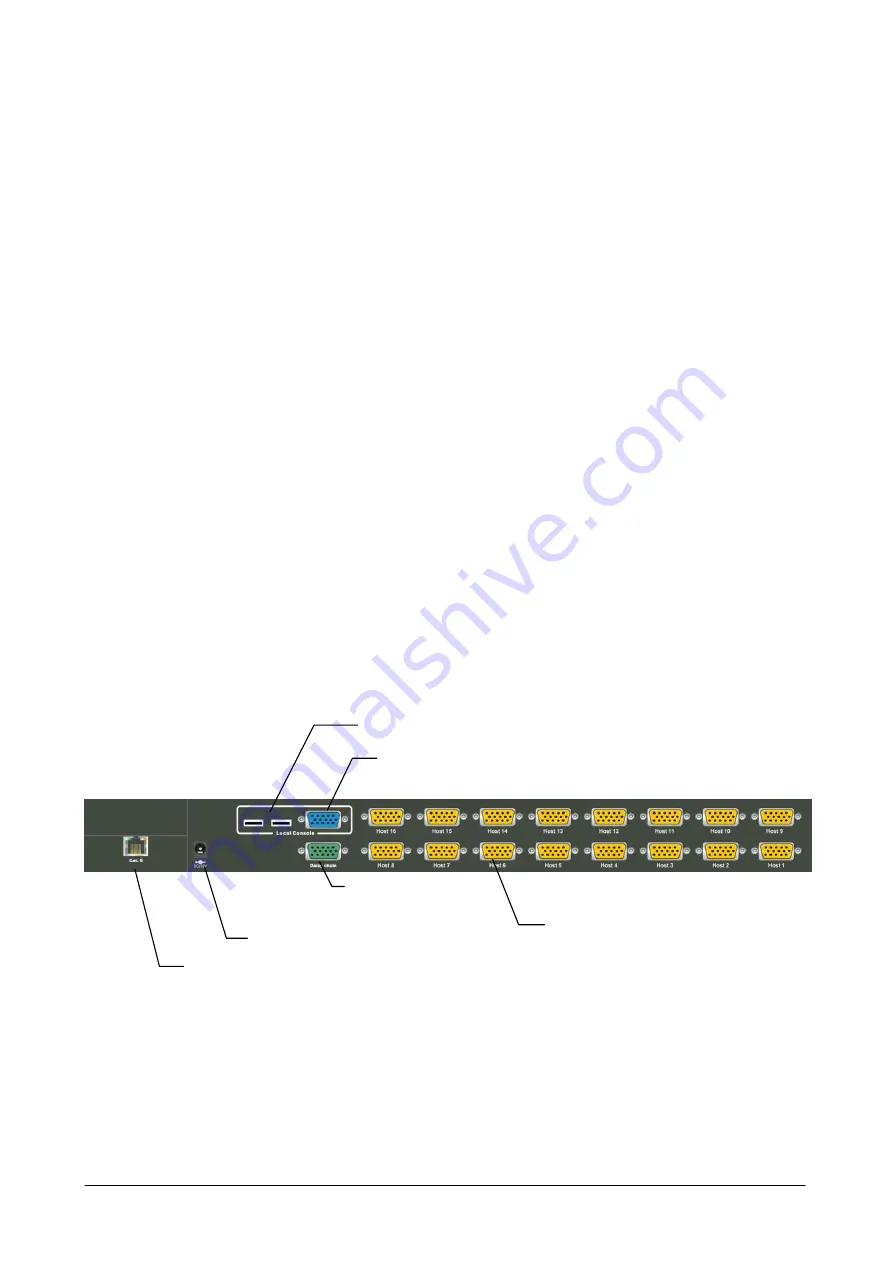
1.8 Back Panels
Figure 4. Back Panel View
Remote Console Port
(CAT5 T-Module)
DC Power Jack
Local Console Keyboard/Mouse Ports
Daisy Chain In
Local Console VGA Port /
Daisy Chain Out
Connector for each Host Port


