background image


LevelOne 


WAP-0002 

22Mbps Wireless Access Point 


User’s Manual 


Version: 1.0 

Summary of Contents for WAP-0002

Page 1: ...LevelOne WAP 0002 22Mbps Wireless Access Point User s Manual Version 1 0...

Page 2: ...earing in this document are registered property of their respective owners FCC STATEMENT This product has been tested and complies with the specifications for a Class B digital device pursuant to Part...

Page 3: ...POINT 6 CONFIGURING YOUR LEVELONE WAP 0002 8 CONFIGURATION MENU 9 Status Page 11 Basic Setting 12 IP Setting 14 Advanced Setting 16 Security 19 Tools 22 USING AP 22M UTILITY FOR MANAGEMENT 24 INSTALLI...

Page 4: ...e g DHCP server and 4 different operation modes allow the users to share resources and information e g files and printers and enjoy the freedom of networking wirelessly The LevelOne WAP 0002 is an id...

Page 5: ...d configuration utility AP management utility running on PC to make it easy to manage and configure all the AP in the same network System Requirements Windows 95 98 98SE Millennium NT 2000 and XP comp...

Page 6: ...r cable is required to connect to computer directly WIRELESS ACCESS POINT S LEDs Power LED ON when the unit is powered up LAN LED ON indicates LAN connection blink indicates LAN activity WLAN LED ON i...

Page 7: ...or Cable modem provided by your ISP as part of the broadband connection installation 3 A Router that connects to the ADSL Cable modem for internet connection sharing 4 An Access Point to connect with...

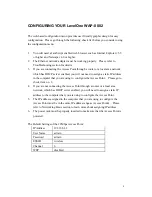
Page 8: ...tatic IP address to the computer that you are using to configurethe Access Point P lease go to check item no 6 4 If you are not connecting the Access Point through a router or a local area network whi...

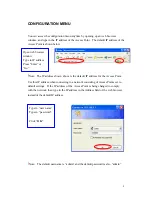
Page 9: ...ccess Point Use this IP address when connecting to a network consisting of Access Points set to default settings If the IP address of the Access Point is being changed to comply with the network then...

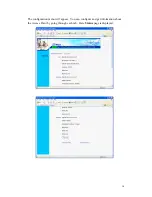
Page 10: ...10 The configuration menu will appear You can configure and get information about the Access Point by going through each tab Here Status page is displayed...

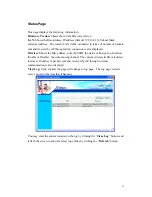
Page 11: ...hows the Mac address current ESSID the status of Encryption Function Enable or Disable the current using channel The current wireless traffic calculated in terms of number of packets sent and received...

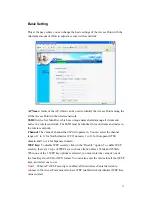
Page 12: ...of channel that AP will operate in You can select the channel range of 1 to 11 for North America FCC domain 1 to 13 for European ETSI domain and 1 to 14 for Japanese domain WEP Key To disable WEP sec...

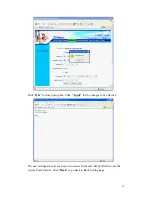
Page 13: ...anges made to any of the items above to be effective click Apply The new settings are now been saved to Access Point and will be effective once the Access Point restarts Click Back to go back to Basic...

Page 14: ...an also set the Access Point to obtain the IP from a DHCP server but it is not recommended Once set it will be difficult to determine the dynamic IP assigned to the Access Point Select the option Obta...

Page 15: ...to close pop up box Click Apply for the changes to be effective The new settings are now been saved to Access Point and will be effective once the Access Point restarts Click Back to go back to Basic...

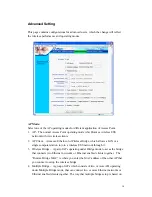
Page 16: ...h allows a LAN or a single computer station to join a wireless ESS network through it 3 Wireless Bridge A pair of APs operating under Bridge mode to act as the bridge that connects two Ethernet networ...

Page 17: ...k must use the same authentication type It s recommend that you use the default setting Preamble Type Preamble is a sequence of bits transmitted at 1Mbps that allows the PHY circuitry to reach steady...

Page 18: ...he default setting is Diversity Antenna which is better for reception SSID Broadcast While SSID Broadcast is enabled all wireless clients will be able to communicate with the Access Point For security...

Page 19: ...he new login password Here are the necessary steps 1 Enter the new password in the AP Password New field 2 Enter the new password again in the Confirm field 3 Click Apply Note The wireless clients wil...

Page 20: ...vices that are listed in this table for access authorization or denial When MAC Filter is enabled by selecting the Enabled radio box select one of two choices Only deny PCs with MAC listed below to ac...

Page 21: ...in Access Pint is 50 You can browse through the MAC address saved by selecting the drop down box For any changes made in the security page click Apply for the changes to be effective When the above pa...

Page 22: ...configurations to a file Restore Settings Click on the Browse button to open a FileOpen Dialog box where you get to select the file which you save previous settings and configurations to be opened Up...

Page 23: ...FileOpen Dialog box where you get to select the firmware file which you download from the web for the latest version Upon selecting the firmware file click Upgrade and complete the firmware upgrade pr...

Page 24: ...the steps below for installation and refer to Manage and Configure AP with AP 22M Utility session Access point configuration Note The installation demonstrated is based on Windows XP operating system...

Page 25: ...25 4 Select menu option Access Point on the left side of screen 5 Click Install on the menu bar to proceed with 22M AP installation...

Page 26: ...26 6 The 22M AP Utility loads the Install wizard for installation Click Next to start installation Click Next to install in default folder or Click Browse to install in a different folder...

Page 27: ...27 Installation wizard copies the utility program files in your PC 7 Click Finish to complete the installation...

Page 28: ...to configure one AP to another to save the trouble of logging into the web configuration utility of each AP However all the Access Points that you wish to configure using AP 22M Utility must be in th...

Page 29: ...rts up Status displays the basic settings of the selected Access Point AvailableAP lists all the 22mpbs Access Point of the same network domain detected on the network You can select a particular Acce...

Page 30: ...e 1 Access Point 2 Access Point Client 3 Wireless Bridge and 4 Multiple Bridge Please refer to Appendix C Glossary for the functionalities and definitions of these operating modes Advanced Settings re...

Page 31: ...rity protection to make sure you have the right authorization Note The default username is admin and the default password is also admin Enter UserName and Password for the Access Point Click OK button...

Page 32: ...about Network and IP address Click Apply button for any changes made to be effective The utility program will prompt you for user name and password for security protection Select DHCP Client if there...

Page 33: ...e that allows you to configure the WEP settings for the Access Point Enable WEP Key security by clicking Data Encryption Select the Auth Mode and the Key Length Fill at least on of the 4 the Web Key f...

Page 34: ...s Access Point properly and the Ethernet LED of the Wireless Access Point is ON Check that the IP address of the computer is in the same IP range and subnet as that of the Wireless Access Point Please...

Page 35: ...ess clients cannot access the network in the infrastructure mode Check that the wireless network device is being installed and working properly Go to Start Right mouse click on My Computer Properties...

Page 36: ...36 Go to Device Manager Right mouse click on the network adapter which you connect RJ45 cable with...

Page 37: ...37 Go to Properties Check and make sure that the network adapter is working properly...

Page 38: ...s or computers wirelessly Multi point Bridge Connects more than two independent Ethernet LAN networks or computers wirelessly 5 What is the difference between 22Mbps and 11Mbps wireless products What...

Page 39: ...supports 64 128 256 bit shared key for WEP 9 Would the information be transmitted securely in the air WLAN offers two layers of protection for security First layer is on the hardware level As with Dir...

Page 40: ...earn the basics of home networking Using the Windows XP Network Setup Wizard Go to Start menu Control Panel NetworkConnections In the menu on the left side of the window select Set up a home or small...

Page 41: ...ur computer to the Internet In the case of using router in the network choose the second option Click Next to continue 1 Enter a short description for your computer 2 Enter a name for your computer to...

Page 42: ...42 Enter Workgroup name for your home network Click Next to continue Click Next and wait for the wizard to apply the settings...

Page 43: ...ou may create a network setup disk whichsaves you the trouble of having to configure every PCs in your network Select the first choice and insert a floppy disk into your disk drive Click Next to conti...

Page 44: ...44 Click Format Disk if you wish to format the disk Click Next to copy the necessary files to the disk Click Next to continue with the Network Setup Wizard...

Page 45: ...k into the disk drive of a PC and open to browse the content of the disk with My Computer or Windows File Manager Double click and run the file netsetup for the program to handle the rest Click Finish...

Page 46: ...ars type command ipconfig all and press Enter This command will display the IP addresses of all the network adapters in your computer In this case the IP address of your network adapter is 192 168 0 2...

Page 47: ...the Start menu Run type winipcfg and click OK The Windows IP Configuration Menu window would appear where you first click release button to release the current IP address followed by clicking of Renew...

Page 48: ...ddresses will expire and may be changed over time Static IP addresses are the IP addresses that users manually enter for each of the network adapters Note There might be two or more Local Area Connect...

Page 49: ...on Properties would appear Select Internet Protocol TCP IP and Click Properties to continue The TCP IP Properties window appears Select Obtain an IP address automatically if you are on a DHCP enabled...

Page 50: ...ing IP address Enter the IP address and subnet mask fields Enter the IP address of the Router in the Default gateway field Enter the IP address of the Router in the DNS serverfield Click Ok to close t...

Page 51: ...CP enabled network Click OK to close the window with the changes made Select Use the following IP address Enter the IP address and subnet mask fields Enter the IP address of the Router in the Default...

Page 52: ...gs Control Panel Double click on Network Select TCP IP of the network device Click Properties to continue The TCP IP Properties window appears Select Obtain an IP address automatically if you are on a...

Page 53: ...following IP address Enter the IP address and subnet mask fields Enter the IP address of the Router in the Default gateway field Enter the IP address of the Router in the DNS serverfield Click Ok to...

Page 54: ...ion is set to Open System authentication 2 Shared Key Shared Key authentication supports authentication of stations as either a member of those who know s a shared secret key or a member of those who...

Page 55: ...lision is detected they both back off and wait a random amount of time before retrying DHCP Dynamic Host Configuration Protocol which is a protocol that lets network administrators manage and allocate...

Page 56: ...me size is too small it will create the overhead during the transmission Gateway a device that interconnects networks with different incompatible communication protocols IEEE The Institute of Electric...

Page 57: ...xpected to be used only in networks of like equipment that can all handle the optional mode IEEE 802 11b standard PSDU PLCP service data unit Roaming A LAN mobile user moves around an ESS and enjoys a...

Page 58: ...ssfully from one point to another in a given period of time WEP Wired Equivalent Privacy WEP is an encryption scheme used to protect wireless data communication To enable the icon will prevent other s...

Page 59: ...446 5 MHz 2483 5 MHz France Operating Channel 11 Channels North America 13 Channels Europe 14 Channels Japan RF Output Power 16 18 dBm typical Sensitivity 22MHz PBCC 80 dBm Typically 25 5 11MHz PBCC 8...

Reviews: