background image

IF Y

O

U NEED TO REQUEST ANY

 PARTS PLEASE USE THE LIST BELOW

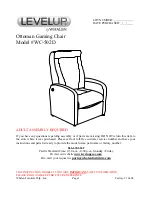
   Otto

ma
n

 Ga

min

g

 C
h

a

ir (W

C

-5

0

2

D

)

*W
C-502D-A

-RS

P

Right

 S
ide P

anel

*W
C-502D-G-B

P

B

ot

tom
 P
anel

*W
C-502D-B

-LS

P

Lef

t S
ide P

anel

*W
C-502D-1-FL

F

loor Leveler

*W
C-502D-C-B

B

ac
k

res

t

*W
C

-502D-2-M

B

M

et

al B

rac

k

et

*W
C-502D-D-S

C

S

eat

 Cus

hion

*W
C

-502D-3-S

P

F

S

ide P

anel Fas

tener (2-1/

2"

 L B

olt
)

*W
C-502D-E

-B
P

B

ac
k

 P
anel

*W
C-502D-4-5/

8A
B

5

/8

" A
llen B

o

lt

*W
C-502D-F-FP

F

ront

 P
anel

*W
C-502D-5-M

5A
W

M

5 A

llen W

renc

h

Summary of Contents for Ottoman Gaming Chair

Page 1: ...egarding assembly or if parts are missing DO NOT return this item to the store where it was purchased Please call our toll free customer service number and have your instructions and parts list ready to provide the model name part name or factory number 866 632 6632 Pacific Standard Time 8 30 a m 4 30 p m Monday Friday Or visit our website www levelupgear com Or e mail your request to parts whalen...

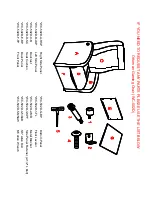
Page 2: ...tely through the instructions and verify that all parts listed are present before beginning assembly A Right Side Panel 1 B Left Side Panel 1 C Backrest 1 D Seat Cushion 1 E Back Panel 1 F Front Panel 1 G Bottom Panel 1 1 Floor Leveler 4 2 Metal Bracket 8 3 Side Panel Fastener 2 4 5 8 Allen Bolt 16 1 extra 5 M5 Allen Wrench 1 Tools required Allen Wrench provided ...

Page 3: ...nit and confirm that you have all the hardware and required parts listed 2 Tightly screw the Floor Levelers 1 into the threaded inserts underneath the Left and Right Side Panels A and B by rotating clockwise 3 Locate the Right Side Panel A and place it on a scratch free surface with cleats facing up as shown 4 Align and attach 4 Metal Brackets 2 to the Right Side Panel A using the 5 8 Allen Bolts ...

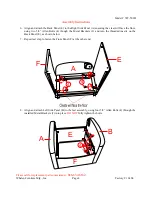
Page 4: ...suring the cleat will face the floor using two 5 8 Allen Bolts 4 though the Metal Brackets 2 and into the threaded inserts on the Back Panel E as shown below 7 Repeat last step to fasten the Front Panel F at the other end 8 Align and attach Left Side Panel B to the last assembly using four 5 8 Allen Bolts 4 through the installed Metal Brackets 2 into place DO NOT fully tighten the bolts E A 4 4 F ...

Page 5: ...mbly Instructions 9 Place the Seat Cushion D onto the upper cleats of Side Panels A and B with the thick edge facing forward 10 Snugly fit the tilt pivots pre attached on the Backrest C between the slots of both Side Panels A and B You may require applying pressure to the Side Panels to make it fit properly D A B C A B C A B ...

Page 6: ... the Backrest C to both Side Panels A and B by using two Fasteners 3 provided Make sure the flat washer is located between the bolt and metal spacer 12 Pivot the Backrest C to the upright position and remove the Seat Cushion D Go back and securely tighten all the bolts with the Allen Wrench 5 provided 13 Now tilt and rest the Bottom Panel G onto the bottom cleats of assembled frame for storage C D...

Page 7: ...move z In the event that your furniture is stained or otherwise damaged during use we recommend that you call a professional to repair your furniture z Check bolts screws periodically and tighten them if necessary We hope you enjoy your purchase for many years and thank you for choosing Whalen Furniture QUALITY GUARANTEE We are confident that you will be delighted with your Whalen Furniture purcha...

Page 8: ...el WC 502D G BP Bottom Panel WC 502D B LSP Left Side Panel WC 502D 1 FL Floor Leveler WC 502D C B Backrest WC 502D 2 MB Metal Bracket WC 502D D SC Seat Cushion WC 502D 3 SPF Side Panel Fastener 2 1 2 L Bolt WC 502D E BP Back Panel WC 502D 4 5 8AB 5 8 Allen Bolt WC 502D F FP Front Panel WC 502D 5 M5AW M5 Allen Wrench ...

Reviews: