7
EN
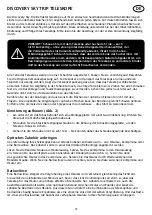
DISCOVERY SKY TRIP TELESCOPES
Discovery Sky Trip refracting telescopes installed on simple alt-azimuth mounts make a wonderful
present for beginning astronomers of all ages. With these models, you can explore craters on the Moon,
observe details on surfaces of different planets, as well as enjoy the views of bright deep-sky objects.
These instructions will help you set up, properly use, and care for your telescope. Please read them
thoroughly before getting started.
All parts of the telescope will arrive in one box. Be careful when unpacking it. We recommend keeping
the original shipping containers. In the event that the telescope needs to be shipped to another location,
having the proper shipping containers will help ensure that your telescope survives the journey intact.
Be sure to check the box carefully, as some parts are small. All screws should be tightened securely to
eliminate flexing and wobbling, but be careful not to overtighten them, as that may strip the threads.
During assembly (and anytime, for that matter), do not touch the surfaces of the optical elements with
your fingers. The optical surfaces have delicate coatings on them that can easily be damaged if touched.
Never remove lenses or mirrors from their housing, or the product warranty will be null and void.
Mount assembly (fig. 2)
•
On the lower part of the tube, there is a mounting plate with a threaded hole. Align it with the
fastening screw of the tripod.
•
Screw the tripod fastening screw into the hole on the tube mounting plate in order to secure the
telescope tube.
•
Do not overtighten the screw because you might accidently damage the screw thread.
Optical accessories assembly
Your telescope can be equipped with additional accessories, such as eyepieces, diagonal prism or a
Barlow lens. The accessories should be installed in well-defined ordering.
Loosen the focuser thumbscrew. Insert the diagonal prism into the focuser tube and retighten the
thumbscrew to hold the diagonal prism in place (fig. 4). Then, insert the desired eyepiece into the
diagonal prism and secure it by retightening the thumbscrew. If a Barlow lens is needed, install it
between the diagonal prism and the eyepiece.
Barlow lens
A Barlow lens increases the magnifying power of an eyepiece, while reducing the field of view. It expands
the cone of the focused light before it reaches the focal point, so that the telescope's focal length
appears longer to the eyepiece. In addition to increasing magnification, the benefits of using a Barlow
lens include improved eye relief, and reduced spherical aberration of the eyepiece. For this reason,
a Barlow plus a lens often outperform a single lens producing the same magnification. And the best
advantage is that a Barlow lens can potentially double the number of eyepieces in your collection.
Optical finderscope assembly and alignment
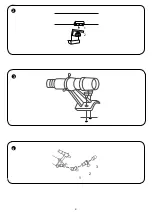
Unthread two screws in the back of the telescope tube. Place the finderscope base above the holes on
the tube. Lock the finderscope base into position by tightening the screws (fig. 3).
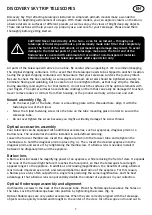
Optical finderscopes are very useful accessories. When they are correctly aligned with the telescope,
objects can be quickly located and brought to the center of the view. Turn the scope end in and out to
CAUTION! Never look directly at the Sun — even for an instant — through your
telescope or finderscope without a professionally made solar filter that completely
covers the front of the instrument, or permanent eye damage may result. To avoid
damage to the internal parts of your telescope, make sure the front end of the
finderscope is covered with aluminum foil or another non-transparent material.
Children should use the telescope under adult supervision only.
Summary of Contents for 77863
Page 4: ...4 3 2 1 2 1 2 3 4 ...


