background image

PL

EN

DE

Teleskopy Strike 115 PLUS / 135 PLUS

Teleskop Strike 115 PLUS / 135 PLUS

Strike 115 PLUS / 135 PLUS telescopes

Teleskopy Strike 115 PLUS/135 PLUS

 Strike 115 PLUS / 135 PLUS

 Strike 115 PLUS / 135 PLUS

UA

CZ

RU

Summary of Contents for Strike 115 PLUS

Page 1: ...EN DE Teleskopy Strike 115 PLUS 135 PLUS Teleskop Strike 115 PLUS 135 PLUS Strike 115 PLUS 135 PLUS telescopes Teleskopy Strike 115 PLUS 135 PLUS Strike 115 PLUS 135 PLUS Strike 115 PLUS 135 PLUS UA CZ RU ...

Page 2: ...Strike 115 PLUS 1 Strike 135 PLUS ...

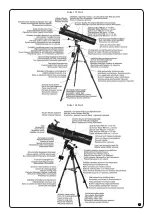
Page 3: ...ude adjustment screw Przednia ruba regulacji w pionie P ední šroub nastavení zem ší ky Vordere Polhöhenschraube Front latitude adjustment screw Przednia ruba regulacji w pionie Zadní šroub nastavení zem ší ky Hintere Polhöhenschraube Rear latitude adjustment screw Tylna ruba regulacji w pionie Strike 135 PLUS Strike 115 PLUS Há ek Haken Hook Haczyk Držák Halterung Holder Uchwyt 2 3 4 5 6 7 8 9 10 ...

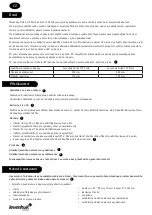
Page 4: ...nou te kou Používá se k lokalizaci objekt p ed použitím tubusu teleskopu Upozorn ní Hledá ek je nutné p ed zahájením pozorování se ídit s teleskopem Barlow v len 2X Používá se ke zdvojnásobení zv tšení libovolného okuláru tj okulár 25 mm nabízí zv tšení 36x ale p i použití Barlowova lenu 2X dosahuje zv tšení až 72x Okuláry Okulár 10 mm 90x 180x p i použití Barlowova lenu 2X Nabízí nejvyšší zv tšen...

Page 5: ...ké montáži nachází se na spodní stran montáže 4 Paralaktickou montáž uložte na stativ 5 Utažením areta ního šroubu montáž upevn te 6 K montáži p ipevn te teleskop 7 P ipevn te odkládací p ihrádku na p íslušenství Montáž hledá ku P ipevn ní hledá ku 1 Hledá ek vyjm te z krabice 2 Uvoln te k ídlaté šrouby na stran hledá ku a zasu te jej do rybinového držáku na horní stran tubusu teleskopu 3 K ídlaté...

Page 6: ...ým kolísáním jasu P i úvodním pozorování používejte okuláry s malým zv tšením abyste mohli využít výhod širšího zorného pole a vyššího kontrastu obrazu Okuláry s vysokým zv tšením lze nejlépe použít za nocí kdy jsou dokonalé podmínky umož ující detailní pozorování Vyvažování osy rektascenze 1 P ed vyvažováním se ujist te zda je teleskop ádn upevn n k montáži 2 Jednou rukou p idržte teleskop a druh...

Page 7: ... zahajte pomocí okuláru 25 mm a zaost ete obraz Chcete li pozorovat detaily M síce nebo planet postupujte podle následujících jednoduchých pokyn 1 Pomocí okuláru s nízkým zv tšením prove te p esné vycentrování pozorovaného objektu na st ed nitkového k íže okuláru 2 Okulár vyjm te a nahra te jej siln jším okulárem Pro dosažení maximálního zv tšení m žete využít i Barlow v len Chcete li jej použít v...

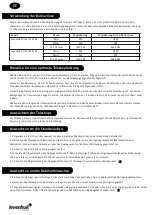
Page 8: ...fördern Mit zunehmender Praxis werden Sie ein Gefühl für die Vergrößerungen der verschiedenen Objektive und die jeweils bei Bewegungen zu erwartenden Veränderungen des Sichtfelds entwickeln Leuchtpunktsucher Dient zur Lokalisierung von Objekten vor der Verwendung des Teleskoptubus Bitte beachten Sie dass der Leuchtpunktsucher vor Beginn der Observationen am Teleskoptubus ausgerichtet werden muss 2...

Page 9: ...kular Merken Sie sich dass die Vergrößerung des Okulars umso kleiner ist je größer die Brennweite ist Denken Sie auch daran dass sich bei höheren Vergrößerungen das Sichtfeld verkleinert und Helligkeit und Schärfe der Bilder nachlassen 3 Barlowlinse Mit der Barlowlinse erreichen Sie die maximale sinnvolle Vergrößerung Ihres Teleskops Setzen Sie die Barlowlinse in den Fokussierer ein und platzieren...

Page 10: ...en Bildkontrast des schwachen Okulars zunutze Das starke Okular eignet sich für Detailbeobachtungen in Nächten mit perfekter Sicht Auswuchten um die Stundenachse 1 Vergewissern Sie sich vor dem Auswuchten davon dass das Teleskop sicher an der Montierung befestigt ist 2 Halten Sie das Teleskop mit einer Hand und lösen Sie mit der anderen die Verriegelungsknöpfe für Rektaszension und Deklination Dre...

Page 11: ...der Leuchtpunkt auf das Objekt zeigt Beginnen Sie die Observation mit dem 25 mm Okular und fokussieren Sie das Sichtfeld Zum Studium der Details von Mond und Planeten können Sie dieser einfachen Prozedur folgen 1 Benutzen Sie ein schwaches Okular und vergewissern Sie sich davon dass sich das beobachtete Objekt direkt in der Mitte des Okular Fadenkreuzes beindet 2 Nehmen Sie das Okular ab und setze...

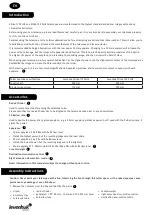
Page 12: ...piece EN Telescope tube speciications Levenhuk Strike 115 PLUS Levenhuk Strike 135 PLUS Focal length 900 mm 900 mm Diameter aperture 114 mm 135 mm Red dot inder Used to locate objects before using the telescope tube Please note that the red dot inder has to be aligned to the telescope tube prior to any observations 2X Barlow lens Used to double the power of any given eyepiece e g a 25 mm eyepiece ...

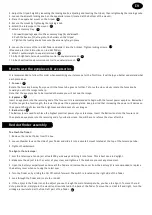
Page 13: ...part so the accessory tray its underneath 2 Push the hooks of the tray into the holders on the tripod 3 Tighten the locking knobs to secure the accessory tray in place 8 Loosen the screws of the red dot inder and slide it into the bracket Tighten locking screws Please see further instructions on red dot inder 9 Attach counterweight to equatorial mount 10 Attach right ascension slow motion control ...

Page 14: ...ightly with little or no twinkling When beginning your observations use low power eyepieces to take advantage of the wider ield of view and higher contrast of the image High power eyepieces are best used on nights when viewing conditions are perfect for detailed observations Balancing the telescope The telescope should be balanced before each observing session Balancing reduces stress on the mount...

Page 15: ...study the details of the Moon or planets just follow this simple procedure 1 With a low power eyepiece make sure that the observed object is directly in the center of the eyepiece crosshairs 2 Remove the eyepiece and replace it with a high power one You can also use a Barlow lens to achieve maximum power To do that irst insert the Barlow lens in the focuser and then place an eyepiece into the rece...

Page 16: ... okularze i powi kszeniu Szukacz Red Dot Słu y do lokalizowania obiektów przed rozpocz ciem korzystania z teleskopu Pami taj e szukacz Red Dot musi by prawidłowo ustawiony wzgl dem tubusu teleskopu jeszcze przed rozpocz ciem obserwacji Soczewka Barlowa 2X Soczewka ta dwukrotnie zwi ksza powi kszenie dowolnego okularu np w przypadku okularu o ogniskowej 25 mm i powi kszeniu 36x u ycie soczewki Barl...

Page 17: ...acy wykorzystuj c okular o najmniejszym powi kszeniu Pami taj e im wi ksza ogniskowa tym mniejsze powi kszenie okularu Pami taj tak e e zwi kszenie powi kszenia powoduje zmniejszenie pola widzenia oraz jasno ci i ostro ci obrazu 3 Soczewka Barlowa Zadaniem soczewki Barlowa jest maksymalizacja powi kszenia teleskopu Umie soczewk Barlowa w tubusie ogniskuj cym a nast pnie umie w niej okular Po zamon...

Page 18: ... obraz b dzie miał wi kszy kontrast Okulary o du ym powi kszeniu najlepiej sprawdzaj si do obserwacji szczegółowej w noce charakteryzuj ce si doskonałymi warunkami obserwacyjnymi Wywa anie w osi rektascensji 1 Przed przyst pieniem do wywa ania upewnij si e teleskop jest stabilnie zamocowany do monta u 2 Przytrzymuj c teleskop jedn r k drug r k poluzuj pokr tła blokuj ce w osiach rektascensji i dek...

Page 19: ...dal skierowany jest na ten obiekt Rozpocznij obserwacj wykorzystuj c okular o ogniskowej 25 mm i wyostrz obraz W celu obserwacji Ksi yca lub planet post puj zgodnie z poni sz procedur 1 Przy zało onym okularze o najmniejszym powi kszeniu upewnij si e obserwowany obiekt znajduje si dokładnie na rodku krzy yka okularu 2 Wymie okular na okular o wi kszym powi kszeniu W tym celu mo esz te u y soczewki...

Page 20: ...RU Levenhuk Strike 115 PLUS Levenhuk Strike 135 PLUS 900 900 114 135 25 10 1 2 2 25 36 2 72 3 10 90 180 2 25 36 72 2 F7 3 F23 123X 39X 246X 78X 2 4 5 6 1 25 10 1 25 2 2 1 4 2 3 5 6 7 8 9 ...

Page 21: ...RU 2 3 4 5 6 7 1 2 3 8 9 10 11 1 2 3 1 2 3 1 300 2 3 4 ON OFF 5 6 19 20 18 10 11 12 13 14 15 16 17 ...

Page 22: ...RU 2 Levenhuk Strike 115 PLUS 10 90X 180X 25 36X 72X F7 3 F23 123X 39X 246X 78X Levenhuk Strike 135 PLUS 10 90X 180X 25 36X 72X F7 3 F23 123X 39X 246X 78X 30 1 2 3 4 5 1 2 3 21 22 ...

Page 23: ...RU 1 1 56 56 2 3 25 1 2 Levenhuk Levenhuk Levenhuk Levenhuk 3 Levenhuk Levenhuk 3 2 3 128 499 922 06 76 22 812 454 70 27 www levenhuk ru ___________________________ __________________________ 23 ...

Page 24: ...k Strike 115 PLUS Levenhuk Strike 135 PLUS 900 mm 900 mm 114 mm 135 mm Strike 115 PLUS Strike 135 PLUS 25 10 2 25 36 2 72 10 90 180 2 25 36 72 2 F7 3 F23 123 39 246 78 2 1 25 10 F7 3 F23 1 25 2 1 2 3 4 5 6 7 8 9 ...

Page 25: ...UA 2 3 4 5 6 1 2 3 8 9 10 11 1 2 3 1 2 3 1 300 2 3 4 5 6 19 20 16 17 10 11 12 13 14 15 18 ...

Page 26: ...UA 2 Levenhuk Strike 115 PLUS 10 90X 180X 25 36X 72X F7 3 F23 123X 39X 246X 78X Levenhuk Strike 135 PLUS 10 90X 180X 25 36X 72X F7 3 F23 123X 39X 246X 78X 30 1 2 3 4 5 1 2 3 22 21 ...

Page 27: ... 1 1 2 3 25 1 2 Levenhuk Levenhuk Ltd Levenhuk Levenhuk Ltd 3 Levenhuk www levenhuk com ua ___________________________ __________________________ UA 23 ...

Page 28: ...inigung Ihrer Optik und zum Erhalt ihrer Strapazierfähigkeit und hohen Qualität benötigen Levenhuk optics cleaning tools The Levenhuk series of cleaning tools is all you need to keep your optics clean and durable and to maintain its excellent quality Prost edky na išt ní optiky Levenhuk ada isticích prost edk Levenhuk pom že zajistit istotu dlouhou životnost a vynikající kvalitu vašich optických p...

Reviews: