background image

12


Quick start

3

Quick  start

3.1

Switching on

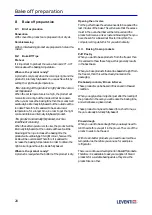
Switch the oven on by using the main switch.
The main switch can be found on the bottom right hand 
side of the oven.
The display will now show a clock.
To actually start working with the oven you should press 
the I-button (below) on the operation panel.

When the previous session with the oven has been 
ended in the cleaning cycle by switching the oven off, then 
the oven may start a rinsing cycle first. This is to prevent 
that there are chemical residues still present in the oven 
chamber when you start the preparation.

3.2

Quick start with the Mastermind

3.2.1 Select programme and start

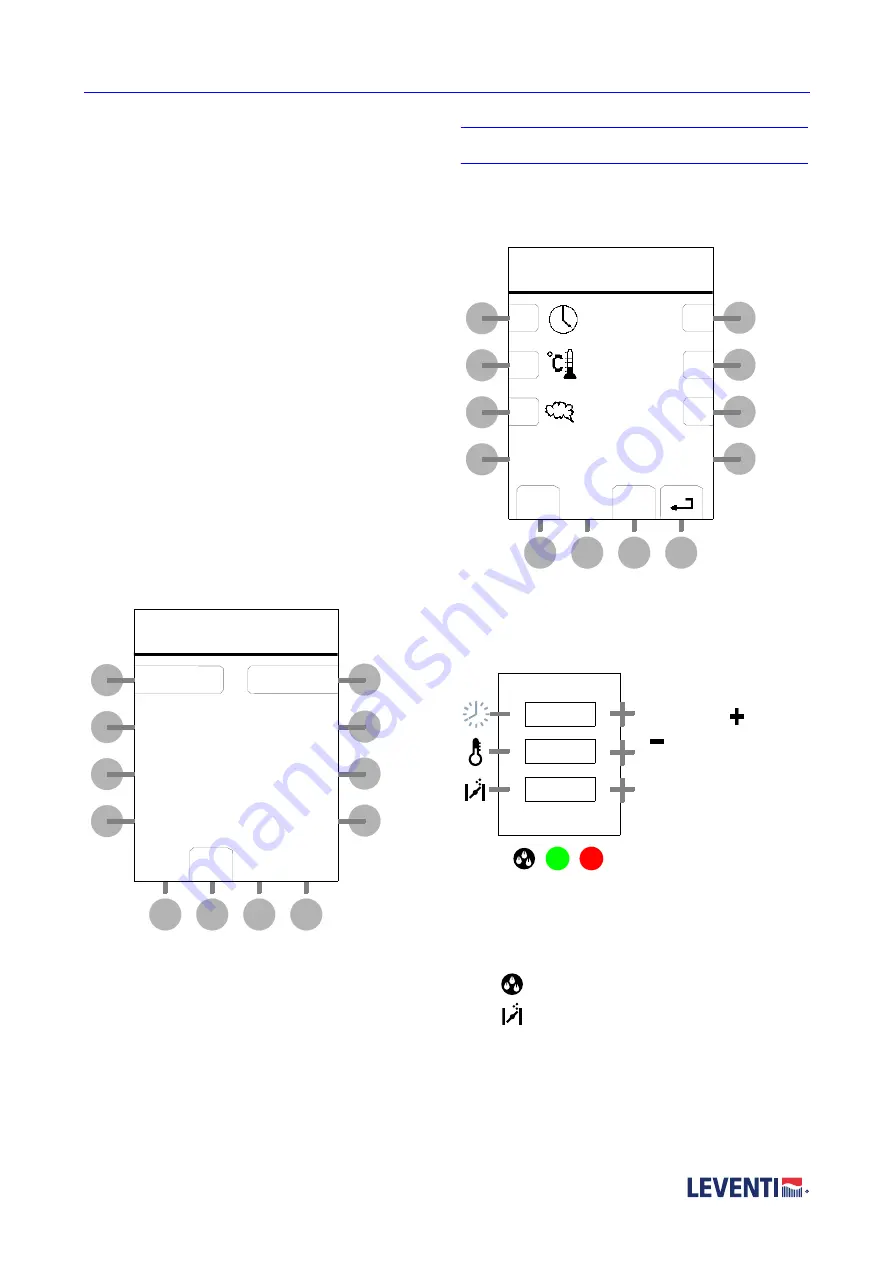
The oven will always come up with the selection menu of 
the various groups in the illuminated display on the 
operation panel. Should you loose your way in the 
computer, then press the red stop key as many times 
untill you return in this screen.

Select the product group of your choice.
Select the programme of your choice.
Press the green start button.

3.3

Manual control

You can set the oven to manual controls.
Choose menu / manual control

select menu / manual operation

Choose the preparation method
Set the desired values
Press Start.

3.4

Quick start with the Digital

3.4.1 Starting preparation

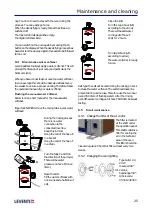
Set the desired values for 
temperatures, time and 

flap by using 

 and/or 


Start the preparation with 
the green start button.

Caution: when it is 
important to preheat the 
oven before you load the 
products in the oven, then 

preheat the oven on the desired temperature by using 
time preparation before actually loading the oven.
Start the oven with the settings for the product you want 
to prepare. 

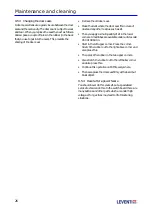
Press 

 to inject water during preparation.

Press 

 to open or close the flap during preparation. 

3.4.2 Starting continuous operation

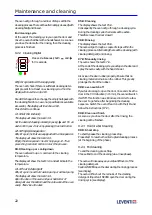
It is possible to let the oven work continuously. Act as 
follows:

select product group

bread

bake-off

menu

manual operation

extra

set preperation

start

+

+

+

-

-

-

-

00:18:00

180

00

Summary of Contents for Bakermat

Page 1: ...articleno 05000000415 BAKERMAT mastermind digital version 01 06 2008 User instructions ...

Page 2: ...ion of text and of drawings Should there be a distinction between what has been mentioned in the delivery contract and what has been described in this manual then the text as written in the contract will be valid Forinformationregardinginstallations repairsandmaintenancewherethis manual does not foresee then youshouldcontact theCustomerServices Department of Levens Cooking Baking Systems B V Congr...

Page 3: ...lay of a programme 14 4 6 Change settings during preparation 14 4 7 Table planner 14 4 7 1 Default value of the table planner 14 5 Programme management Mastermind 15 5 1 Define groups and programmes 15 5 2 New group 15 5 3 Delete group 15 5 4 Change programme 15 5 5 New programme 15 5 6 Copy programme 15 5 7 Delete programme 15 5 8 View programme 15 6 The mastermind and tag 16 6 1 What is a tag 16...

Page 4: ...ance 25 9 5 1 Change the filter of the air cooler 25 9 5 2 Changing the oven lighting 25 9 5 3 Changing the door seals 26 9 5 4 Reset after a power failure 26 10 Error notifications Mastermind 27 10 1 Maintenance messages 27 10 2 User errors Mastermind 27 10 3 System errors 28 10 4 Fatal errors 28 11 Technical sheet 30 11 1 Connection values 30 11 1 1 Water supply and drainage 30 11 1 2 Power supp...

Page 5: ...afely with your oven Summary of safety risks for users General Danger Beware of hot parts Beware of parts with convey electric current Beware of becoming trapped Beware of hot steam Read the instruction manual before using this equipment booster ...

Page 6: ...en you open the side panels for maintenance or cleaning then always pull out the plug from the partition socket That prevents accidents The most critical placeshavebeenmarkedwiththeindicated sticker Check the power cables regularly This cable should neverbedamaged norconductedunderthefurnaceand should not cross a warm surface or should be led over sharp edges When the cable and or the plug is dama...

Page 7: ...nks Liquids and drinks may not be heated in closed or sealed containers This prevents products from exploding Heating with microwaves can lead to irregular heating Always stir products such as drinks and baby food well and afterwards check the temperature carefully This prevents the risk of burns When heating packaged products in the oven using the microwavefunctionlookintotheovenregularly Thisist...

Page 8: ...heat liquids and foodstuffs in sealed containers This prevents exploding products WARNING Heating with microwaves can lead to irregular heating Always stir productssuchasdrinksandbabyfoodwell and afterwards check the temperature carefully This prevents the risk of burns For Boosteroven only Make a copy of this page cut out the warnings and hang it next to the oven in order to alert the user to the...

Page 9: ...efunctionof thebuttons is reflected in the display and can vary per screen Softkeys The functions of the keys are explained in the display and can vary These buttons are called soft keys Sometimes symbols and sometimes texts are used in the display The symbols The meaning of the softkeysymbols are Move cursor to the right Move cursor to the left Scroll up Scroll down Increase the value on the line...

Page 10: ...ed low medium high Flap position 2 4 2 Digital The display is provided with push buttons besides and under the screen The function of the buttons is related to the displays aside The symbols Next to the displays you find symbols The symbels communicate what the displays mean Time hours minutes Ovenroom temperature C Flap postion open or close The panel has different buttons Increase the value on t...

Page 11: ...e valve will stay automatically closed When you set the humidity level at 100 and temperatures of 100 C or lower special cooking techniques are started This phase has ended when the set time has elapsed Regeneration Preparation method mainly used for regenerating prepareddisheslikepizzabread By usingaspecial moist control there is no dehydration and loss of taste This phase has ended when the set ...

Page 12: ...turn in this screen Select the product group of your choice Select the programme of your choice Press the green start button 3 3 Manual control You can set the oven to manual controls Choose menu manual control select menu manual operation Choose the preparation method Set the desired values Press Start 3 4 Quick start with the Digital 3 4 1 Starting preparation Set the desired values for temperat...

Page 13: ...startcountingdownimmediately Youdo not need to confirm your setting When the set time has expired then an acoustic signal will sound The oven will operate continuously on the set temperature The time setting can be used again 3 4 3 Switching off To switch off the oven you press the 0 button on the operation panel The clock will remain in the display When you want to disconnect the oven completely ...

Page 14: ... correction Increase the value of for example the temperature on the line with or decrease with Confirm the settings by pressing OK 4 7 Table planner During the preparation also for manual control you can activate the cooking timer table planner With this option you can set the cooking time for a product plate or tray in the oven The table planner consists of eight differentindependentcookingtimer...

Page 15: ...mme Choose the programme you want to change You can change the name add a phase delete a phase or amend a phase When you change a phase Choose the preparation method you want to change Or Choose just to change the settingsfor the phase with retention of the preparation method Important Cook Hold is always the last phase of the programme The computer will ensure this condition 5 5 New programme sel...

Page 16: ...s a double check if the name already exists if this is the case then it will inform you hereof When you place an unknown tag in front of the oven then you have the option to format the tag 6 3 The tag menu In the tag menu you can choose the desired actions You can Move programmes from the tag to the oven Move programmes from the oven to the tag Check the tag content Inform that you are ready in th...

Page 17: ...tag choose tag content delete programmes Select the programme you wish to delete and confirm your choice Select the next programme you wish to delete or return to the main menu by pressing the stop button 6 6 3 Empty or formatting a tag You can empty the tag in one go choose tag content empty tag 6 7 End tag sesssion without tag You can end the tag session without keeping the tag at the tag sign c...

Page 18: ...h this button right next to it on the operation panel you select the programme or group to be shown in the display of your own start up menu The name will be shown inverted if selected With this symbol you will deselect the choice The text will be shown regularly again if deselected Tip Sometimesit canbeusefull toshowonlyoneproduct in the choice menu then you are sure that the one operating the ov...

Page 19: ...u settings menu comm port function Profile Composer to load baking programmes into the oven Scrolling display for the automatic switching on of the scrolling display External Data Logging for the storage of HACCP information An external receiving computer or laptop is required for this 7 2 Digital 7 2 1 Set date and time The date and time showed in the display can be set differently Hold the two b...

Page 20: ...r to obtain the right colouring and have the inside fully baked When is the product ready Aproduct isready whenthe bottomof the product isdry Opening the air valve For theperfect baketheair valveneedstobeopenedthe last minutes of the bake This will ensure that the excess moist in the oven chamber will be removed and the product will receiveanicecrust andbrowning Whenyou have chosen for a Bakermat ...

Page 21: ...e chloride elements in these products Option handshower Leventicandelivertheovenwithanoptionalhandshower Whenyouuseahandshoweryouwill alwayshaveawater supply at hand that you can easily use to clean or rinse the oven chamber with Ask your dealer for more information about the Leventi handshowers There are various configurations with or without Fat Separator Soap Pump or Circulation Pump This has c...

Page 22: ... of detergent over thebottomandthesidewallsof theoven cavity Then close the door C5 9 Cleaning The display shows the text C5 9 Consequently the oven will go through a cleaning cycle During the cleaning cycle chemicals will be active Therefore leave the door closed C6 9 Rinsing The display shows the text C6 9 The oven will go through a couple of steps within the cleaning process Alternating there w...

Page 23: ... forget to clean the filter in the fat separator For the Type 4 also clean the fine filter 9 2 6 Cleaning additionals Cleaning the stand and trolley The stand and the trolley should be cleaned every week by using a detergent and hot water Cleaning the extractor hood The extractor hood should be cleaned every week by using a detergent and hot water Do not forget to also clean the grid of the extrac...

Page 24: ...When the oven is too hot then it needs to cool the boiler down first 9 3 1 Decalcifying the boiler Depending on the use and the degree of your water the boiler needs to be decalcified On average this needs to be done once every two weeks with a maximal water degreeof3 dh Theovenwill indicatewhenthisneedsto be done The Mastermind will show the message that the boiler needs to be decalcified The Dig...

Page 25: ... machine Keep this in mind Hang the end of the hose E in a bucket Hang the end of the hose F in a drain Turn the taps C and D in thedirectionof thearrows There will be water pressure on hose E max 2 liters Open the lid G Fill the water softener with onetooneandahalf kilosof salt Close the lid G Turn the tap C back left according to the arrow There will be salt water coming out of hose F Wait for 2...

Page 26: ...l quantity of kit in the lower corners Small tubesareavailableunder articlecode 05001086000 Start in the left upper corner Press the corner Stretch the rubber out to the right above corner and also press this Then press the rubber in the two upper corners Also stretch the rubber out to the left below corner and also press this Continue this operation until it fits everywhere Then also press the do...

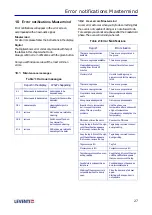
Page 27: ... There are no programmes in the group There are no groups available There are no groups Maximal table planner cooking timer time is 99 minutes Maximal time that can be set Memory is full U wants to add a group or programme whilst the memory is full There are no groups There are no groups There are no programmes There are no programmes Programme name already exists Name programme already exists Gro...

Page 28: ...the water supply When this occurs again call the Customer Services You can continue to work When this occurs again call theCustomer Services 120 Programme not suitable for this oven configuration Choose another programme This programme has been made on another oven configurationandisnot no longer feasible for example core probe damaged 123 No contact with Boosterprint Re start oven or continue to ...

Page 29: ...ions Mastermind 138 Computer overloaded 999 A ftal error occured The oven does not function properly anymore Confirm to switch off Call the Customer Services Department Table 4 Fatal errors No Notification in the screen ...

Page 30: ...oint The oven may be placed to the back wall We advise you nevertheless to keep a safety margin of at least 1 centimer 11 3 Oven room space 1 4 trays 2 6 trays 3 8 trays 4 10 trays 11 4 Measures and weight 11 5 Extraction Theovenshouldprefarablybeplacedunderanextraction system Leventi can deliver a standard extractor hoods with or without a motor Content 11 6 Environmental data The oven produces l...

Page 31: ...erweg 27 NL 5126 BD Gilze The Netherlands General Phone Numbers Tel 31 0 161 459100 Fax 31 0 161 459199 Website www leventi com E mail export leventi nl Customer Services Department Tel 31 0 161 459191 option 1 Fax 31 0 161 453695 E mail customerservices leventi nl ...

Page 32: ...32 Support ...

Page 33: ...liecina ka turpmƗk tekstƗ minƝtƗ mašƯna atsakingai pareiškia kad toliau nurodyta mašina jiddikjara li huwa risponsabbli ghall makna li qedgha tidher hawn taht deklaruje z peáną odpowiedzialnoĞcią Īe wymieniona maszyna preberá zodpovednosĢ za nižšie uvedené zariadenie izjavlja da jamþi da je navedena naprava Bakermat in overeenstemming is met de richtlijnen is in accordance with the directives est ...

Page 34: ...Broekakkerweg 27 NL 5126 BD Gilze The Netherlands Levens Cooking Baking Systems B V ...

Reviews: