background image

5

E

N

GL

IS

H

LEVITA HC-101

4

Using the hair clipper

The hair clipper can be used, directly connected to the main power 
or cordless, using the charged build-in batteries.

4.1

Directly connected to the main power

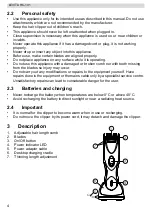
Make sure that the On/Off switch 

 is on the Off position. 

Insert the power cord plug 

into the socket at the bottom of 

the clipper.

Plug the AC-adaptor into an AC outlet (230V-50Hz).

Push the On/Off switch 

to the 

‘On’

 position for use. 

After use, push the On/Off switch 

back to 

‘Off’

.

4.2

Using the charging function

Make sure that the On/Off switch 

 is on the Off position. 

Insert the power cord plug of the AC-adaptor into the socket located on the left side 
of the desktop charging cradle 

Put the hair clipper into the desktop charging cradle 

.

Plug the AC-adaptor into an AC outlet. It will start recharging the battery.

The clipper can work for about 60min. after 7 hours charge. 
To use, remove the hair clipper out of the desktop charging cradle 

and push the On/

Off switch 

 to the 

‘On’ 

position

Do not charge the appliance for more than 24 hours.
The charging light will not go out or change colour when the appliance
is fully charged.
Only charge the clipper when the battery is (almost) empty.

4.3

Using the adjustable hair length comb

The adjustable comb 

can be used for adjusting the cutting hair length in 4, 8, 12, 16 

or 20mm.

Slide the comb attachment into the guiding grooves of the clipper. Make sure that 
the arms of the comb attachment have been properly slid into the grooves on both 
sides.

Hold the clipper with the blades 

upwards.

Press the comb lock with the thumb and slide the comb forward or backward until it 
reaches the length you desire. 

Release the comb and verify it is locked.

4.4

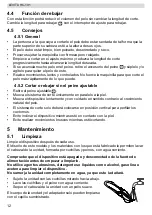
Thinning function

With this function, you can reduce the volume of the hair without changing the hair 
length. Use the thinning switch adjustment 

to change the thinning length.

Summary of Contents for HC 101

Page 1: ...HC 101 USER GUIDE MANUAL DE USUARIO V1 0...

Page 2: ...acter sticas descritas en este manual pueden ser objeto de futuras modificaciones This product is in compliance with the essential requirements and other relevant provisions of the R TTE directive 199...

Page 3: ...in or drop into water or other liquid Do not reach for an appliance that has fallen into water Unplug immediately Do not operate the equipment if the mains plug cable or the equipment itself is damage...

Page 4: ...liance with a damaged or broken comb nor with teeth missing from the blades so injury may occur Do not carry out any modifications or repairs to the equipment yourself Have repairs done to the equipme...

Page 5: ...n work for about 60min after 7 hours charge To use remove the hair clipper out of the desktop charging cradle and push the On Off switch to the On position Do not charge the appliance for more than 24...

Page 6: ...d carefully move the appliance against the direction of hair growth Only when trimming contours should the cutting system be positioned vertically Make sure you do not tilt the appliance while it is t...

Page 7: ...uct into the normal household garbage but bring the product to a collection point for the recycling of electrical and electronic equipments The symbol on the product user guide and or box indicate thi...

Page 8: ...anged or repaired by Levita or its appointed service centers 8 3 Warranty exclusions Damage or defects caused by incorrect treatment or operation and damage resulting from use of non original parts or...

Page 9: ...l quido No toque un dispositivo que se haya ca do en el agua Desench felo inmediatamente No utilice el equipo si el enchufe el cable o el propio equipo est n da ados Si el equipo ha sufrido una ca da...

Page 10: ...ado o roto o si faltan dientes en las cuchillas ya que podr a provocar lesiones No realice ninguna modificaci n ni reparaci n en el equipo usted mismo Las reparaciones del equipo o del cable de alime...

Page 11: ...mesa Coloque la maquinilla para cortar el pelo en el soporte cargador de sobremesa Conecte el adaptador de CA a una toma de CA La pila comenzar a recargarse Tras 7 horas de carga la maquinilla tendr u...

Page 12: ...ema de corte nicamente en paralelo a la piel Mueva el dispositivo lentamente y con cuidado en sentido contrario al crecimiento natural del pelo El sistema de corte solo deber colocarse en posici n ver...

Page 13: ...ormal sino en un punto de recogida destinado al reciclaje de aparatos el ctricos y electr nicos As lo indica el s mbolo en el producto en el manual de usuario o en la caja Si los lleva a un punto de r...

Page 14: ...de servicio autorizados cambian o reparan la unidad 8 3 Limitaciones de la garant a Los da os o defectos causados por un uso incorrecto y los da os resultantes del uso de piezas o accesorios no origin...

Page 15: ......

Page 16: ......

Page 17: ......

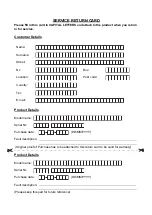
Page 18: ...tails Model name Serial Nr Purchase date DD MM YYYY Fault description Original proof of Purchase has to be attached to this return card to be valid for warranty Product Details Model name Serial Nr Pu...

Page 19: ...elo No de Serie Fecha de compra DD MM AAAA Descripci n del fallo Tiene que adjuntar el original de la prueba de compra a esta tarjeta de devoluci n para validar la garant a Detalles del Producto Nombr...

Page 20: ...HC 101 visit our website www levita electronics com MD8100202...

Reviews: