background image

4

EN

SAFETY INFORMATION

• 

Only 

use the humidifier as described in 

this manual.

• 

Place the humidifier and cord so that it 

will not be knocked over. 

Do not

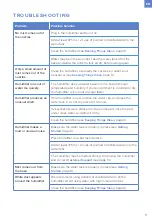
 place 

near large pieces of furniture or in high-

traffic areas.

• 

When not in use, turn the humidifier 

off and disconnect from power by 

removing the plug from the outlet.

• 

Do not

 use the humidifier in wet 

environments. 

• 

Keep the humidifier out of reach from 

children.

• 

Do not

 open the base or remove the 

water level sensor for self-servicing.

• 

Always

 unplug your humidifier from 

the power outlet before cleaning your 

humidifier or detaching the water tank 

from the humidifier base.

• 

Always

 make sure to place the 

humidifier on a flat, level surface before 

operation.

• 

Only

 fill the water tank with clean water. 

Never

 fill the water tank with any other 

liquids.

• 

Do not

 place the humidifier near 

sources of heat, such as stovetops, 

ovens, or radiators.

• 

Do not

 place the humidifier directly on 

floors, carpets, or rugs.

• 

Do not

 use other items as replacement 

parts for this product.

• 

Do not

 cover the nozzles while the 

humidifier is on. Doing so may damage 

the humidifier.

To reduce the risk of fire, electric shock, or other injury, follow all instructions and 

safety guidelines.

General Safety

• 

Remove the water tank from the base 

before moving the humidifier.

• 

Do not

 immerse the humidifier base, 

power cord, or plug in water.

• 

Do not

 handle the power cord or plug 

with wet hands. Keep the plug and 

power cord away from liquids.

• 

If the humidifier is damaged or is not 

functioning properly, stop using it and 

contact 

Customer Support

 immediately 

(see page 13).

• 

Not for commercial use.          

Household use 

only

.

• 

Do not

 add essential oils, 

supplemental water treatment 

liquids, or water filters into the 

water tank or base. This will 

damage the humidifier and cause 

leaks. 

Only

 add essential oils to 

the aroma pad.

Caution: Risk of Leaks and  

Electric Shock

READ AND 

SAVE THESE 

INSTRUCTIONS

Summary of Contents for Classic 200

Page 1: ...Ultrasonic Cool Mist Humidifier Model Classic 200 USER MANUAL Questions or Concerns support eu levoit com EN DE...

Page 2: ...eshooting Warranty Information Customer Support 3 3 4 5 6 7 9 11 13 13 EN Table of Contents DE Inhaltsverzeichnis ES FR IT Espa ol Fran ais Italiano Lieferumfang Technische Daten Sicherheitshinweise I...

Page 3: ...dity Noise Level 30dB Effective Range 24 35 m 285 376 ft Dimensions 35 4 x 20 2 x 15 2 cm 14 x 8 x 6 in Weight 1 6 kg 3 5 lb Thank you for purchasing the CLASSIC 200 ULTRASONIC COOL MIST HUMIDIFIER BY...

Page 4: ...at such as stovetops ovens or radiators Do not place the humidifier directly on floors carpets or rugs Do not use other items as replacement parts for this product Do not cover the nozzles while the h...

Page 5: ...ush Storage H Base I Control Button J Insulation Ring K Transducer L Float Housing M Float N Mist Tube O Water Tank Windows P Air Outlet Q Inner Chamber R Power Cord S Water Tank Cap T Silicone Sealin...

Page 6: ...back on top of the water tank Note We recommend using purified or distilled water to fill the tank Do not fill the water tank with hot water Only add water through the water tank cap Do not add water...

Page 7: ...resistant surface such as a table or nightstand Make sure the room is well ventilated General Operation Note Position the humidifier at least 30 cm 12 in away from walls and appliances to prevent the...

Page 8: ...e humidifier USING YOUR HUMIDIFIER CONT Your humidifier can be used as an aroma diffuser Figure 3 1 Preventing Water Leaks Make sure the silicone sealing ring around the water tank cap is secured at a...

Page 9: ...ow it to sit for at least 1 hour You should clean your humidifier every 3 days Change the water every day or every other day to avoid bacteria growth Note Do not allow water inside or around the air o...

Page 10: ...fier 1 Fill the water tank with 238 mL 1 cup of vinegar along with 3 8 L 1 gal of water 2 Place the humidifier outdoors and allow it to run for 1 hour 3 Pour out the mixture and refill with water Then...

Page 11: ...n unusual smell If the humidifier is new remove the water cap and place the water tank in a cool dry place for 12 hours If essential oils were diffused on the aroma pad rinse the pad under clean water...

Page 12: ...the humidifier on a lower mist setting Open a window to ensure proper airflow for your humidifier or move the humidifier to a more well ventilated room Make sure the water tank is properly in place s...

Page 13: ...chase Warranty lengths may vary between product categories Should you encounter any issues or have any questions regarding your new product feel free to contact our helpful Customer Support Team CUSTO...

Page 14: ...k dass Sie sich f r den K HLNEBEL ULTRASCHALL LUFTBEFEUCHTER CLASSIC 200 VON LEVOIT ENTSCHIEDEN HABEN Lieferumfang Technische Daten 1 Ultraschallluftbefeuchter 3 Aroma Pads 1 vorinstalliert 1 Reinigun...

Page 15: ...len Sie den Wasserbeh lter nie mit irgendwelchen anderen Fl ssigkeiten Befolgen Sie s mtliche Anweisungen und Sicherheitshinweise um das Risiko von Brand Stromschl gen und sonstigen Verletzungen zu re...

Page 16: ...er Wasserfilter in den Wasserbeh lter oder das Unterteil Dies besch digt den Luftbefeuchter und verursacht Leckagen Geben Sie therische le nur auf das Aroma Pad Vorsicht Gefahr durch Leckagen und Stro...

Page 17: ...ste H Unterteil I Steuertaste J Isolierring K Umwandler L Schwimmerschutz M Schwimmer N Nebelr hre O Wasserbeh lterfenster P Luftauslass Q Innere Kammer R Stromkabel S Wasserbeh lterdeckel T Silikon D...

Page 18: ...er destilliertem Wasser zur Bef llung des Wasserbeh lters F llen Sie den Wasserbeh lter nicht mit hei em Wasser F gen Sie Wasser ausschlie lich ber die mit dem Deckel gesch tzte ffnung des Wasserbeh l...

Page 19: ...Fl che wie einen Tisch oder einen Nachttisch Sorgen Sie daf r dass das Zimmer gut bel ftet ist Allgemeiner Betrieb Hinweis Stellen Sie den Luftbefeuchter mindestens 30 cm 12 Zoll von W nden und Ger t...

Page 20: ...ZUNG IHRES LUFTBEFEUCHTERS FORTS Ihr Luftbefeuchter kann als Aromazerst uber verwendet werden Abbildung 3 1 Vermeiden von Wasseraustritt Achten Sie darauf dass der Silikonring um den Wasserbeh lterdec...

Page 21: ...Sie die Einheit mindestens eine Stunde lang so stehen Sie sollten Ihren Luftbefeuchter alle drei Tage reinigen Wechseln Sie das Wasser jeden oder zumindest jeden zweiten Tag um Bakterienbildung zu ver...

Page 22: ...ml 1 Tasse Essig zusammen mit 3 8 l 1 Gallone Wasser in den Wasserbeh lter 2 Stellen Sie den Luftbefeuchter nach drau en und lassen Sie ihn eine Stunde laufen 3 Gie en Sie die Mischung aus und f llen...

Page 23: ...htigkeit ab Wenn Ihre Umgebung kalt und oder trocken ist wird das Wasser im Luftbefeuchter schneller aufgebraucht Der Luftbefeuchter gibt einen ungew hnlichen Geruch ab Wenn der Luftbefeuchter neu ist...

Page 24: ...ie den Kundendienst siehe Seite 25 Achten Sie darauf dass der Silikonring um den Wasserbeh lterdeckel dicht anliegt Um den Luftbefeuchter bildet sich eine Wasserlache Stellen Sie den Luftbefeuchter au...

Page 25: ...hler ab dem Kaufdatum f r zwei Jahren Die Garantiefrist ist von Produkt zu Produkt unterschiedlich Bei Fragen zu oder Problemen mit Ihrem neuen Produkt hilft Ihnen unser Kundendienst gerne weiter KUND...

Page 26: ......

Page 27: ...27 Connect with us LevoitUK Verbinden Sie sich mit uns LevoitGermany...

Page 28: ...AU0919MC M1 1_0819Classic200_eu levoit com...

Reviews: