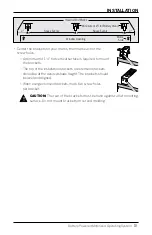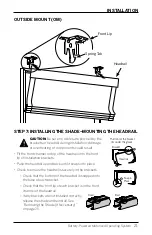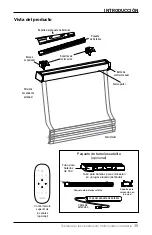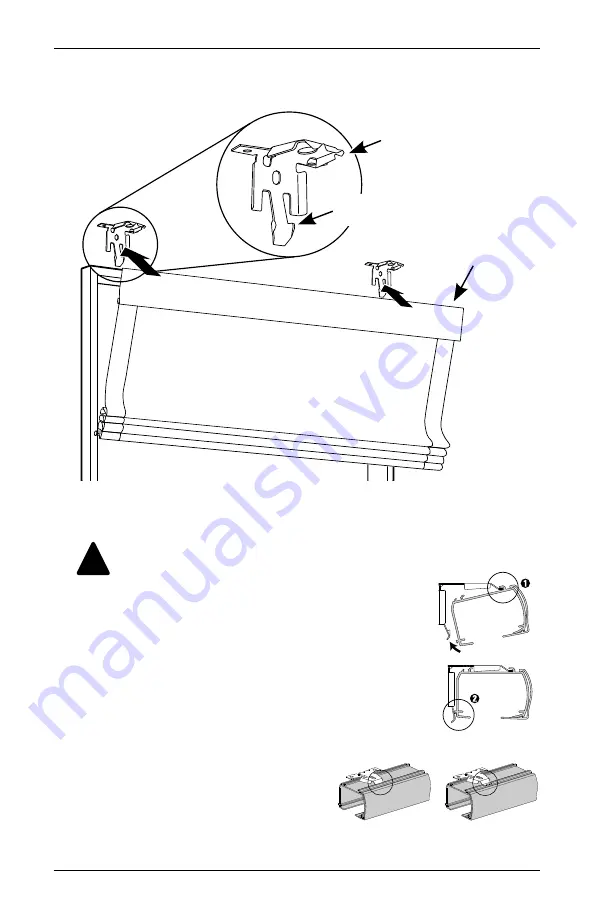
Headrail
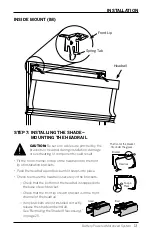
Front lip
Spring tab
Headrail
Front lip
Spring tab
Front Lip
Spring Tab
Headrail
STEP 7: INSTALLING THE SHADE–MOUNTING THE HEADRAIL
CAUTION:
Be sure no cables are pinched by the
brackets or headrail during installation; damage
or overheating of components could result.
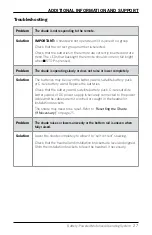
• Fit the front channel on top of the headrail onto the front
lip of installation brackets.
• Push the headrail up and back until it snaps into place.
• Check to ensure the headrail is securely in the brackets.
— Check that the bottom of the headrail is snapped into
the base of each bracket.
— Check that the front lip of each bracket is in the front
channel of the headrail.
— If any brackets are not installed correctly,
release the shade and reinstall. See
“Removing the Shade (If Necessary)”
on page
25
.
Snap in
Place
Battery-Powered Motorized Operating System
!
Headrail
Bracket
Good
Bad
The front of the bracket
fits under the groove.
OUTSIDE MOUNT (OM)
INSTALLATION
21
Summary of Contents for Corded Lift Control
Page 22: ......
Page 23: ...Persianas natural INSTALACI N MANEJO CUIDADO Control de elevaci n con cuerda...
Page 44: ...2020 LEVOLOR Inc 5775 Glenridge Drive Building A Atlanta GA 30328 1011801 19 0050 032...
Page 64: ......
Page 84: ...2020 LEVOLOR Inc 5775 Glenridge Drive Building A Atlanta GA 30328 1011802 19 0050 033...
Page 102: ......
Page 103: ...Control de elevaci n sin cuerda Persianas natural INSTALACI N MANEJO CUIDADO...
Page 120: ...2020 LEVOLOR Inc 5775 Glenridge Drive Building A Atlanta GA 30328 1011800 19 0050 034...
Page 150: ......
Page 151: ...Sistema de funcionamiento motorizado con bater a Persianas natural INSTALACI N MANEJO CUIDADO...
Page 180: ...2020 LEVOLOR Inc 5775 Glenridge Drive Building A Atlanta GA 30328 1011799 19 0050 035...

