12
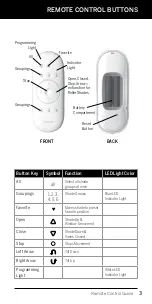
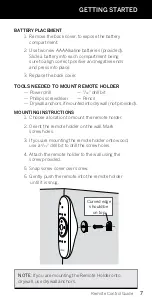
BATTERY PLACEMENT
Remote Control Guide
CUSTOMIZING BOTTOM STOP LIMIT
1. Press and hold the motor activation button on the
shade, while at the same time pressing and holding
the
CLOSE button on remote. The motor’s LED
will illuminate red and the shade will begin to lower.
2. Once the shade has stopped, use the remote to
position the desired stopping point.
3. Press and hold the STOP button on the remote
until the red LED starts flashing to put the remote
in program mode.
4. Press and hold the motor activation button on the
shade, while at the same time pressing and holding
the
CLOSE button on remote. The motor’s LED will
flash green and the shade will move up/down slightly.
5. Remote will automatically set to desired stopping
point after 30 seconds.
BATTERY REPLACEMENT
Replacing the batteries in the remote will not cause the loss
of any window covering programming, including GROUPS and
FAVORITE. The remote uses two Alkaline AAA batteries.
To replace the batteries in the remote:
1. Slide open back of battery compartment.
2. Gently lift and remove the old batteries. To remove
batteries use a small screwdriver or fingernail to lift
battery and remove from slot.
3. Insert new batteries, be sure to align correct positive
and negative ends and press into place.
4. Align and replace the back cover onto the backside
of the remote.
NOTE:
When the window covering starts moving slowly,
the batteries in the window covering battery pack may
need to be replaced. More than likely the batteries in the
remote are just fine.


