background image

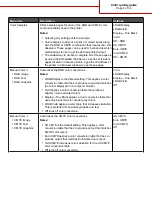
Color misregistration

Example

Cause

Solution

ABCDE

ABCDE

ABCDE

ABCDE

Color has shifted outside of the
appropriate area or has been
superimposed over another color
area.

Adjust the color alignment. For
more information, see “Adjusting
the color alignment” on
page 9.

Remove and reinstall the
photoconductors. For more
information about installing
supplies, see the User's Guide on
the Software and Documentation
CD.

Note: If you have not resolved the
issue, adjust the color alignment
again.

Adjusting the color alignment

1

Make sure the printer is turned off.

2

From the control panel, press and hold 

 and 

 while turning the printer on.

3

Release both buttons when 

Performing Self Test

 appears.

The printer performs its power-on sequence, and then 

Config Menu

 appears.

4

Press 

 until 

Color Alignment

 appears, and then press 

.

5

Press 

 again to print the alignment page.

6

Press 

 until 

Set A

 appears, and then press 

.

7

From the printed sheet, find the straightest of the 20 lines beside the letter A.

8

Press 

 or 

 until that number is displayed, and then press 

.

Submitting Selection

 appears.

9

Repeat steps 6 through 8 to align sets A through L.

10

Press 

.

11

Press 

 until 

Exit Config Menu

 appears, and then press 

.

Resetting the Printer

 appears briefly, followed by a clock, and then 

Ready

 appears.

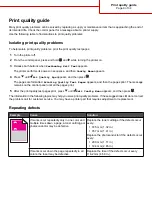
Print quality guide

Page 9 of 34

Summary of Contents for 534n - C Color Laser Printer

Page 1: ...t color conversion tables to each object on the printed page It looks at how the color for each object is defined Off turns off color correction Manual allows customization of the color tables using t...

Page 2: ...r is not supported in PPDS and only partially supported by the PCL emulation printer software On Off RGB Brightness Adjusts brightness in color outputs Notes 0 is the default setting 6 is the maximum...

Page 3: ...the default setting This applies a color conversion table that tries to produce output that matches the colors displayed on a computer monitor Vivid applies a color conversion table that produces bri...

Page 4: ...r using RGB or CMYK color combinations Additionally they commonly let users modify the color of each object in a document For more information see the software program Help section How does the printe...

Page 5: ...ssages Guide on the Software and Documentation CD Make sure to print on the recommended type of color transparencies For more information about the paper and media specifications see the User s Guide...

Page 6: ...information no color conversion is implemented Note The Color Samples pages are not useful if the software program does not specify colors with RGB or CMYK combinations Additionally certain situation...

Page 7: ...c increment This provides a way to print multiple pages of colored boxes that surround a specific color of interest There are nine conversion tables available with the following three options Print Pr...

Page 8: ...then the pages print The message remains on the control panel until all the pages print 5 After the print quality test pages print press until Exit Config Menu appears and then press The information i...

Page 9: ...off 2 From the control panel press and hold and while turning the printer on 3 Release both buttons when Performing Self Test appears The printer performs its power on sequence and then Config Menu ap...

Page 10: ...s Make sure the Paper Type and Paper Weight settings match the type of media you are using Avoid textured media with rough finishes A toner cartridge is low or may be almost empty Replace the toner ca...

Page 11: ...of media you are using Color Saver is On Turn Color Saver off Toner is low Replace the toner cartridge Toner cartridge is defective or worn Light colored line white line or incorrectly colored line Ex...

Page 12: ...CDE ABCDE Toner is smeared before fusing to the media If media is stiff try feeding from another tray Toner cartridge is defective Replace the toner cartridge causing the streaks Transfer belt is defe...

Page 13: ...tion Guides in the selected tray are set for a different paper size than what is loaded in the tray Move the guides in the tray to the proper positions for the size loaded Auto size sensing is set to...

Page 14: ...you are using Change the Paper Type and Paper Weight settings to match the paper or specialty media loaded in the printer Paper has been stored in a high humidity environment Load paper from a fresh...

Page 15: ...ot remove trays while a job prints or while Busy blinks on the display Doing so may cause a jam 1 Grasp the handle and pull the tray out Remove the tray completely 2 Squeeze the width guide tabs toget...

Page 16: ...edges on a level surface 5 Load the paper stack with the recommended print side faceup Load the stack toward the back of the tray as shown When loading preprinted letterhead place the header toward th...

Page 17: ...the printer draws from another tray To change the paper size and type settings 1 Make sure the printer is on and Ready appears 2 From the control panel press 3 Press until Paper Menu appears and then...

Page 18: ...ogram Toner Cartridge C5340YX C534 Cyan Extra High Yield Toner Cartridge C5342CX C534 Magenta Extra High Yield Toner Cartridge C5342MX C534 Yellow Extra High Yield Toner Cartridge C5342YX C534 Cyan Hi...

Page 19: ...30 Photoconductor Unit C53030X C530 C532 C534 Photoconductor Unit Multi Pack C53034X C530 C532 C534 Fuser 100V 50 60Hz 40X3571 C530 C532 C534 Fuser 120V 50 60Hz low voltage 40X3569 C530 C532 C534 Fuse...

Page 20: ...Cyan PC Unit Life Warning Magenta PC Unit Life Warning or Yellow PC Unit Life Warning appears you need to order replacement photoconductor s Part number Part name C53030X Photoconductor Unit C53034X...

Page 21: ...2 x 266 7 mm 7 25 x 10 5 in A5 148 x 210 mm 5 83 x 8 27 in Folio 216 x 330 mm 8 5 x 13 in Statement 139 7 x 215 9 mm 5 5 x 8 5 in X X Universal 148 x 210 mm to 215 9 x 355 6 mm 5 83 x 8 27 in to 8 5...

Page 22: ...se media storage guidelines to help avoid jams and uneven print quality For best results store media where the temperature is 21 C 70 F and the relative humidity is 40 Store media in cartons when poss...

Page 23: ...fter loading media Make sure the guides in the trays are properly positioned and are not pressing too tightly against the paper Make sure all media sizes and media types are set correctly in the contr...

Page 24: ...the defects on the print job indicates which particular part is causing the defect Change the photoconductor unit for the color that shows this defect Change the toner cartridge for the color that sh...

Page 25: ...ng Custom Types Universal Setup Menu Settings Page Device Statistics Network Setup Page Network x Setup Page Wireless x Setup Page Profiles List NetWare Setup Page Print Fonts Print Directory Setup Me...

Page 26: ...nking green The printer is warming up processing data or printing Solid green The printer is on but idle Solid red Operator intervention is needed 5 Stop Stops all printer activity A list of options i...

Page 27: ...map Provides a list of the control panel menus and settings Information guide Provides help in locating additional information Connection guide Provides information about connecting the printer locall...

Page 28: ...ating systems Windows Server 2003 and Windows Server 2003 x64 Windows XP and Windows XP x64 bit Edition Windows 2000 Windows NT 4 0 Windows Me Windows 98 Second Edition 1 Insert the Software and Docum...

Page 29: ...lation the printer is set up to be shared so that other network computers can print to it Installing software for direct IP printing 1 Insert the Software and Documentation CD If the install screen do...

Page 30: ...k Places Find the name of the host computer and look for the shared name assigned to the printer 3 Connect other network computers to the printers Using the peer to peer method a Open the printers fol...

Page 31: ...in a downloadable software package on the Lexmark Web site at www lexmark com Creating a queue in the Print Center or Printer Setup Utility For local printing you need to create a print queue 1 Insta...

Page 32: ...From the Printer Menu choose Add Printer d From the pop up menu choose AppleTalk e From the list select the AppleTalk zone For information about which zone or printer to select see the network setup p...

Page 33: ...ter damage Always use at least two people to lift the printer Always turn off the printer using the power switch before moving it Disconnect all cords and cables from the printer before moving it Remo...

Page 34: ...cart used to move the printer must have a surface able to support the full footprint of the printer Any cart used to move the options must have a surface able to support the dimensions of the options...

Reviews: