3
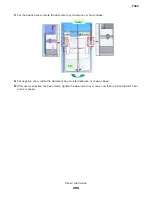
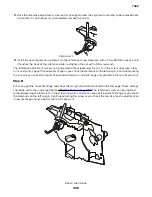
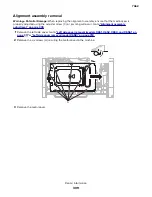
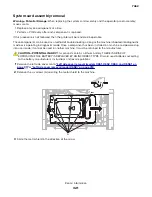
Back the reference adjustment screw out far enough to allow the alignment assembly to be removed from
the printer. It is not necessary to completely remove the screw.
Allen wrench
4
Install the new alignment assembly. Turn the reference screw clockwise with a 7 mm M3 Allen wrench until
it touches the back of the reference plate, and tighten the nut with a 5.5 mm wrench.
The reference adjustment screw can be adjusted without loosening the nut. Turn the screw clockwise a few
turns and print a copy of the Quick Test Page as you check the diamonds on the left margin. Continue adjusting
the screw as you check the results of each adjustment on a new test page until you obtain the results you want.
Step B
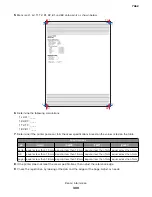
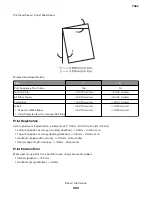
Print a copy of the Quick Test Page and check the margin adjustments printed on the test page. These settings
should be within the range specified in
. The reference screw can be adjusted
without loosening the locknut. Turn the screw a few turns, and print a copy of the Quick Test Page as you check
the diamonds on the left margin. Continue adjusting the screw as you check the results of each adjustment on
a new test page until you obtain the results you want.
7462
Repair information
306
Summary of Contents for 7462 series
Page 26: ...7462 26 ...
Page 30: ...7462 30 ...
Page 38: ... Analog or digital multimeter Flashlight optional 7462 General information 38 ...
Page 288: ...7462 288 ...
Page 346: ...5 Remove the pins D on both sides securing the links C A B D 7462 Repair information 346 ...
Page 348: ...9 Lift the operator panel door assembly out of the machine 7462 Repair information 348 ...
Page 416: ...A 3 Remove the anti tip latch assembly 7462 Repair information 416 ...
Page 419: ...A 3 Remove the HCIT tray cover front 7462 Repair information 419 ...
Page 564: ...7462 564 ...
Page 566: ...7462 566 ...
Page 571: ...7462 571 ...
Page 576: ...7462 Parts catalog 576 ...
Page 581: ...Assembly 4 Media path and ducts 1 2 3 4 5 6 7 8 9 10 11 14 13 12 3 7462 Parts catalog 581 ...
Page 591: ...Assembly 9 Fuser and LVPS card assemblies 1 4 2 3 5 6 7 8 9 10 7462 Parts catalog 591 ...
Page 595: ...Assembly 11 ADF unit assembly 1 7462 Parts catalog 595 ...
Page 597: ...Assembly 12 ADF covers 1 2 3 4 5 6 7 8 9 10 11 12 7462 Parts catalog 597 ...
Page 599: ...Assembly 13 ADF feed and drive 7462 Parts catalog 599 ...
Page 601: ...7462 Parts catalog 601 ...
Page 602: ...Assembly 14 ADF electronics 7462 Parts catalog 602 ...
Page 604: ...7462 Parts catalog 604 ...
Page 607: ...7462 Parts catalog 607 ...
Page 610: ...7462 Parts catalog 610 ...
Page 613: ...7462 Parts catalog 613 ...
Page 616: ...7462 Parts catalog 616 ...
Page 617: ...Assembly 19 MFP stapler assembly 1 1 7462 Parts catalog 617 ...
Page 621: ...Assembly 21 MFP stapler assembly 3 4 5 1 2 3 6 6 7 8 9 10 11 7462 Parts catalog 621 ...
Page 623: ...Assembly 22 MFP stapler assembly 4 1 2 7462 Parts catalog 623 ...
Page 625: ...Assembly 23 MFP offset stacker assembly 1 1 7462 Parts catalog 625 ...
Page 629: ...Assembly 25 MFP offset stacker 3 4 5 1 2 3 6 6 7 8 9 10 11 7462 Parts catalog 629 ...
Page 631: ...Assembly 26 MFP 4 bin mailbox assembly 1 1 7462 Parts catalog 631 ...
Page 633: ...Assembly 27 MFP 4 bin mailbox assembly 2 3 2 4 5 11 8 9 10 7 1 6 7462 Parts catalog 633 ...
Page 637: ...Assembly 29 Envelope feeder 1 7462 Parts catalog 637 ...
Page 642: ...7462 Parts catalog 642 ...
Page 644: ...7462 644 ...
Page 684: ...7462 684 ...
Page 698: ...7462 Index 698 ...


