Notes:
–
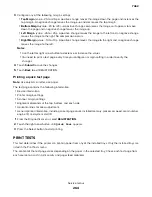
When the last digit or character is changed, press the select button to validate Configuration ID 1.
–
If the process is successful, then
Submitting Selection
and the value for configuration ID 2
appear on the display.
3
Enter configuration ID 2.
4
Depending on your printer model, touch
Submit
or press the Select button to apply the changes.
Note:
The process is successful if
Submitting Selection
or a check mark, depending on your
printer model, appears on the display.
5
Restart the printer.
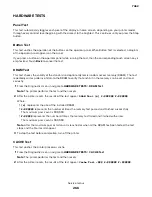
Edge to Edge
When enabled, this setting shifts all four margins (top, bottom, left, and right) to the physical edge of the page
(printable area of a supported paper size).
Set the setting to Off to restore normal margins.
EP SETUP
EP Defaults
This setting restores each printer setting listed in EP SETUP to its factory default value. This is also used to help
correct print quality problems.
1
From the Diagnostics menu, navigate to
EP SETUP
>
EP Defaults
.
2
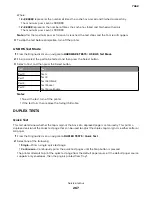
Select one of the following:
•
Restore
—To restore the default values.
•
Do Not Restore
—To exit without changing the settings.
Fuser Temperature (Fuser Temp)
This setting adjusts the fuser temperature to solve problems with paper curl on low
‑
grade paper and problems
with letterheads on some types of media.
1
From the Diagnostics menu, navigate to
EP SETUP
>
Fuser Temp
.
2
Set the fuser temperature to Normal, Lower, or Lowest.
Note:
Normal is the factory default setting.
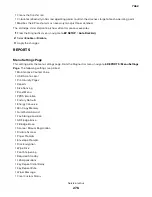
Fuser Page Count
Note:
The fuser page count can only be viewed.
From the Diagnostics menu, navigate to
EP SETUP
>
Fuser Page Count
.
7462
Service menus
274
Summary of Contents for 7462 series
Page 26: ...7462 26 ...
Page 30: ...7462 30 ...
Page 38: ... Analog or digital multimeter Flashlight optional 7462 General information 38 ...
Page 288: ...7462 288 ...
Page 346: ...5 Remove the pins D on both sides securing the links C A B D 7462 Repair information 346 ...
Page 348: ...9 Lift the operator panel door assembly out of the machine 7462 Repair information 348 ...
Page 416: ...A 3 Remove the anti tip latch assembly 7462 Repair information 416 ...
Page 419: ...A 3 Remove the HCIT tray cover front 7462 Repair information 419 ...
Page 564: ...7462 564 ...
Page 566: ...7462 566 ...
Page 571: ...7462 571 ...
Page 576: ...7462 Parts catalog 576 ...
Page 581: ...Assembly 4 Media path and ducts 1 2 3 4 5 6 7 8 9 10 11 14 13 12 3 7462 Parts catalog 581 ...
Page 591: ...Assembly 9 Fuser and LVPS card assemblies 1 4 2 3 5 6 7 8 9 10 7462 Parts catalog 591 ...
Page 595: ...Assembly 11 ADF unit assembly 1 7462 Parts catalog 595 ...
Page 597: ...Assembly 12 ADF covers 1 2 3 4 5 6 7 8 9 10 11 12 7462 Parts catalog 597 ...
Page 599: ...Assembly 13 ADF feed and drive 7462 Parts catalog 599 ...
Page 601: ...7462 Parts catalog 601 ...
Page 602: ...Assembly 14 ADF electronics 7462 Parts catalog 602 ...
Page 604: ...7462 Parts catalog 604 ...
Page 607: ...7462 Parts catalog 607 ...
Page 610: ...7462 Parts catalog 610 ...
Page 613: ...7462 Parts catalog 613 ...
Page 616: ...7462 Parts catalog 616 ...
Page 617: ...Assembly 19 MFP stapler assembly 1 1 7462 Parts catalog 617 ...
Page 621: ...Assembly 21 MFP stapler assembly 3 4 5 1 2 3 6 6 7 8 9 10 11 7462 Parts catalog 621 ...
Page 623: ...Assembly 22 MFP stapler assembly 4 1 2 7462 Parts catalog 623 ...
Page 625: ...Assembly 23 MFP offset stacker assembly 1 1 7462 Parts catalog 625 ...
Page 629: ...Assembly 25 MFP offset stacker 3 4 5 1 2 3 6 6 7 8 9 10 11 7462 Parts catalog 629 ...
Page 631: ...Assembly 26 MFP 4 bin mailbox assembly 1 1 7462 Parts catalog 631 ...
Page 633: ...Assembly 27 MFP 4 bin mailbox assembly 2 3 2 4 5 11 8 9 10 7 1 6 7462 Parts catalog 633 ...
Page 637: ...Assembly 29 Envelope feeder 1 7462 Parts catalog 637 ...
Page 642: ...7462 Parts catalog 642 ...
Page 644: ...7462 644 ...
Page 684: ...7462 684 ...
Page 698: ...7462 Index 698 ...


