Action
Yes
No
Step 4
a
Depending on your operating system, specify the paper type
from the Printing Preferences or Print dialog.
Notes:
•
Make sure that the setting matches the paper loaded.
•
You can also change the setting on the printer control
panel. Navigate to:
Settings
>
Paper
>
Tray Configuration
>
Paper Size/Type
b
Print the document.
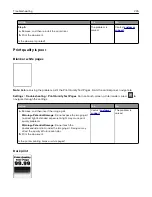
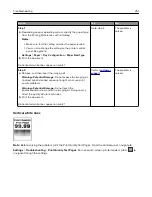
Is the print light?
Go to step 5.
The problem is
solved.
Step 5
Check if paper has texture or rough finishes.
Are you printing on textured or rough paper?
Go to step 6.
Go to step 7.
Step 6
a
Replace textured or rough paper with plain paper.
b
Print the document.
Is the print light?
Go to step 7.
The problem is
solved.
Step 7
a
Load paper from a fresh package.
Note:
Paper absorbs moisture due to high humidity. Store
paper in its original wrapper until you are ready to use it.
b
Print the document.
Is the print light?
Go to step 8.
The problem is
solved.
Step 8
a
Remove, and then insert the imaging kit.
Warning—Potential Damage:
Do not expose the imaging kit
to direct light. Extended exposure to light may cause print
quality problems.
Warning—Potential Damage:
Do not touch the
photoconductor drum under the imaging kit. Doing so may
affect the quality of future print jobs.
b
Print the document.
Is the print light?
Contact
The problem is
solved.
Troubleshooting
241
Summary of Contents for CX920
Page 164: ... Scanner glass Scanner glass pad 3 Close the scanner cover Maintaining the printer 164 ...
Page 172: ...5 Insert the new toner cartridge 6 Remove the waste toner bottle Maintaining the printer 172 ...
Page 177: ...8 Insert the waste toner bottle and then close the door Maintaining the printer 177 ...
Page 207: ... Below the fuser area Duplex area Clearing jams 207 ...
Page 212: ...2 Open door J Clearing jams 212 ...
Page 214: ... Areas H1 and H2 Area H6 Clearing jams 214 ...
Page 218: ...2 Remove the staple cartridge holder 3 Remove the loose staples Clearing jams 218 ...
Page 220: ...2 Remove the staple cartridge holder 3 Remove the loose staples Clearing jams 220 ...
Page 222: ...2 Remove the staple cartridge holder 3 Remove the loose staples Clearing jams 222 ...
Page 276: ...6 Remove the controller board shield Upgrading and migrating 276 ...
Page 279: ...4 Remove the controller board shield Upgrading and migrating 279 ...
Page 285: ...7 Connect the tray connector to the printer 8 Open trays 2 and 3 Upgrading and migrating 285 ...
Page 290: ...9 Remove the stabilizing feet from the tray Upgrading and migrating 290 ...
Page 294: ...17 Secure the tray cable with the clamp Upgrading and migrating 294 ...
Page 301: ...7 Remove the paper guides 8 Attach the sensor cover Upgrading and migrating 301 ...
Page 307: ...8 Attach the finisher to the printer Upgrading and migrating 307 ...

