3
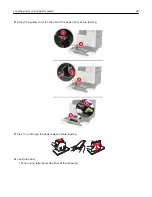
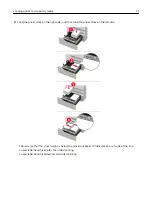
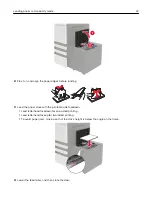
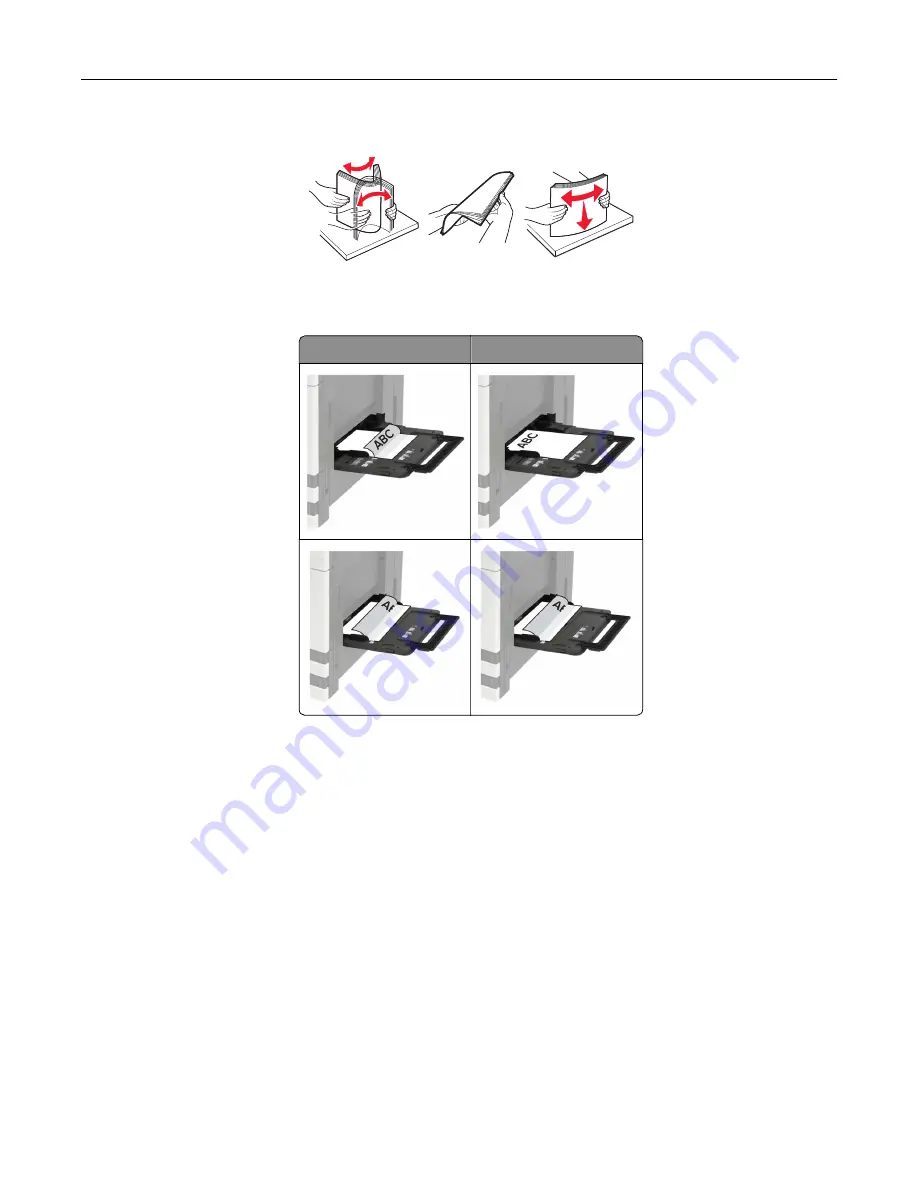
Flex, fan, and align the paper edges before loading.
4
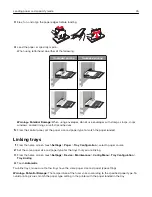
Load the paper or specialty media.
When using letterhead, do either of the following:
One
‑
sided printing
Two
‑
sided printing
Warning—Potential Damage:
When using envelopes, do not use envelopes with stamps, clasps, snaps,
windows, coated linings, or self
‑
stick adhesives.
5
From the control panel, set the paper size and paper type to match the paper loaded.
Linking trays
1
From the home screen, touch
Settings
>
Paper
>
Tray Configuration
> select a paper source.
2
Set the same paper size and paper type for the trays that you are linking.
3
From the home screen, touch
Settings
>
Device
>
Maintenance
>
Config Menu
>
Tray Configuration
>
Tray Linking
.
4
Touch
Automatic
.
To unlink trays, make sure that no trays have the same paper size and paper type settings.
Warning—Potential Damage:
The temperature of the fuser varies according to the specified paper type. To
avoid printing issues, match the paper type setting in the printer with the paper loaded in the tray.
Loading paper and specialty media
35
Summary of Contents for CX920
Page 164: ... Scanner glass Scanner glass pad 3 Close the scanner cover Maintaining the printer 164 ...
Page 172: ...5 Insert the new toner cartridge 6 Remove the waste toner bottle Maintaining the printer 172 ...
Page 177: ...8 Insert the waste toner bottle and then close the door Maintaining the printer 177 ...
Page 207: ... Below the fuser area Duplex area Clearing jams 207 ...
Page 212: ...2 Open door J Clearing jams 212 ...
Page 214: ... Areas H1 and H2 Area H6 Clearing jams 214 ...
Page 218: ...2 Remove the staple cartridge holder 3 Remove the loose staples Clearing jams 218 ...
Page 220: ...2 Remove the staple cartridge holder 3 Remove the loose staples Clearing jams 220 ...
Page 222: ...2 Remove the staple cartridge holder 3 Remove the loose staples Clearing jams 222 ...
Page 276: ...6 Remove the controller board shield Upgrading and migrating 276 ...
Page 279: ...4 Remove the controller board shield Upgrading and migrating 279 ...
Page 285: ...7 Connect the tray connector to the printer 8 Open trays 2 and 3 Upgrading and migrating 285 ...
Page 290: ...9 Remove the stabilizing feet from the tray Upgrading and migrating 290 ...
Page 294: ...17 Secure the tray cable with the clamp Upgrading and migrating 294 ...
Page 301: ...7 Remove the paper guides 8 Attach the sensor cover Upgrading and migrating 301 ...
Page 307: ...8 Attach the finisher to the printer Upgrading and migrating 307 ...


