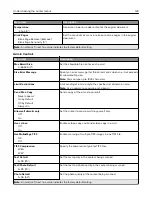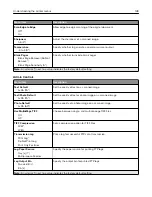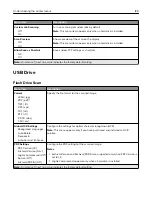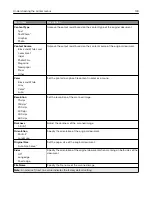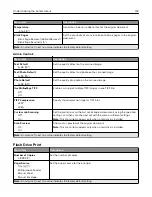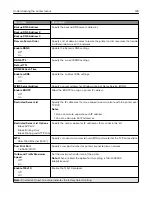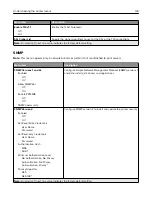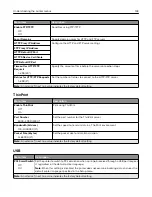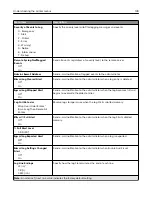
Menu item
Description
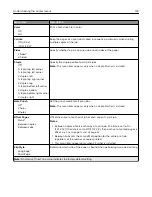
PCL SmartSwitch
Off
On*
Set the printer to switch automatically to PCL emulation
when a print job requires it, regardless of the default
printer language.
Note:
When this setting is disabled, the printer does
not examine incoming data and uses the default printer
language specified in the Setup menu.
PS SmartSwitch
Off
On*
Set the printer to switch automatically to PostScript
emulation when a print job requires it, regardless of the
default printer language.
Note:
When this setting is disabled, the printer does
not examine incoming data and uses the default printer
language specified in the Setup menu.
Job Buffering
Off*
On
Temporarily store print jobs on the hard disk before
printing.
Note:
This menu item appears only when a hard disk is
installed.
Mac Binary PS
Auto*
On
Off
Set the printer to process Macintosh binary PostScript
print jobs.
Notes:
•
On processes raw binary PostScript print jobs.
•
Off filters print jobs using the standard protocol.
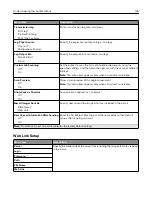
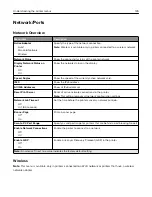
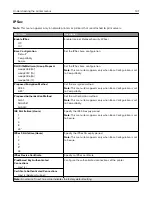
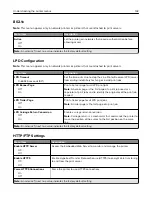
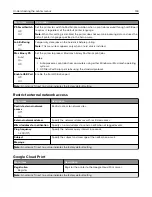
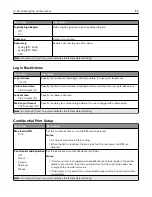
Ethernet
Menu item
Description
Network Speed
Show the speed of the active network adapter.
IPv4
Enable DHCP (On*)
Set Static IP Address
Configure the IPv4 settings.
IPv6
Enable IPv6 (On*)
Enable DHCPv6 (Off*)
Stateless Address Autoconfiguration (On*)
DNS Server Address
Manually Assigned IPv6 Address
Manually Assigned IPv6 Router
Address Prefix (64*)
All IPv6 Addresses
All IPv6 Router Addresses
Configure the IPv6 settings.
Network Address
UAA
LAA
Specify the network address.
Note:
An asterisk (*) next to a value indicates the factory default setting.
Understanding the printer menus
137
Summary of Contents for CX920
Page 164: ... Scanner glass Scanner glass pad 3 Close the scanner cover Maintaining the printer 164 ...
Page 172: ...5 Insert the new toner cartridge 6 Remove the waste toner bottle Maintaining the printer 172 ...
Page 177: ...8 Insert the waste toner bottle and then close the door Maintaining the printer 177 ...
Page 207: ... Below the fuser area Duplex area Clearing jams 207 ...
Page 212: ...2 Open door J Clearing jams 212 ...
Page 214: ... Areas H1 and H2 Area H6 Clearing jams 214 ...
Page 218: ...2 Remove the staple cartridge holder 3 Remove the loose staples Clearing jams 218 ...
Page 220: ...2 Remove the staple cartridge holder 3 Remove the loose staples Clearing jams 220 ...
Page 222: ...2 Remove the staple cartridge holder 3 Remove the loose staples Clearing jams 222 ...
Page 276: ...6 Remove the controller board shield Upgrading and migrating 276 ...
Page 279: ...4 Remove the controller board shield Upgrading and migrating 279 ...
Page 285: ...7 Connect the tray connector to the printer 8 Open trays 2 and 3 Upgrading and migrating 285 ...
Page 290: ...9 Remove the stabilizing feet from the tray Upgrading and migrating 290 ...
Page 294: ...17 Secure the tray cable with the clamp Upgrading and migrating 294 ...
Page 301: ...7 Remove the paper guides 8 Attach the sensor cover Upgrading and migrating 301 ...
Page 307: ...8 Attach the finisher to the printer Upgrading and migrating 307 ...

