Maintaining the printer
Warning—Potential Damage:
Failure to maintain optimum printer performance, or to replace parts and
supplies, may cause damage to your printer.
Networking
Note:
Purchase a MarkNet
TM
N8370 wireless print server first before setting up the printer on a wireless
network. For information on installing the wireless print server, see the setup sheet that came with the
option.
Connecting the printer to a Wi
‑
Fi network
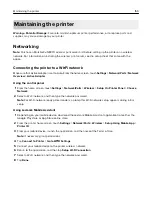
Make sure that Active Adapter is set to Auto. From the home screen, touch
Settings
>
Network/Ports
>
Network
Overview
>
Active Adapter
.
Using the control panel
1
From the home screen, touch
Settings
>
Network/Ports
>
Wireless
>
Setup On Printer Panel
>
Choose
Network
.
2
Select a Wi
‑
Fi network, and then type the network password.
Note:
For Wi
‑
Fi
‑
network
‑
ready printer models, a prompt for Wi
‑
Fi network setup appears during initial
setup.
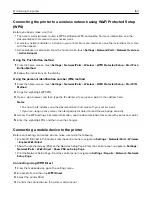
Using Lexmark Mobile Assistant
1
Depending on your mobile device, download the Lexmark Mobile Assistant application from either the
Google Play store or App Store online store.
2
From the printer home screen, touch
Settings
>
Network/Ports
>
Wireless
>
Setup Using Mobile App
>
Printer ID
.
3
From your mobile device, launch the application, and then accept the Terms of Use.
Note:
If necessary, grant permissions.
4
Tap
Connect to Printer
>
Go to Wi
‑
Fi Settings
.
5
Connect your mobile device to the printer wireless network.
6
Return to the application, and then tap
Setup Wi-Fi Connection
7
Select a Wi-Fi network, and then type the network password.
8
Tap
Done
.
Maintaining the printer
159
Summary of Contents for CX920
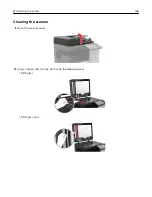
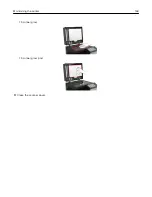
Page 164: ... Scanner glass Scanner glass pad 3 Close the scanner cover Maintaining the printer 164 ...
Page 172: ...5 Insert the new toner cartridge 6 Remove the waste toner bottle Maintaining the printer 172 ...
Page 177: ...8 Insert the waste toner bottle and then close the door Maintaining the printer 177 ...
Page 207: ... Below the fuser area Duplex area Clearing jams 207 ...
Page 212: ...2 Open door J Clearing jams 212 ...
Page 214: ... Areas H1 and H2 Area H6 Clearing jams 214 ...
Page 218: ...2 Remove the staple cartridge holder 3 Remove the loose staples Clearing jams 218 ...
Page 220: ...2 Remove the staple cartridge holder 3 Remove the loose staples Clearing jams 220 ...
Page 222: ...2 Remove the staple cartridge holder 3 Remove the loose staples Clearing jams 222 ...
Page 276: ...6 Remove the controller board shield Upgrading and migrating 276 ...
Page 279: ...4 Remove the controller board shield Upgrading and migrating 279 ...
Page 285: ...7 Connect the tray connector to the printer 8 Open trays 2 and 3 Upgrading and migrating 285 ...
Page 290: ...9 Remove the stabilizing feet from the tray Upgrading and migrating 290 ...
Page 294: ...17 Secure the tray cable with the clamp Upgrading and migrating 294 ...
Page 301: ...7 Remove the paper guides 8 Attach the sensor cover Upgrading and migrating 301 ...
Page 307: ...8 Attach the finisher to the printer Upgrading and migrating 307 ...


