Note:
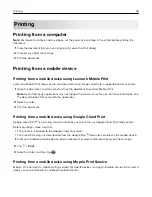
Make sure that you download the Mopria Print Service application from the Google Play store and
enable it in the mobile device.
1
From your Android mobile device, launch a compatible application or select a document from your file
manager.
2
Tap
>
.
3
Select a printer, and then adjust the settings, if necessary.
4
Tap
.
Printing from a mobile device using AirPrint
The AirPrint software feature is a mobile printing solution that allows you to print directly from Apple devices
to an AirPrint
‑
certified printer.
Notes:
•
Make sure that the Apple device and the printer are connected to the same network. If the network has
multiple wireless hubs, then make sure that both devices are connected to the same subnet.
•
This application is supported only in some Apple devices.
1
From your mobile device, select a document from your file manager or launch a compatible application.
2
Tap
>
.
3
Select a printer, and then adjust the settings, if necessary.
4
Print the document.
Printing from a mobile device using Wi
‑
Fi Direct®
Wi
‑
Fi Direct
®
is a printing service that lets you print to any Wi
‑
Fi Direct
‑
ready printer.
Note:
Make sure that the mobile device is connected to the printer wireless network. For more information,
see
“Connecting a mobile device to the printer” on page 160
.
1
From your mobile device, launch a compatible application or select a document from your file manager.
2
Depending on your mobile device, do one of the following:
•
Tap
>
.
•
Tap
>
.
•
Tap
>
.
3
Select a printer, and then adjust the settings, if necessary.
4
Print the document.
Printing
46
Summary of Contents for CX920
Page 164: ... Scanner glass Scanner glass pad 3 Close the scanner cover Maintaining the printer 164 ...
Page 172: ...5 Insert the new toner cartridge 6 Remove the waste toner bottle Maintaining the printer 172 ...
Page 177: ...8 Insert the waste toner bottle and then close the door Maintaining the printer 177 ...
Page 207: ... Below the fuser area Duplex area Clearing jams 207 ...
Page 212: ...2 Open door J Clearing jams 212 ...
Page 214: ... Areas H1 and H2 Area H6 Clearing jams 214 ...
Page 218: ...2 Remove the staple cartridge holder 3 Remove the loose staples Clearing jams 218 ...
Page 220: ...2 Remove the staple cartridge holder 3 Remove the loose staples Clearing jams 220 ...
Page 222: ...2 Remove the staple cartridge holder 3 Remove the loose staples Clearing jams 222 ...
Page 276: ...6 Remove the controller board shield Upgrading and migrating 276 ...
Page 279: ...4 Remove the controller board shield Upgrading and migrating 279 ...
Page 285: ...7 Connect the tray connector to the printer 8 Open trays 2 and 3 Upgrading and migrating 285 ...
Page 290: ...9 Remove the stabilizing feet from the tray Upgrading and migrating 290 ...
Page 294: ...17 Secure the tray cable with the clamp Upgrading and migrating 294 ...
Page 301: ...7 Remove the paper guides 8 Attach the sensor cover Upgrading and migrating 301 ...
Page 307: ...8 Attach the finisher to the printer Upgrading and migrating 307 ...

