1
From the Diagnostics menu, navigate to:
Device Tests
>
Flash Test
Files will be lost. Go/Stop?
appears.
2
Do one of the following:
•
Depending on the printer model, press
OK
or touch
to continue.
•
Press
X
to cancel.
Note:
When the test starts, it cannot be stopped or canceled.
3
After the test is complete, a message appears indicating a pass or fail result.
4
Press
X
to return to the Device tests menu.
5
Reformat the flash device using the Flash format setting in the Utilities menu.
Printer Setup
Defaults
Warning—Potential Damage:
Modification of the printer setting Defaults causes the NVRAM space to be
restored to the printer factory settings.
This setting is used by the printer to determine whether U.S. or non-U.S. factory default values should be used.
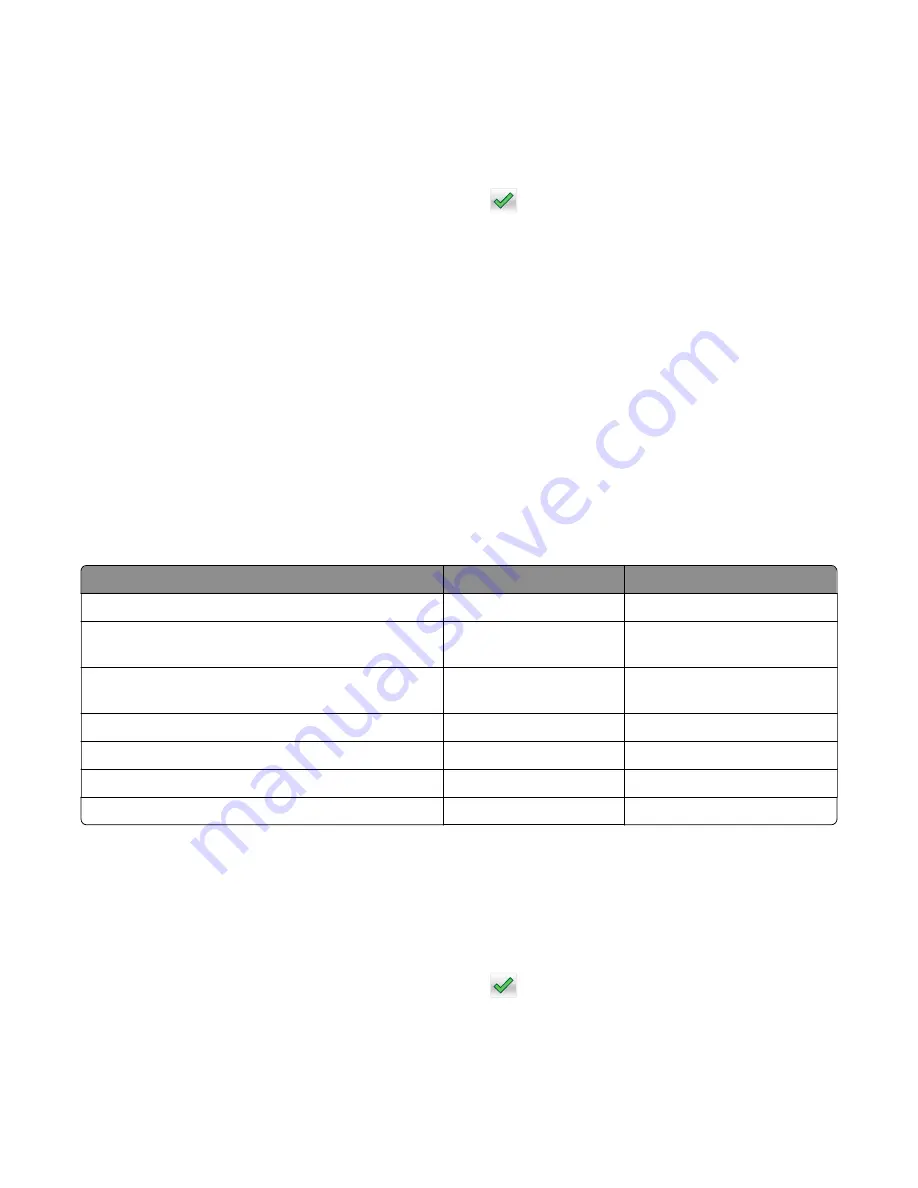
The following printer settings have different U.S. and non-U.S. values:
Printer default values
U.S. value
Non-U.S. value
Paper Sizes setting in the General Settings menu
U.S.
Metric
Default Paper Size (paper feeding sources which do
not have hardware size sensing capabilities)
Letter
A4
Default Envelope Size (envelope feeding sources
which do not have hardware size sensing capability)
10 Envelope
DL Envelope
Fax media size
Letter
A4
PCL Symbol Set
PC-8
PC-850
PPDS Code Page
437
850
Universal Units of Measure
Inches
Millimeters
To change this setting:
1
From the Diagnostics menu, navigate to:
Printer Setup
>
Defaults
2
Choose U.S. or Non
‑
U.S.
3
Do one of the following:
•
Depending on the printer model, press
OK
or touch
to save any changes.
•
Press
X
to return to the Printer setup menu.
4514-6xx
Service menus
185
Summary of Contents for M3150
Page 12: ...Part name index 393 4514 6xx Table of contents 12 ...
Page 20: ...4514 6xx 20 ...
Page 38: ...4514 6xx 38 ...
Page 172: ...4514 6xx 172 ...
Page 246: ...3 Remove two screws A and then remove the cooling fan mount A 4514 6xx Parts removal 246 ...
Page 256: ...5 Remove the four screws B and then remove the right front mount B 4514 6xx Parts removal 256 ...
Page 260: ...b Set the spring over the plunger 4514 6xx Parts removal 260 ...
Page 277: ...3 Squeeze the latches B to release the left and right links B 4514 6xx Parts removal 277 ...
Page 300: ...3 Place the printer on its rear side 4 Release the sensor flag A 4514 6xx Parts removal 300 ...
Page 301: ...5 Remove the screw B 6 Remove the sensor flag bracket C 4514 6xx Parts removal 301 ...
Page 323: ...3 Swing the right cover backward to remove 4 Remove the screw D 4514 6xx Parts removal 323 ...
Page 333: ...4514 6xx 333 ...
Page 335: ...Assembly 1 Covers 4514 6xx Parts catalog 335 ...
Page 338: ...4514 6xx Parts catalog 338 ...
Page 339: ...Assembly 2 Electronics 1 1 2 3 4 5 7 9 10 11 6 8 12 4514 6xx Parts catalog 339 ...
Page 342: ...4514 6xx Parts catalog 342 ...
Page 343: ...Assembly 3 Electronics 2 4 3 2 1 5 6 8 9 7 4514 6xx Parts catalog 343 ...
Page 345: ...4514 6xx Parts catalog 345 ...
Page 346: ...Assembly 4 Frame 10 11 12 13 14 9 1 5 6 7 8 4 4 2 3 4514 6xx Parts catalog 346 ...
Page 349: ...Assembly 5 Option trays 3 4 5 6 1 2 4514 6xx Parts catalog 349 ...
Page 354: ...4514 6xx Parts catalog 354 ...
Page 356: ...4514 6xx Parts catalog 356 ...
Page 364: ...4514 6xx 364 ...
Page 376: ...4514 6xx 376 ...
Page 386: ...4514 6xx Index 386 ...
Page 392: ...4514 6xx Part number index 392 ...
Page 398: ...4514 6xx Part name index 398 ...


