4-28
Service Manual
4080-001
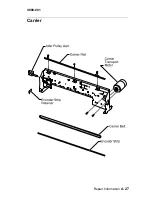
Carrier Belt Removal
1. Remove the input / output tray assembly.
2. Remove the front cover, refer to
“Covers and Doors” on
page 4-3
.
3. Disconnect the operator panel cable and note the routing.
4. Move the carrier assembly to the right side of the printer.
5. Remove the carrier shaft retainer clip from the right side of the
carrier shaft.
6. Remove the screw from the left side of the carrier shaft.
7. Remove the carrier shaft by sliding it to the right.
8. Gently lift up on the carrier taking care not to damage the
encoder strip and remove the carrier.
9. Push the idler pulley to the right to release the tension on the
belt and remove the belt.
Note: When reinstalling the carrier belt, take care not to damage
the encoder strip.
Carrier Rail Removal
Refer to the
“Carrier Rail Removal” on page 4-11
.
Summary of Contents for Optra Color 45
Page 11: ...xi 4080 001 ...
Page 12: ...xii Service Manual 4080 001 ...
Page 22: ...1 10 Service Manual 4080 001 ...
Page 68: ...3 16 Service Manual 4080 001 ...
Page 71: ...Repair Information 4 3 4080 001 Covers and Doors ...
Page 78: ...4 10 Service Manual 4080 001 Frames ...
Page 82: ...4 14 Service Manual 4080 001 Paper Feed ...
Page 86: ...4 18 Service Manual 4080 001 Electronics ...
Page 95: ...Repair Information 4 27 4080 001 Carrier ...
Page 99: ...Repair Information 4 31 4080 001 Maintenance Station ...
Page 104: ...6 2 Service Manual 4080 001 ...
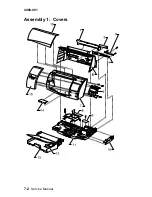
Page 106: ...7 2 Service Manual 4080 001 Assembly 1 Covers ...
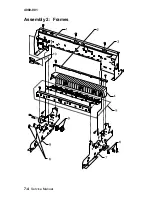
Page 108: ...7 4 Service Manual 4080 001 Assembly 2 Frames ...
Page 110: ...7 6 Service Manual 4080 001 Assembly 3 Paper Feed ...
Page 112: ...7 8 Service Manual 4080 001 Assembly 4 Electronics ...
Page 114: ...7 10 Service Manual 4080 001 Assembly 5 Carrier ...
Page 116: ...7 12 Service Manual 4080 001 Assembly 6 Carrier Transport ...
Page 118: ...7 14 Service Manual 4080 001 Assembly 7 Maintenance Station ...


