


Diagnostic aids
3-43
7510
Go Back
Previous
Next
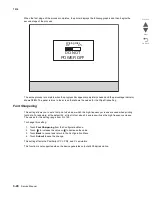
Paper Prompts
When a tray is out of the indicated paper size, a prompt is sent to the user to load paper in a tray. This setting
controls the tray the user is directed to fill. Selections are Auto (default), MP Feeder, and Manual Paper.
To change this setting:
1.
Touch
Paper Prompts
from the Configuration Menu.
[setting's current value]
appears on the
touch-screen.
2.
Touch
or
to scroll through the setting's other possible values.
3.
To exit this screen without changing the setting's value, touch
Back
.
4.
To save the setting's new value, touch
Submit
.
Envelope Prompts
This setting controls the tray the user is directed to refill when a specific envelope size is out. The selections are
Auto (default), MP Feeder, and Manual Env.
To change the value of this setting:
1.
Touch
Env Prompts
from the Configuration Menu.
[setting's current value]
appears on the touch-
screen.
2.
Touch
or
to scroll through the setting's possible values.
3.
To exit this screen without changing the setting's value, touch
Back
.
4.
To save the setting's new value, touch
Submit
.
Jobs On Disk
Jobs On Disk allows you to delete buffered jobs saved on the disk.
To delete jobs saved on the disk:
1.
Touch
Jobs On Disk
from the Configuration Menu.
2.
Touch
Delete
to decrease the setting's value; touch
to increase the setting's value.
3.
Touch
Back
to cancel and return to the Configuration Menu.
Disk Encryption
This setting determines if the printer encrypts the information that it writes to the hard disk. The values are
Disable and Enable.
Warning:
If the value is changed from
Enable
to
Disable
or from
Disable
to
Enable
, then the printer
completely formats the hard disk. All information on the disk will be unrecoverable.
To change this setting:
1.
Touch
Disk Encryption
from the Configuration Menu.
Note:
If an advanced password has been established, you must enter this password in order to change the
setting. If no advanced password exists, you can establish one by using the keyboard that appears on the LCD.
2.
Touch
Submit
to save the change.
3.
Touch
Back
to cancel and return to the Configuration Menu.
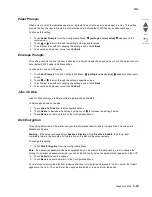
If you remove an encrypted disk from a device and then try to install another disk,
Disk Corrupted. Reformat?
appears on the LCD. You can format the newly installed disk or remove it from the device.
Summary of Contents for X945E
Page 20: ...xx Service Manual 7510 Go Back Previous Next ...
Page 25: ...Notices and safety information xxv 7510 Go Back Previous Next ...
Page 26: ...xxvi Service Manual 7510 Go Back Previous Next ...
Page 32: ...xxxii Service Manual 7510 Go Back Previous Next ...
Page 88: ...1 56 Service Manual 7510 Go Back Previous Next TTM theory ...
Page 97: ...General information 1 65 7510 Go Back Previous Next 3TM theory ...
Page 104: ...1 72 Service Manual 7510 Go Back Previous Next 1TM theory ...
Page 111: ...General information 1 79 7510 Go Back Previous Next Duplex ...
Page 432: ...3 52 Service Manual 7510 Go Back Previous Next ...
Page 475: ...Repair information 4 43 7510 Go Back Previous Next E F ...
Page 483: ...Repair information 4 51 7510 Go Back Previous Next Connectors A ...
Page 623: ...Repair information 4 191 7510 Go Back Previous Next ...
Page 653: ...Repair information 4 221 7510 Go Back Previous Next ...
Page 714: ...4 282 Service Manual 7510 Go Back Previous Next ...
Page 715: ...Connector locations 5 1 7510 Go Back Previous Next 5 Connector locations Locations ...
Page 720: ...5 6 Service Manual 7510 Go Back Previous Next Printhead Polygon mirror motor ...
Page 725: ...Connector locations 5 11 7510 Go Back Previous Next ...
Page 726: ...5 12 Service Manual 7510 Go Back Previous Next ...
Page 729: ...Connector locations 5 15 7510 Go Back Previous Next Switch media size Switch TTM media size ...
Page 765: ...Parts catalog 7 31 7510 Go Back Previous Next Assembly 29 Electrical 1 3 5 9 2 10 6 4 8 1 7 ...
Page 770: ...7 36 MFP Service Manual 7510 Go Back Previous Next Assembly 32 Electrical 4 2 1 4 3 5 7 6 8 9 ...
Page 797: ...Parts catalog 7 63 7510 Go Back Previous Next Assembly 50 1TM feed unit assembly 4 3 5 4 1 2 ...
Page 802: ...7 68 MFP Service Manual 7510 Go Back Previous Next Assembly 53 1TM drive and electrical ...
Page 804: ...7 70 MFP Service Manual 7510 Go Back Previous Next Assembly 54 3TM covers 3 5 2 4 1 ...
Page 812: ...7 78 MFP Service Manual 7510 Go Back Previous Next Assembly 58 3TM drive and electrical ...
Page 815: ...Parts catalog 7 81 7510 Go Back Previous Next Assembly 60 TTM media trays 3 5 4 3 7 2 6 8 1 ...
Page 824: ...7 90 MFP Service Manual 7510 Go Back Previous Next Assembly 67 TTM drive and electrical ...
Page 828: ...7 94 MFP Service Manual 7510 Go Back Previous Next ...
Page 836: ...I 8 Service Manual 7510 Go Back Previous Next ...
Page 844: ...I 16 Service Manual 7510 Go Back Previous Next ...


