To accept any and all of these risks and to proceed with the use of non-genuine supplies or parts in your
printer, from the control panel, press and hold
X
and
#
simultaneously for 15 seconds.
If you do not want to accept these risks, then remove the third-party supply or part from your printer and
install a genuine Lexmark supply or part. For more information, see
“Using genuine Lexmark parts and
If the printer does not print after pressing and holding
X
and
#
simultaneously for 15 seconds, then reset
the supply usage counter.
1
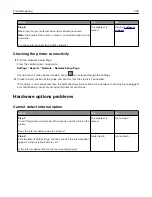
From the control panel, navigate to:
Settings
>
Device
>
Maintenance
>
Configuration Menu
>
Supply Usage And Counters
2
Select the part or supply that you want to reset, and then select
Start
.
3
Read the warning message, and then select
Continue
.
4
Press and hold
X
and
#
simultaneously for 15 seconds to clear the message.
Note:
If you are unable to reset the supply usage counters, then return the item to the place of
purchase.
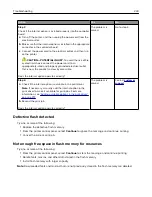
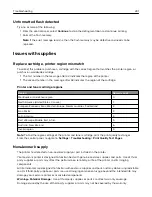
Scanner maintenance required, use ADF Kit
The printer is scheduled for maintenance. For more information, go to
contact your service representative, and then report the message.
Paper feed problems
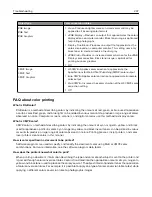
Envelope seals when printing
Action
Yes
No
Step 1
a
Use an envelope that has been stored in a dry environment.
Note:
Printing on envelopes with high moisture content can
seal the flaps.
b
Send the print job.
Does the envelope seal when printing?
Go to step 2.
The problem is
solved.
Step 2
a
Make sure that paper type is set to Envelope.
From the control panel, navigate to:
Settings
>
Paper
>
Tray Configuration
>
Paper Size/Type
For non
‑
touch
‑
screen printer models, press
to navigate
through the settings.
b
Send the print job.
Does the envelope seal when printing?
Contact
The problem is
solved.
Troubleshooting
242
Summary of Contents for XC2235
Page 16: ...2 Locate the serial number at the left side of the printer Learning about the printer 16 ...
Page 185: ...6 Insert the new waste toner bottle 7 Insert the right side cover Maintaining the printer 185 ...
Page 188: ...4 Remove the waste toner bottle 5 Remove the toner cartridges Maintaining the printer 188 ...
Page 192: ...11 Insert the waste toner bottle 12 Insert the right side cover Maintaining the printer 192 ...
Page 207: ...4 Close doors A and B Clearing jams 207 ...
Page 263: ...Upgrading and migrating 263 ...


