IPECS Release 5
Hardware Description & Installation
Issue 5.0
52
¾
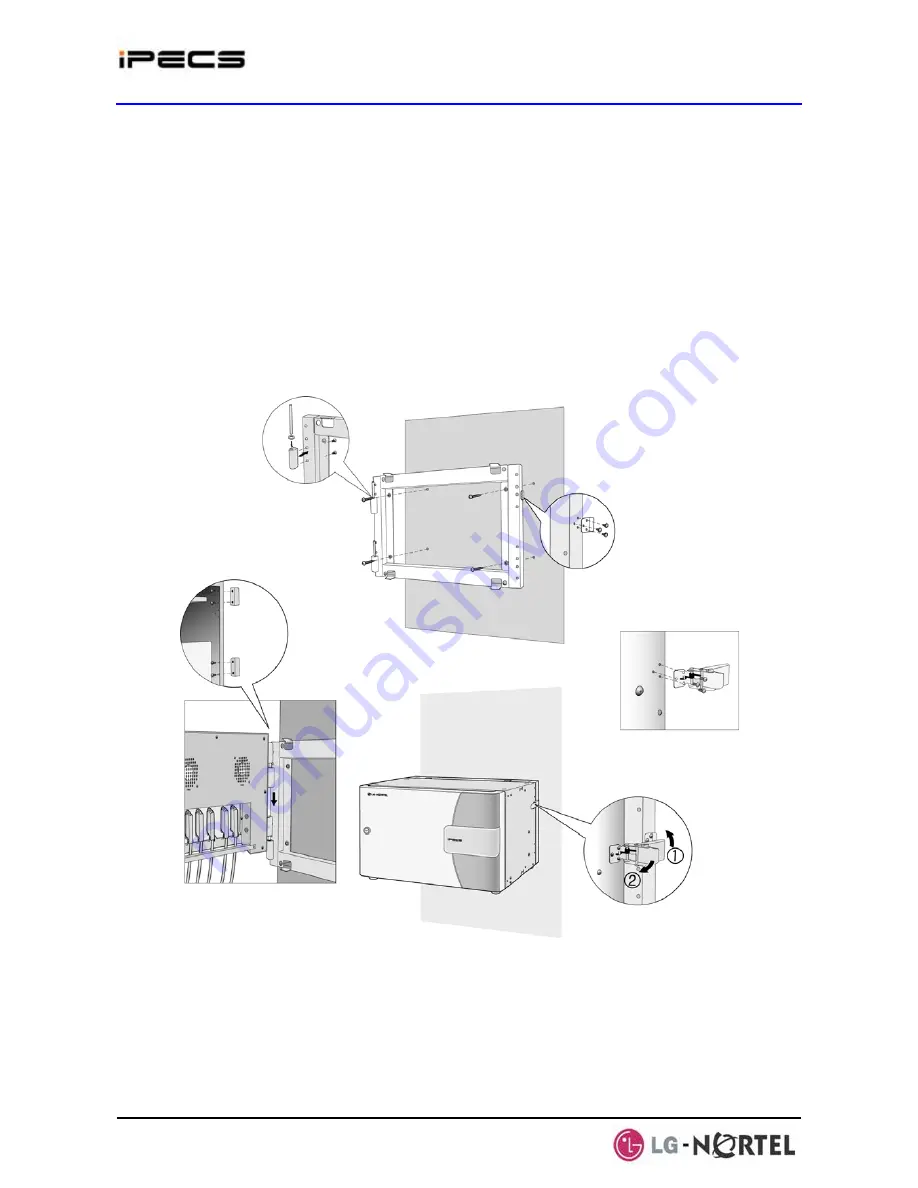
Disassemble the hinges by separating the hinge body and removing the hinge pin.
¾
Mount the separated hinge bodies, two to the Wall Mount bracket and two to the cabinet
using the M6 x 8 mm machine screws two (2) for each hinge body provided.
¾
Use the Wall Mount kit to mark the location of four (4) mounting holes for the Wall Mount kit
as shown in Figure 4.3.1.3-1. Assure the Wall Mount holes are level and plum.
¾
Drill four (4) 7 mm holes for the plastic wall anchors provided.
¾
Fully Insert a wall anchor into the each of the four (4) holes, insert and tighten screws
leaving about 6 mm (¼-inch) exposed.
¾
Place the Wall Mount kit on the four (4) screws and tighten the screws securely.
¾
Insert the hinge pins and mount the cabinet to the Wall Mount kit by aligning the hinge
bodies with the hinge pins and lower into place.
¾
Finally, mount the Cabinet Latch to the Wall Mount bracket and cabinet using the six M3 x 6
mm screws provided. The latch must be installed on the side opposite of the hinges.
Figure 4.3.1.3-1 Cabinet Wall Mount Kit Installation


