background image

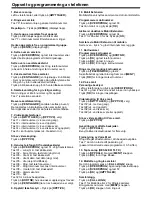
Receiving calls _ Answering a Call While Idle :

1

.  Lift the handset and press the flashing Flex button (as 

needed), the call will be connected.

Responding to a Call While Busy

1

.  

Press 

Hold/

S

ave

and/or

2

.  Press the flashing CO line button

.

Answering Calls to Other Stations

To answer a call ringing at another station:

1

.  Lift the handset,

2

.  Dial 7 (Directed Call Pick-Up code),

3

.  Dial the 

extension

Number of the ringing station; the 

call will be connected.

To answer a call ringing at a station in your 

group:

1

.  Lift the handset,

2

.  Dial 566 (Group Call Pick-Up code), the call is 

connected.

Using Do-Not-Disturb (DND) to Block Incoming 

Calls

To toggle DND ON and OFF:

1

.  Press the 

DND

button.

Forwarding calls to another Station or Voice 

Mail

To activate Call Forward from your phone to 

another phone or internal system resource:

1

.  Lift the handset,

2

.  Press the 

Fwd

Soft button,

3

.  Dial the type of forward code 1-9 (iPECS: 1-5)

4

.  Dial the destination number.

Placing Intercom calls

To place an Intercom call:

1

.  Lift the handset,

2

.  Dial the 

extension

number of the desired station,

3

.  On answer or Splash tone, speak to the called party.

Using Camp-On when calling a busy station.

To Camp-On (wait off-hook) for a busy station:

1

.  Press * and wait 

for the extension to

answer.

Using Last Number Redial (LNR) 

To dial the Last Number for an external call:

1

.  Lift the handset,

2

.  Select the 

Redial

Soft button,

3

.  Press 

volume 

to select from the last 10 

numbers dialed,

4.  Press the 

Send

Soft button or hold/save.

Using System Speed Dial Numbers.

To place a call using System Speed Dial:

1

.  Lift the handset,

2

.  Press the 

Speed

button,

3. Dial the desired System Speed Dial bin number

Using and Entering Station Speed Dial 

Numbers.

To place a call using Station Speed Dial:

1

.  Lift the handset,

2

.  Press 

Speed

,

3

.  Dial the desired Station Speed Dial bin number

LDP Keyset User Operation

To enter a Station Speed Dial number with CO 

Line and Name:

1

.  Press 

Trans/Pgm

,

2

.  Press 

Speed

,

3

.  Dial the desired Station Speed Dial bin number,

4

.  Select/dial the CO line/group,

5

.  Dial the desired number to be stored,

6

.  Press 

Hold/Save

,

7

.  Enter the associated name if desired, using the 

alpha-numeric entry chart,

8

.  Press 

Hold/Save

.

To assign a Station Speed Dial number directly 

to a Flex button:

1

.  Press 

Trans/

P

gm

,

2

.  Press the desired 

Flex

button,

3

.  Select the Tel Num 

Soft

button,

4

.  Select/dial the CO line/group,

5

.  Dial the desired number,

6

.  Press 

Hold/Save

,

7

.  Enter the associated name if desired, using the 

Character Entry chart,

8

.  Press 

Hold/Save

.

ACNR: To retry a busy external number until 

answered

To set up an ACNR, while on an outgoing call:

1

.  Use the Navigation button to display the next menu 

and select the 

ACNR

Soft button,

2

.  Hang-up handset.

To cancel the ACNR request:

1

.  Press the 

ACNR

Soft button

.

Call Transfer: Sending a call to a different 

destination

To Transfer an active call:

1

.  Press 

Trans/

P

gm

,

2

.  Call receiving party,

3

.  Hang-up with or without announcement.

Call Hold: Placing a call in a waiting state 

To place a call on Hold:

1

.  Press 

Hold/

S

ave

.

Joining Multiple People in a Conference

To establish a Conference:

1

.  Establish call with one of the desired conference 

parties,

2

.  Select the 

Conf

Soft button,

3

.  Establish call with the other conference party,

4

.  Select the 

Conf

Soft button,

5

.  Select the 

Conf

Soft button again to establish the 

conference

.

To place a Conference on Hold:

1

.  Press the 

Hold/Save

button.

To retrieve the Conference:

1

.  Select the 

Conf

Soft button.

To make an External-parties-only Conference:

1

.  Establish conference with two external parties,

2

.  Select the 

Conf

Soft button to exit.

To enter pre-opened Conference Room:

1

.  Dial 5 7 X (iPECS: 5 9 X) whe

re

X is the conference 

room number.

Summary of Contents for LDP-7016D

Page 1: ...Choose a site that is dry and well ventilated 10 Do not put the heavy things on the phone 11 Do not drop or throw the phone 12 Static electricity discharge will damage electronic components 13 Keep out of direct sunlight and away from heat 14 No user serviceable parts inside No not insert a screw driver or any metal objects into the phone This may cause electric shock or damage the equipment and w...

Page 2: ...e is active Speaker This button is used to put a call on hold or save information when programming Hold Save Used in conjunction with fixed and flexible features and the function changes in relation to call progress as indicated on the LCD display 3 Soft Buttons This button is used to initiate a call transfer TRS or to enter programming mode PGM Trans PGM A station can initiate a call back request...

Page 3: ...Lift the handset 2 Press Speed 3 Dial the desired Station Speed Dial bin number LDP Keyset User Operation To enter a Station Speed Dial number with CO Line and Name 1 Press Trans Pgm 2 Press speed 3 Dial the desired Station Speed Dial bin number 4 Select dial the CO line group 5 Dial the desired number to be stored 6 Press hold Save 7 Enter the associated name if desired using the alpha numeric en...

Page 4: ...4 iPECS Code Display Phone Version Listen Station Status 6 4 Display Phone MAC IP Address Listen Station Number 6 3 Change Phone IP Address Listen Time Date 6 2 Display Phone IP Address Record User Greeting 6 1 Msg Wait in Exec Sec pair Call Log 5 7 CLI IP Msg Wait Retrieve Two Way Record 5 4 STA Msg Wait Retrieve Set Customer MSG 5 2 HOTDESK Agent Logout Set Pre Selected MSG 5 1 HOTDESK Agent Log...

Page 5: ...lu fişi tek bir pirize takmayın ısınma yapabilir dolayısıyla yangın ve cihaz arızalanması riski vardır 10 Telefonu yere düşürmeyiniz veya atmayınız 11 Telefonu yere düşürmeyiniz veya atmayınız 12 Telefonuzu statik elektriğe maruz kalacak şekilde yerleştirmeyiniz Aksi halde arızalanabilir 13 Direk güneş ışınlarından veya herhangi bir ısıtıcıdan uzak tutunuz 14 İçerisinde kullanıcı tarafından tamir ...

Page 6: ...e özellik seçilir Aktar Prg Bu tuş bir çağrının başka bir aboneye aktarılmasını transferini başlatmak için veya programlama moduna PGM girmek için kullanılır Geri Ara Bir abone meşgul olan diğer bir aboneye geri arama talebinde bulunabilir Meşgul olan istasyonun boşalması halinde geri arama talebinde bulunan istasyon bir sinyal sesi alır Ses Ayarı Ses Ayarı tuşu çalma zili ahize ve hoparlör sesler...

Page 7: ... 3 Karşı tarafı duyunca ya da duymadan telefonu kapatınız LDP Sayısal Set Kullanıcı Operasyonları Dahili Hızlı Arama Numaralarının Harici Hat ve İsimle Birlikte Kaydedilmesi 1 Aktar Prg tuşuna basınız 2 Hızlı Ara tuşuna basınız 3 İstediğiniz dahili hızlı arama numarasını tuşlayınız 4 Çıkış yapacağınız harici hat grubunu seçiniz 5 Kaydetmek istediğiniz numarayı giriniz 6 Beklet Kaydet tuşuna basını...

Page 8: ...dası İptali 9 9 DISA Kısıtlama 4 5 1 4 Çağrı Kapsama Alanı 9 USB Çağrı Kaydetme 4 6 Çağrı Kapsama Dahili XXX 0 0 Özgür Masa MT Agent Kaydı 5 1 5 1 Önceden Seçilmiş Mesaj Etkin Özgür Masa MT Agent Çıkışı 5 2 5 2 Özel Mesaja Ayarla 3 1 Dahili Numarasıyla Mesaja Erişim 5 4 8 0 İki Yönlü Kayıt 3 2 CLI IP Numarasıyla Mesaja Erişim 5 7 5 7 Çağrı Kaydı 3 5 Yönetici Sekreter Mesaj Erişimi 6 1 Kişisel Karş...

Page 9: ...or telefonrøret væk fra den slags objekter og kontrollér røret før brug 8 Undgå at placere telefonen i områder der er støvede fugtige eller hvor telefonen er udsat for vibrationer 9 Vælg et sted der er tørt og godt ventileret til installation af telefonapparatet 10 Placér ikke tunge enheder oven på telefonen 11 Tab ikke telefonapparatet og kast ikke med det 12 Afladning af statisk elektricitet vil...

Page 10: ...ing HOLD GEM Hold Save De 3 soft taster anvendes i forbindelse med de faste og variable funktioner der vises på telefonapparatets skærm f eks under opkald og samtale 3 Soft taster Omstillingstast Anvendes til omstilling af kald og programmering OMST PRG Tran Pgm Noteringstast Anvendes i forbindelse med notering mod et optaget lokalnummer samt telefonsvarer voice mail NOTERING Call back Volumen tas...

Page 11: ...iteten 1 Løft røret 2 Tryk på KORTNR tasten 3 Indtast det ønskede systemkortnummer Benyt Individuel kortnummer faciliteten For at foretage et opkald vha egne kortnumre faciliteten 1 Løft røret 2 Tryk på KORTNR tasten 3 Indtast det ønskede individuelle kortnummer For at indtaste et individuelt kortnummer med bylinie og navn 1 Tryk på OMST PROG tasten 2 Tryk på KORTNR tasten 3 Indtast det ønskede in...

Page 12: ...ens IP adresse Optag velkomstbesked 6 1 Vis telefonens IP adresse Vis nummer log 5 7 Vælg chef sekretær besked Optagelse af samtale 5 4 Find besked eksempel Sæt egen fraværsmeddelelse 5 2 Find besked metode Sæt fraværsmeddelelse 5 1 Free Seating Agent Log ud Kaldsdækning for lok nr XXX 4 6 Free Seating Agent Log ind Kaldsdækning opsætning 4 5 USB optagelse af kald De aktivér Konference Rum 4 4 Spæ...

Page 13: ...kke magnetismen i telefonrøret har tiltrukket seg skarpe metallgjenstander 8 Unngå å plassere telefonen i et miljø med mye støv damp eller hvor det blir utsatt for vibrasjoner 9 Telefonen er tilpasset et normalt kontormiljø med tanke på temperatur og fuktighet 10 Ikke plasser tunge gjenstander på telefonen 11 Unngå at telefonen faller i gulvet eller utsettes for støt Dette kan ødelegge telefonen 1...

Page 14: ...ering Benyttes også for å ringe fra samtalelogg og kortnummerliste VENT LAGRE Benyttes til å programmere og ringe lagrede telefonnummer kortnummer KORTNR Benyttes til å sette apparatet i opptatt ikke forstyrr Knappen lyser rødt når den er aktivert OPPTATT Benyttes til å legge igjen interne beskjeder eller aktivere tilbakering funksjon og for å avlese tapte anrop og andre beskjeder OPPKALL Benyttes...

Page 15: ...st klokkeslett Tast 09 Hjemmekontor Tast 10 Syk Tast for å slå av beskjedene Trykk på KORTNR hvis du ønsker opplesing av fravær Trykk på VENT LAGRE når en av beskjedene er valgt 9 Opptatt Ikke forstyrr Trykk på OPPT VK 10 Mobil Extension Mobiltelefonen knyttes sammen med din kontortelefon Programmere mobilnummer Trykk på OVERF PROG og tast 33 Tast inn mobil nr og trykk på OK Aktivere deaktivere Mo...

Page 16: ...r calling uten mikrofon P Trykk på OK når ett av valgene er gjort Ringesignal og ringevolum Intern ring Trykk på OVERF PROG og tast 18 Ekstern ring Trykk på OVERF PROG og tast 19 Tast fra 01 til 15 for de forskjellige ringetoner Trykk på OK når et av valgene er gjort Programmere apparatnavn Trykk på OVERF PROG og tast 74 Tast inn navn og trykk på OK Programmere internnummer på en fleksibel knapp T...

Page 17: ...вышенной влажностью и вибрацией Это может негативно повлиять на его работу и сократить срок его службы 9 Для установки ТА выбирайте сухие помещения с хорошей вентиляцией В противном случае это может привести к поломке ТА 10 Не кладите на ТА тяжелые предметы Это может привести к поломке ТА Если это произошло и работа ТА нарушена обратитесь в сервис центр 11 Не роняйте и не кидайте ТА Это может прив...

Page 18: ...ется для быстрого набора номера для программирования и для сохранения последнего набранного номера Speed Используется для блокировки всех входящих вызовов Если функция блокировки активна DND индикатор этой кнопки горит красным цветом Также используется для переадресации вызовов на другой номер или на голосовой ящик FWD Если функция переадресации активна индикатор этой кнопки мерцает DND FWD Клавиш...

Page 19: ...а 1 Нажмите Trans Pgm 2 Нажмите Speed 3 Наберите номер индивидуальной ячейки 4 При необходимости нажмите клавишу СО линии или группы СО линий 5 Наберите телефонный номер который Вы хотите сохранить для последующего сокращенного набора 6 Нажмите Hold Save 7 Введите имя соответствующее сохраняемому номеру 8 Нажмите Hold Save Назначение на программируемую клавишу номера внешнего абонента с резервиров...

Page 20: ...ec pair Запись приветствия 6 1 Доступ к ожидающим сообщениям внешних и IP абонентов CLI IP Msg Wait Retrieve Журнал вызовов 5 7 Доступ к ожидающим сообщениям внутренних абонентов STA Msg Wait Retrieve Запись разговора 5 4 Процедура выхода Виртуального внутреннего абонента Создание сообщения при отсутствии 5 2 Процедура входа Виртуального внутреннего абонента Выбор сообщения при отсутствии из имеющ...

Page 21: ...ión 5 No ponga objetos pesados sobre el teléfono 6 No deje caer ni lance el teléfono 7 Las descargas de electricidad estática pueden dañar los componentes electrónicos 8 Mantenga el teléfono alejado de la luz directa del sol y de fuentes de calor 9 No inserte destornilladores ni objetos metálicos en el teléfono Puede causar descargas eléctricas o daños en el equipo y anulará la garantía de su telé...

Page 22: ...ando el altavoz está activo Speaker Esta tecla se usa para retener una llamada o para guardar información durante la programación Hold Save Su función cambia con el estado del teléfono en reposo durante una llamada La función en cada momento se indica en el display 3 teclas Soft Tecla usada para iniciar una transferencia o para entrar en programación Trans PGM Una extensión puede iniciar una solic...

Page 23: ... tecla Speed 3 Marque el número de marcación abreviada deseado Funciones de usuario Introducir un número de marcación abreviada con línea y nombre 1 Pulse la tecla Trans Pgm 2 Pulse la tecla Speed 3 Pulse el número de marcación abreviada que desee 4 Seleccione la línea grupo de líneas 5 Marque el número de teléfono que desea almacenar 6 Pulse la tecla Hold Save 7 Introduzca el nombre asociado si l...

Page 24: ...ón IP teléfono Grabar mensaje de buzón 6 1 Mensaje espera jefe secretaria Registro de llamadas 5 7 Recuperar mensaje espera CLI IP Grabación bidireccional 5 4 Recuperar mensaje espera EXT Fijar mensaje personalizado 5 2 Logout agente HOTDESK Fijar mensaje preseleccionado 5 1 Login agente HOTDESK Call Coverage para EXT XXX 4 6 GRABACIÓN LLAMADA USB Call Coverage 4 5 Restricción DISA Desactivar sala...

Page 25: ...ose a site that is dry and well ventilated 10 Do not put the heavy items on the phone 11 Do not drop or throw the phone 12 Static electricity discharge will damage electronic components 13 Keep out of direct sunlight and away from heat 14 No user serviceable parts inside No not insert a screw driver or any metal objects into the phone This may cause electric shock or damage the equipment and will ...

Page 26: ...l progress as indicated on the LCD display Trans Pgm This button is used to initiate a call transfer Trans or to enter programming mode PGM Call back A station can initiate a call back request to a busy station Once that station becomes idle the initiating station is signaled Volume The volume button adjusts the audio levels for ringing handset and speakerphone functions Menu The menu button is us...

Page 27: ...d Dial 1 Lift the handset 2 Press Speed 3 Dial the desired Station Speed Dial bin number LDP Keyset User Operation To enter a Station Speed Dial number with CO Line and Name 1 Press Trans Pgm 2 Press Speed 3 Dial the desired Station Speed Dial bin number 4 Select dial the CO line group 5 Dial the desired number to be stored 6 Press Hold Save 7 Enter the associated name if desired using the alpha n...

Page 28: ... 3 4 iPECS Code Display Phone MAC IP Address Listen Station Status 6 4 Change Phone IP Address Listen Station Number 6 3 Display Phone IP Address Listen Time Date 6 2 Msg Wait in Exec Sec pair Record User Greeting 6 1 CLI IP Msg Wait Retrieve Call Log 5 7 STA Msg Wait Retrieve Two Way Record 5 4 HOTDESK Agent Logout Set Customer MSG 5 2 HOTDESK Agent Login Set Pre Selected MSG 5 1 USB CALL RECORD ...

Page 29: ...d in this document which bears the CE mark conforms to the European Union Radio and Telecommunications Terminal Equipment Directive R TTE 1999 5 EC including Elec tromagnetic Compatibility Directive 2004 108 EC and Low Voltage Directive 2006 95 EC The product fulfills the essential requirements of the har monized standards shown above Product Safety Instructions This product complies with and conf...

Page 30: ...of doing something that could result in physical injury to you or equipment damage Only trained and qualified service personnel shall install replace or service the phone Do not spill liquid like water on the phone If so call for the service center as this may result in a fire or an electric shock If you see smoke or smell something burning unplug the phone line Call for service center immediately...

Page 31: ... out of direct sunlight and away from heat Ensure that children do not pull on phone cords This may injure children or result in equipment damage Clean the phone with a soft dry cloth only Do not use volatile liquids such as petrol alcohol or acetone as this may cause a fire or result in discoloration or damage to plastics Do not clean with wax or silicon products as these may enter the equipment ...

Page 32: ... the phone uses to control the headset The LDP 7000BTU is compliant with and adopts the Bluetooth Specification V2 0 EDR However interoperability between the LDP 7000BTU and other Bluetooth headset is not guaranteed because it depends on compatibility A followed list is Bluetooth headset model supported by The LDP 7000BTU Jabra BT 250 Jabra BT 135 Jabra BT 620S Plantronics M3500 Plantronics Voyage...

Page 33: ...ch the dummy cover on the bottom of the keyset ȵ Caution Please do not inserting the dummy cover into Keyset when unlatching ŋ Connect the flat cable into the optional connector on the keyset making sure that it is connected securely ſThe connector number is different according to the keyset LDP 7024D CN1 LDP 7024LD CN6 ŋ Hook the option module cover onto the Keyset base line up the protrusions on...

Page 34: ...pair LDP 7000 BTU with the headset you want to use The Bluetooth connection between the headset and LDP 7000 BTU can be established by setting up a paired link With a paired link the LDP 7000 BTU remembers the headset s ID and these 2 items are then paired together eliminating the need to repeat the set up process with future use 4 If you want to use another headset you can erase paired informatio...

Page 35: ...case of CS1000 system MENU 3 1 5 1 When Blutooth Usage is enable 5 2 When Blutooth Usage is disable USING BUTTON EXIT EXIT BLUETOOTH MENU NEXT or Ɗ ƌ Scroll the menu SELECT Save OK Select the menu LDP 7024LD LDP 7024D LDP 7024LD LDP 7024D ...

Page 36: ... link with LDP 7000BTU Refer to headset s user guide for more detail information 2 During pairing it is recommended that the headset and LDP 7000BTU are not more than 1 metre apart with no solid objects in between 3 LDP 7000BTU starts searching for audio enabled devices and accessories LDP 7024LD LDP 7024D LDP 7024LD LDP 7024D ſ Note it may take about 15 seconds to finish searching for devices ...

Page 37: ...list of Bluetooth device starting from the device found first after 15 seconds 2 Scroll to the device you want and press OK or Save Note Device information DEVICE NAME PROFILE NAME 2 2 JABRA 250 HS 00 07 A4 05 95 7B DEVICE NO TOTAL NO DEVICE ADDRESS LDP 7024LD LDP 7024D ...

Page 38: ...headset by pressing OK 3 When the connection has been established the device shows connected to followed by the device s name and address Note that you can have only one active connection at a time 4 If the connection is failed you can try to connect device again 5 Once the headset and LDP 7000BTU have successfully paired you are ready to place and receive calls see section 9 10 LDP 7024LD LDP 702...

Page 39: ...e another headset you can erase paired information and pair with the another headset desired 2 It will take a few seconds to erase paired information 3 If it is unpaired already it will display UNPAIRING FAILED LDP 7024LD LDP 7024D ...

Page 40: ...ready paired but not linked radio with headset STADY ON Ready to make and answer a call BLINK ongoing communication via bluetooth headset 10 Using your LDP 7000BTU You will need to make sure that you pair link your headset and LDP 7000BTU 10 1 Answer a call 1 If there is an incoming call while you are wearing the headset a ring tone will sound in your headset 2 Just press the headset s function bu...

Page 41: ...ress the headset s function button 2 If the phone is in Handset mode press the headset s function button and replace the handset of the phone 10 6 Transferring a call from headset to phone 1 Lift the handset 2 The call will be transferred to the phone 10 7 Performance range 1 Optimal performance range up to 3m 2 Limited performance range up to 5m 3 Performance range may be decrease in case of the ...

Page 42: ...NOV 2008 ISSUE 1 3 Made in Thailand P NO MMBB0133001 ST ...

Page 43: ...Digital Key Telephone USER S GUIDE LDP 7000 BTU Please read this manual carefully before operating your set Retain it for future reference ...

Reviews: