140
Using the PC
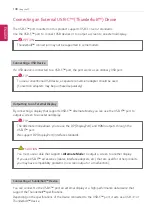
Connecting an External USB-C
™
(Thunderbolt
™
) Device
The USB-C
™
port mounted on this product supports USB 3.1 Gen 2 standards.
Use the USB-C
™
port to connect USB devices or to output a screen to an external display.
OPTION
Thunderbolt
™
connection may not be supported in some models.
Connecting a USB Device
If a USB device is connected to a USB-C
™
port, the port works as an ordinary USB port.
TIP
To use a conventional USB device, a separate conversion adapter should be used.
(Conversion adapters may be purchased separately.)
Outputting to an External Display
By connecting a display that supports USB-C
™
Alternate Mode, you can use the USB-C
™
port to
output a screen to an external display.
TIP
The Alternate mode allows you to use the DP (DisplayPort) and HDMI outputs through the
USB-C
™
port.
We support DP (DisplayPort) interface standards.
CAUTION
You must use a cable that supports
Alternate Mode
to output a screen to another display.
If you use USB-C
™
accessories (cables, interface adapters, etc.) that are used for other products,
you may have compatibility problems (no screen output or a malfunction).
Connecting a Thunderbolt
™
Device
You can connect to the USB-C
™
port an external display or a high-performance data device that
support the Thunderbolt
™
specifications.
Depending on the specifications of the device connected to the USB-C
™
port, it acts as a USB 3.1 or
Thunderbolt
™
device.
ENGLISH
Summary of Contents for 14T90N Series
Page 20: ...20 Introduction Important Safety Precautions Regulatory Notices ENGLISH ...
Page 21: ...Introduction Important Safety Precautions 21 ENGLISH ...
Page 22: ...22 Introduction Important Safety Precautions ENGLISH ...
Page 23: ...Introduction Important Safety Precautions 23 ENGLISH ...
Page 24: ...24 Introduction Important Safety Precautions ENGLISH ...
Page 25: ...Introduction Important Safety Precautions 25 ENGLISH ...
Page 26: ...26 Introduction Important Safety Precautions ENGLISH ...
Page 27: ...Introduction Important Safety Precautions 27 ENGLISH ...
Page 28: ...28 Introduction Important Safety Precautions ENGLISH ...
Page 29: ...Introduction Important Safety Precautions 29 ENGLISH ...
Page 30: ...30 Introduction Important Safety Precautions ENGLISH ...
Page 31: ...Introduction Important Safety Precautions 31 ENGLISH ...
Page 32: ...32 Introduction Important Safety Precautions ENGLISH ...
Page 33: ...Introduction Important Safety Precautions 33 ENGLISH ...
Page 34: ...34 Introduction Important Safety Precautions ENGLISH ...
Page 35: ...Introduction Important Safety Precautions 35 ENGLISH ...
Page 36: ...36 Introduction Important Safety Precautions ENGLISH ...
Page 37: ...Introduction Important Safety Precautions 37 ENGLISH ...
Page 38: ...38 Introduction Important Safety Precautions ENGLISH ...
Page 39: ...Introduction Important Safety Precautions 39 ENGLISH ...
Page 40: ...40 Introduction Important Safety Precautions ENGLISH ...
Page 41: ...Introduction Important Safety Precautions 41 ENGLISH ...
Page 42: ...42 Introduction Important Safety Precautions ENGLISH ...
Page 43: ...Introduction Important Safety Precautions 43 ENGLISH ...
Page 44: ...44 Introduction Important Safety Precautions ENGLISH ...
Page 45: ...Introduction Important Safety Precautions 45 ENGLISH ...
Page 46: ...46 Introduction Important Safety Precautions ENGLISH ...
Page 47: ...Introduction Important Safety Precautions 47 ENGLISH ...
Page 48: ...48 Introduction Important Safety Precautions ENGLISH ...
Page 49: ...Introduction Important Safety Precautions 49 ENGLISH ...
Page 50: ...50 Introduction Important Safety Precautions ENGLISH ...
Page 51: ...Introduction Important Safety Precautions 51 ENGLISH ...
Page 52: ...52 Introduction Important Safety Precautions ENGLISH ...
Page 53: ...Introduction Important Safety Precautions 53 ENGLISH ...
Page 54: ...54 Introduction Important Safety Precautions ENGLISH ...
Page 55: ...Introduction Important Safety Precautions 55 ENGLISH ...
Page 104: ...104 Using the PC 3 Go to Keyboard Backlight and select your desired options ENGLISH ...
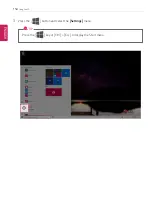
Page 149: ...Using the PC 149 2 When the Settings screen appears select Devices ENGLISH ...
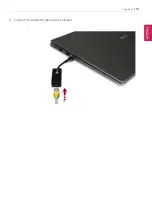
Page 153: ...Using the PC 153 2 Connect the wired LAN cable to the LAN port ENGLISH ...
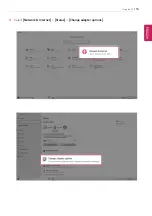
Page 155: ...Using the PC 155 4 Select Network Internet Status Change adapter options ENGLISH ...
Page 156: ...156 Using the PC 5 Right click Ethernet and select the Properties menu ENGLISH ...
Page 161: ...Using the PC 161 3 Select the Access Point you want to connect to and press Connect ENGLISH ...
Page 175: ...Using Software 175 1 Select the All List Update needed menu item ENGLISH ...
Page 180: ...180 Using Software 1 Press the icon on the taskbar ENGLISH ...
Page 192: ...192 Restoring the System 1 Select Keep my files ENGLISH ...
Page 195: ...Restoring the System 195 1 Select Remove everything ENGLISH ...
Page 221: ...Setup and Upgrade 221 2 Select System Display ENGLISH ...
Page 226: ...226 FAQ 2 Select System Display ENGLISH ...
Page 231: ...FAQ 231 1 Select Keep my files ENGLISH ...
Page 234: ...234 FAQ 1 Select Remove everything ENGLISH ...
Page 242: ...242 FAQ 3 Select the Access Point you want to connect to and press Connect ENGLISH ...


