60
Using Windows 10
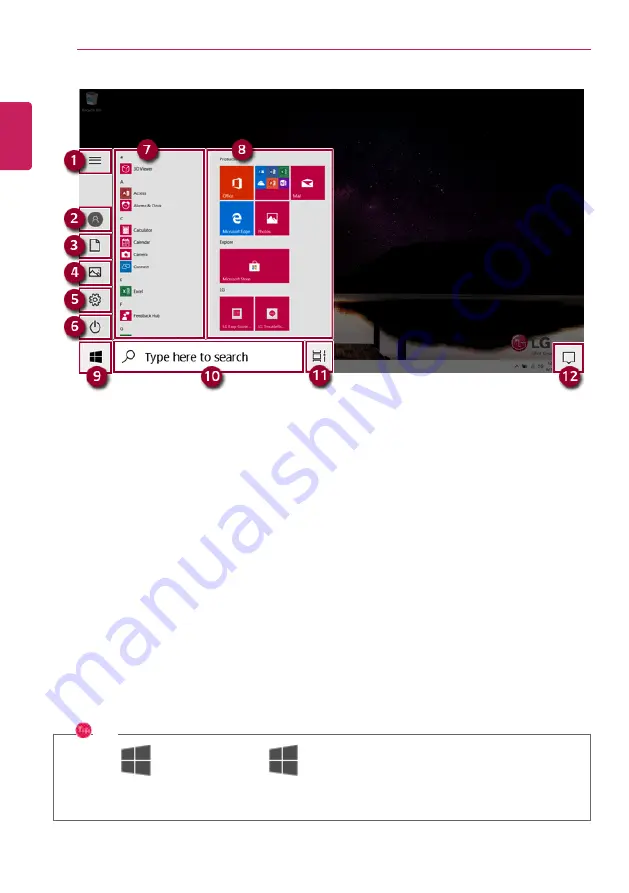
1
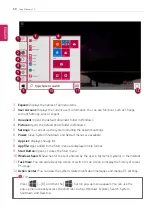
Expand:
Displays the names of all menu items.
2
User Account:
Displays the current user's information. You can use functions such as Change
Account Settings, Lock or Logout.
3
Document:
Opens the default document folder in Windows.
4
Pictures:
Opens the default photo folder in Windows.
5
Settings:
You can set up the system including the network settings.
6
Power:
Sleep, System Shutdown, and Restart menus are available.
7
App List:
Displays the app list.
8
App Tile:
Apps added to the Start menu are displayed in tile format.
9
Start Button:
Opens or closes the Start menu.
10
Windows Search:
Searches for the text entered by the user in My Items (system) or the Internet.
11
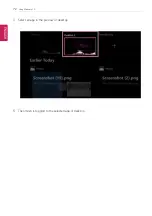
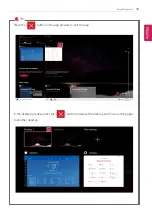
Task View:
You can add a Desktop screen or switch to the screen to display the history of recent
PC usage.
12
Action Center:
You can view the system-related notification messages and change PC settings.
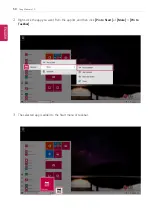
TIP
•
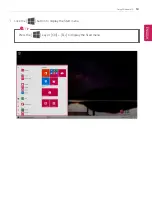
Press [
] + [X], and then the [
] button pop-up menu appears. You can use the
pop-up menu to easily access the shortcuts such as Windows Explorer, Search, System
Shutdown, and Desktop.
ENGLISH
Summary of Contents for 14Z90N Series
Page 22: ...22 Introduction Important Safety Precautions Regulatory Notices ENGLISH ...
Page 23: ...Introduction Important Safety Precautions 23 ENGLISH ...
Page 24: ...24 Introduction Important Safety Precautions ENGLISH ...
Page 25: ...Introduction Important Safety Precautions 25 ENGLISH ...
Page 26: ...26 Introduction Important Safety Precautions ENGLISH ...
Page 27: ...Introduction Important Safety Precautions 27 ENGLISH ...
Page 28: ...28 Introduction Important Safety Precautions ENGLISH ...
Page 29: ...Introduction Important Safety Precautions 29 ENGLISH ...
Page 30: ...30 Introduction Important Safety Precautions ENGLISH ...
Page 31: ...Introduction Important Safety Precautions 31 ENGLISH ...
Page 32: ...32 Introduction Important Safety Precautions ENGLISH ...
Page 33: ...Introduction Important Safety Precautions 33 ENGLISH ...
Page 34: ...34 Introduction Important Safety Precautions ENGLISH ...
Page 35: ...Introduction Important Safety Precautions 35 ENGLISH ...
Page 36: ...36 Introduction Important Safety Precautions ENGLISH ...
Page 37: ...Introduction Important Safety Precautions 37 ENGLISH ...
Page 38: ...38 Introduction Important Safety Precautions ENGLISH ...
Page 39: ...Introduction Important Safety Precautions 39 ENGLISH ...
Page 40: ...40 Introduction Important Safety Precautions ENGLISH ...
Page 41: ...Introduction Important Safety Precautions 41 ENGLISH ...
Page 42: ...42 Introduction Important Safety Precautions ENGLISH ...
Page 43: ...Introduction Important Safety Precautions 43 ENGLISH ...
Page 44: ...44 Introduction Important Safety Precautions ENGLISH ...
Page 45: ...Introduction Important Safety Precautions 45 ENGLISH ...
Page 46: ...46 Introduction Important Safety Precautions ENGLISH ...
Page 47: ...Introduction Important Safety Precautions 47 ENGLISH ...
Page 48: ...48 Introduction Important Safety Precautions ENGLISH ...
Page 49: ...Introduction Important Safety Precautions 49 ENGLISH ...
Page 50: ...50 Introduction Important Safety Precautions ENGLISH ...
Page 51: ...Introduction Important Safety Precautions 51 ENGLISH ...
Page 52: ...52 Introduction Important Safety Precautions ENGLISH ...
Page 53: ...Introduction Important Safety Precautions 53 ENGLISH ...
Page 54: ...54 Introduction Important Safety Precautions ENGLISH ...
Page 55: ...Introduction Important Safety Precautions 55 ENGLISH ...
Page 56: ...56 Introduction Important Safety Precautions ENGLISH ...
Page 101: ...Using the PC 101 3 Go to Keyboard Backlight and select your desired options ENGLISH ...
Page 133: ...Using the PC 133 2 When the Settings screen appears select Devices ENGLISH ...
Page 137: ...Using the PC 137 2 Connect the wired LAN cable to the LAN port ENGLISH ...
Page 139: ...Using the PC 139 4 Select Network Internet Status Change adapter options ENGLISH ...
Page 140: ...140 Using the PC 5 Right click Ethernet and select the Properties menu ENGLISH ...
Page 145: ...Using the PC 145 3 Select the Access Point you want to connect to and press Connect ENGLISH ...
Page 159: ...Using Software 159 1 Select the All List Update needed menu item ENGLISH ...
Page 164: ...164 Using Software 1 Press the icon on the taskbar ENGLISH ...
Page 176: ...176 Restoring the System 1 Select Keep my files ENGLISH ...
Page 177: ...Restoring the System 177 2 Check the current settings ENGLISH ...
Page 180: ...180 Restoring the System 1 Select Remove everything ENGLISH ...
Page 181: ...Restoring the System 181 2 Check the current settings ENGLISH ...
Page 183: ...Restoring the System 183 4 Press Next to proceed with installation as guided ENGLISH ...
Page 208: ...208 Setup and Upgrade 3 Boots using the selected device ENGLISH ...
Page 210: ...210 Setup and Upgrade 2 Select System Display ENGLISH ...
Page 217: ...FAQ 217 2 Select System Display ENGLISH ...
Page 222: ...222 FAQ 1 Select Keep my files ENGLISH ...
Page 223: ...FAQ 223 2 Check the current settings ENGLISH ...
Page 226: ...226 FAQ 1 Select Remove everything ENGLISH ...
Page 227: ...FAQ 227 2 Check the current settings ENGLISH ...
Page 229: ...FAQ 229 4 Press Next to proceed with installation as guided ENGLISH ...
Page 235: ...FAQ 235 3 Select the Access Point you want to connect to and press Connect ENGLISH ...


