Using the PC
95
Using USB-C
™
(Thunderbolt
™
) Charging Function
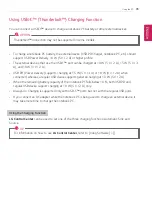
You can connect a USB-C
™
device to charge a notebook PC battery or other external devices.
OPTION
Thunderbolt
™
connection may not be supported in some models.
•
To charge a notebook PC battery, the external device (USB PD Charger, notebook PC, etc.) should
support USB Power Delivery 10 W (5 V / 2 A) or higher profile.
•
The external devices that use the USB-C
™
port can be charged at 10 W (5 V / 2 A), 15 W (5 V / 3
A), and 18 W (9 V / 2 A).
•
USB PD (Power Delivery) supports charging at 15 W (5 V / 3 A) or 18 W (9 V / 2 A) when
connected, whereas a regular USB device supports general charging at 10 W (5 V / 2 A).
•
When the remaining battery capacity of the notebook PC falls below 10 %, both USB PD and
regular USB device support charging at 10 W (5 V / 2 A) only.
•
Always-On Charging is supported only with USB-C
™
ports, but not with the regular USB ports.
•
If you connect an AC adapter while the notebook PC is being used to charge an external device, it
may take more time to charge the notebook PC.
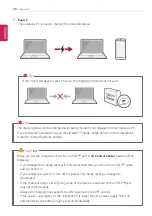
Using the Charging Function
LG Control Center
can be used to set one of the three charging functions: Automatic, Sink and
Source.
TIP
For information on how to use
LG Control Center
, refer to [Using Software] > [].
ENGLISH
Summary of Contents for 14Z990
Page 1: ......
Page 46: ...46 Using Windows 10 5 You can see the installed app in the app list on the Start menu ENGLISH ...
Page 65: ...Using the PC 65 3 Go to Keyboard Backlight and select your desired options ENGLISH ...
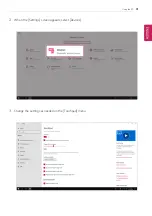
Page 100: ...100 Using the PC 2 When the Settings screen appears select Devices ENGLISH ...
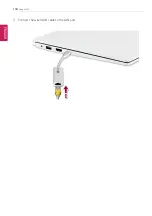
Page 104: ...104 Using the PC 2 Connect the wired LAN cable to the LAN port ENGLISH ...
Page 106: ...106 Using the PC 4 Select Network Internet Status Change adapter options ENGLISH ...
Page 107: ...Using the PC 107 5 Right click Ethernet and select the Properties menu ENGLISH ...
Page 111: ...Using the PC 111 1 Press the Action Center icon on the right side of the taskbar ENGLISH ...
Page 113: ...Using the PC 113 3 Select the Access Point you want to connect to and press Connect ENGLISH ...
Page 128: ...128 Using Software 1 Select the All List Updated needed menu item ENGLISH ...
Page 138: ...138 Using Software Secure Deletion 1 Select Data Security Secure deletion Running ENGLISH ...
Page 142: ...142 Using Software 3 Enter the new password and your email address and press OK ENGLISH ...
Page 144: ...144 Using Software 1 Press the icon on the taskbar ENGLISH ...
Page 155: ...Using Software 155 3 Select Android or iPhone and then press the Next button ENGLISH ...
Page 196: ...196 Setup and Upgrade 3 Boots using the selected device ENGLISH ...
Page 198: ...198 Setup and Upgrade 2 Select System Display ENGLISH ...
Page 206: ...206 FAQ 2 Select System Display ENGLISH ...
Page 217: ...FAQ 217 1 Press the Action Center icon on the right side of the taskbar ENGLISH ...
Page 219: ...FAQ 219 3 Select the Access Point you want to connect to and press Connect ENGLISH ...
Page 222: ...222 FAQ 2 Connect the wired LAN cable to the LAN port ENGLISH ...
Page 224: ...224 FAQ 4 Select Network Internet Status Change adapter options ENGLISH ...
Page 225: ...FAQ 225 5 Right click Ethernet and select the Properties menu ENGLISH ...
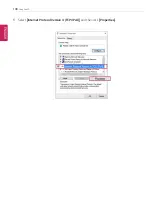
Page 226: ...226 FAQ 6 Select Internet Protocol Version 4 TCP IPv4 and then click Properties ENGLISH ...

