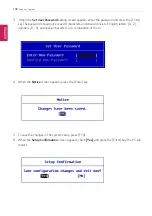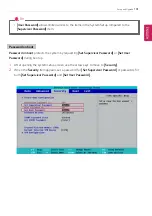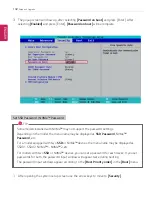
Setup and Upgrade
189
TIP
•
With
Supervisor Password
, you are authorized to set all items in the System Setup and
to set
Password on boot
. In case other people also use the PC, it is recommended to set
the
Set User Password
.
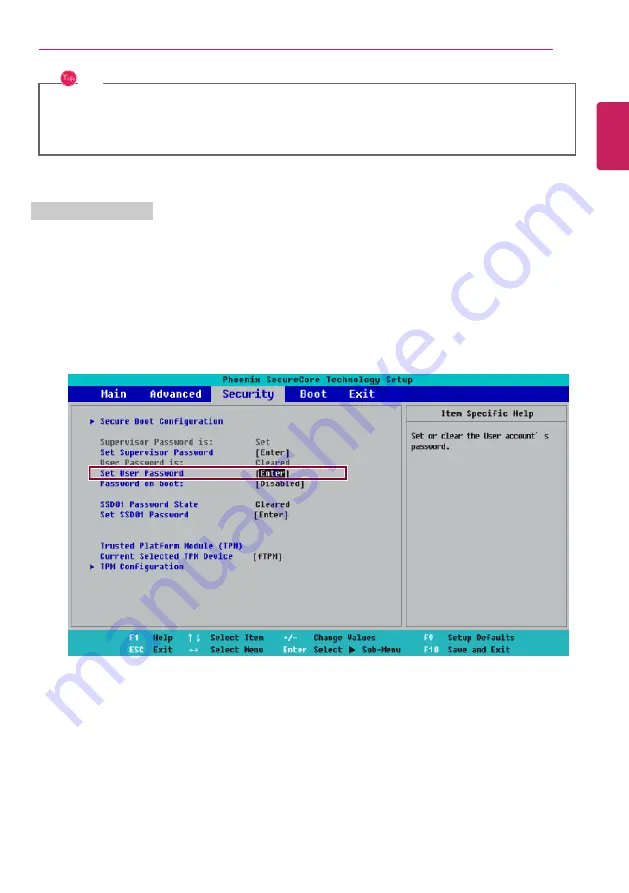
Set User Password
The password set by the
Set User Password
process is lower in level than that set by the
[Set
Supervisor Password]
process, and so the user can use the
[Set User Password]
only after setting a
password in the
[Set Supervisor Password]
menu.
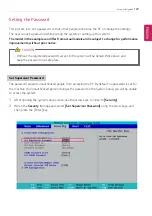
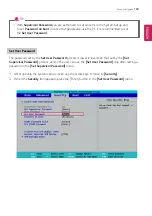
1
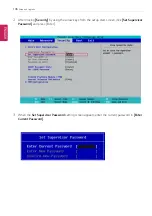
After opening the system setup screen, use the arrow keys to move to
[Security]
.
2
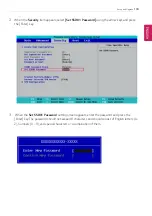
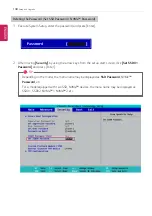
When the
Security
item appears, press the [Enter] button in the
[Set User Password]
menu.
ENGLISH
Summary of Contents for 15Z995 Series
Page 22: ...22 Introduction Important Safety Precautions Regulatory Notices ENGLISH ...
Page 23: ...Introduction Important Safety Precautions 23 ENGLISH ...
Page 24: ...24 Introduction Important Safety Precautions ENGLISH ...
Page 25: ...Introduction Important Safety Precautions 25 ENGLISH ...
Page 26: ...26 Introduction Important Safety Precautions ENGLISH ...
Page 27: ...Introduction Important Safety Precautions 27 ENGLISH ...
Page 28: ...28 Introduction Important Safety Precautions ENGLISH ...
Page 29: ...Introduction Important Safety Precautions 29 ENGLISH ...
Page 30: ...30 Introduction Important Safety Precautions ENGLISH ...
Page 31: ...Introduction Important Safety Precautions 31 ENGLISH ...
Page 32: ...32 Introduction Important Safety Precautions ENGLISH ...
Page 33: ...Introduction Important Safety Precautions 33 ENGLISH ...
Page 34: ...34 Introduction Important Safety Precautions ENGLISH ...
Page 35: ...Introduction Important Safety Precautions 35 ENGLISH ...
Page 36: ...36 Introduction Important Safety Precautions ENGLISH ...
Page 37: ...Introduction Important Safety Precautions 37 ENGLISH ...
Page 38: ...38 Introduction Important Safety Precautions ENGLISH ...
Page 39: ...Introduction Important Safety Precautions 39 ENGLISH ...
Page 40: ...40 Introduction Important Safety Precautions ENGLISH ...
Page 41: ...Introduction Important Safety Precautions 41 ENGLISH ...
Page 42: ...42 Introduction Important Safety Precautions ENGLISH ...
Page 43: ...Introduction Important Safety Precautions 43 ENGLISH ...
Page 44: ...44 Introduction Important Safety Precautions ENGLISH ...
Page 45: ...Introduction Important Safety Precautions 45 ENGLISH ...
Page 46: ...46 Introduction Important Safety Precautions ENGLISH ...
Page 47: ...Introduction Important Safety Precautions 47 ENGLISH ...
Page 48: ...48 Introduction Important Safety Precautions ENGLISH ...
Page 49: ...Introduction Important Safety Precautions 49 ENGLISH ...
Page 50: ...50 Introduction Important Safety Precautions ENGLISH ...
Page 51: ...Introduction Important Safety Precautions 51 ENGLISH ...
Page 52: ...52 Introduction Important Safety Precautions ENGLISH ...
Page 97: ...Using the PC 97 3 Go to Keyboard Backlight and select your desired options ENGLISH ...
Page 133: ...Using the PC 133 2 When the Settings screen appears select Devices ENGLISH ...
Page 137: ...Using the PC 137 2 Connect the wired LAN cable to the LAN port ENGLISH ...
Page 139: ...Using the PC 139 4 Select Network Internet Status Change adapter options ENGLISH ...
Page 140: ...140 Using the PC 5 Right click Ethernet and select the Properties menu ENGLISH ...
Page 145: ...Using the PC 145 3 Select the Access Point you want to connect to and press Connect ENGLISH ...
Page 159: ...Using Software 159 1 Select the All List Update needed menu item ENGLISH ...
Page 164: ...164 Using Software 1 Press the icon on the taskbar ENGLISH ...
Page 176: ...176 Restoring the System 1 Select Keep my files ENGLISH ...
Page 179: ...Restoring the System 179 1 Select Remove everything ENGLISH ...
Page 206: ...206 Setup and Upgrade 3 Boots using the selected device ENGLISH ...
Page 208: ...208 Setup and Upgrade 2 Select System Display ENGLISH ...
Page 215: ...FAQ 215 2 Select System Display ENGLISH ...
Page 220: ...220 FAQ 1 Select Keep my files ENGLISH ...
Page 223: ...FAQ 223 1 Select Remove everything ENGLISH ...
Page 231: ...FAQ 231 3 Select the Access Point you want to connect to and press Connect ENGLISH ...


