8
Instruction / Safety Information
Product Installation/Usage Precautions
CAUTION
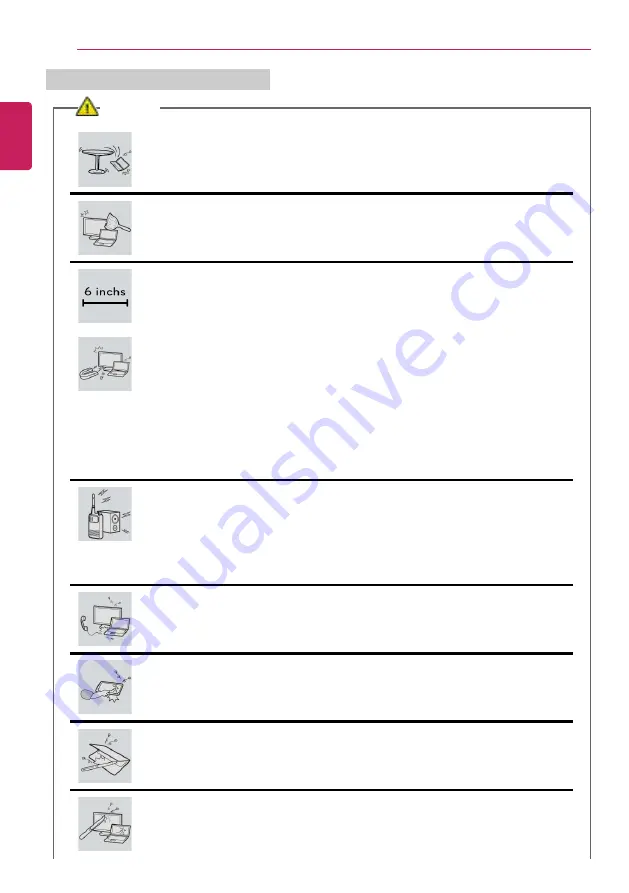
Place the machine in a safe place so it does not fall.
•
If dropped, the machine may be damaged or cause an injury.
Use the product in a clean, dust-free environment.
•
Otherwise, the system may not function properly.
Do not place any objects within 6 inches of the PC.
•
Lack of ventilation may overheat the PC from inside and put users at risk of
burn injuries.
Do not store or use the PC near a magnetic object (i.e. a bag with a
magnetic object, a diary, a wallet, a memo board, high-powered speakers, a
bracelet, or etc.).
•
Otherwise, the storage device (HDD, SSD, eMMC) and the system may be
damaged, and the system may fail to operate properly.
Do not use the PC on a bag with magnetic objects attached to it.
•
Otherwise, the storage device and the system may be damaged, and the
system may fail to operate properly.
Operate the product where there is no electromagnetic interference.
•
Keep a proper distance between the PC and electronic appliances such as
radios or speakers that generate strong magnetic fields.
•
Otherwise, data may be lost from the storage device (HDD, SSD, eMMC) or
the LCD color may be damaged.
Do not connect a key-phone line to a wired LAN port.
•
A fire may occur or the product may get damaged.
If the LCD screen is damaged, do not touch LCD with your hands.
•
Contact the service center as it may cause an injury.
Do not leave any objects such as a pen between the keypad and the LCD.
•
You might break the LCD by unwittingly closing it with a foreign object
remaining on the pad.
Do not press or scratch the LCD with a sharp object.
•
It may cause impairment.
ENGLISH
Summary of Contents for 17Z990 Series
Page 22: ...22 Instruction Safety Information Regulatory Notices ENGLISH ...
Page 23: ...Instruction Safety Information 23 ENGLISH ...
Page 24: ...24 Instruction Safety Information ENGLISH ...
Page 25: ...Instruction Safety Information 25 ENGLISH ...
Page 26: ...26 Instruction Safety Information ENGLISH ...
Page 27: ...Instruction Safety Information 27 ENGLISH ...
Page 28: ...28 Instruction Safety Information ENGLISH ...
Page 29: ...Instruction Safety Information 29 ENGLISH ...
Page 30: ...30 Instruction Safety Information ENGLISH ...
Page 31: ...Instruction Safety Information 31 ENGLISH ...
Page 32: ...32 Instruction Safety Information ENGLISH ...
Page 33: ...Instruction Safety Information 33 ENGLISH ...
Page 34: ...34 Instruction Safety Information ENGLISH ...
Page 35: ...Instruction Safety Information 35 ENGLISH ...
Page 36: ...36 Instruction Safety Information ENGLISH ...
Page 37: ...Instruction Safety Information 37 ENGLISH ...
Page 38: ...38 Instruction Safety Information ENGLISH ...
Page 39: ...Instruction Safety Information 39 ENGLISH ...
Page 40: ...40 Instruction Safety Information ENGLISH ...
Page 41: ...Instruction Safety Information 41 ENGLISH ...
Page 42: ...42 Instruction Safety Information ENGLISH ...
Page 43: ...Instruction Safety Information 43 ENGLISH ...
Page 44: ...44 Instruction Safety Information ENGLISH ...
Page 45: ...Instruction Safety Information 45 ENGLISH ...
Page 46: ...46 Instruction Safety Information ENGLISH ...
Page 47: ...Instruction Safety Information 47 ENGLISH ...
Page 48: ...48 Instruction Safety Information ENGLISH ...
Page 49: ...Instruction Safety Information 49 ENGLISH ...
Page 50: ...50 Instruction Safety Information ENGLISH ...
Page 51: ...Instruction Safety Information 51 ENGLISH ...
Page 52: ...52 Instruction Safety Information ENGLISH ...
Page 53: ...Instruction Safety Information 53 ENGLISH ...
Page 54: ...54 Instruction Safety Information ENGLISH ...
Page 55: ...Instruction Safety Information 55 ENGLISH ...
Page 56: ...56 Instruction Safety Information ENGLISH ...
Page 101: ...Using the PC 101 3 Go to Keyboard Backlight and select your desired options ENGLISH ...
Page 133: ...Using the PC 133 2 When the Settings screen appears select Devices ENGLISH ...
Page 137: ...Using the PC 137 2 Connect the wired LAN cable to the LAN port ENGLISH ...
Page 139: ...Using the PC 139 4 Select Network Internet Status Change adapter options ENGLISH ...
Page 140: ...140 Using the PC 5 Right click Ethernet and select the Properties menu ENGLISH ...
Page 145: ...Using the PC 145 3 Select the Access Point you want to connect to and press Connect ENGLISH ...
Page 159: ...Using Software 159 1 Select the All List Update needed menu item ENGLISH ...
Page 164: ...164 Using Software 1 Press the icon on the taskbar ENGLISH ...
Page 174: ...174 Restoring the System 1 Select Keep my files ENGLISH ...
Page 175: ...Restoring the System 175 2 Check the current settings ENGLISH ...
Page 178: ...178 Restoring the System 1 Select Remove everything ENGLISH ...
Page 179: ...Restoring the System 179 2 Check the current settings ENGLISH ...
Page 181: ...Restoring the System 181 4 Press Next to proceed with installation as guided ENGLISH ...
Page 206: ...206 Setup and Upgrade 3 Boots using the selected device ENGLISH ...
Page 208: ...208 Setup and Upgrade 2 Select System Display ENGLISH ...
Page 213: ...FAQ 213 2 Select System Display ENGLISH ...
Page 218: ...218 FAQ 1 Select Keep my files ENGLISH ...
Page 219: ...FAQ 219 2 Check the current settings ENGLISH ...
Page 222: ...222 FAQ 1 Select Remove everything ENGLISH ...
Page 223: ...FAQ 223 2 Check the current settings ENGLISH ...
Page 225: ...FAQ 225 4 Press Next to proceed with installation as guided ENGLISH ...
Page 231: ...FAQ 231 3 Select the Access Point you want to connect to and press Connect ENGLISH ...


