background image

12

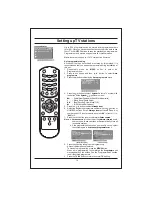
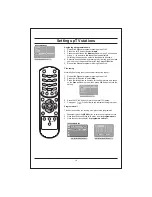
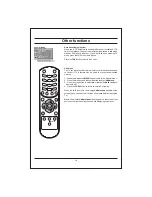
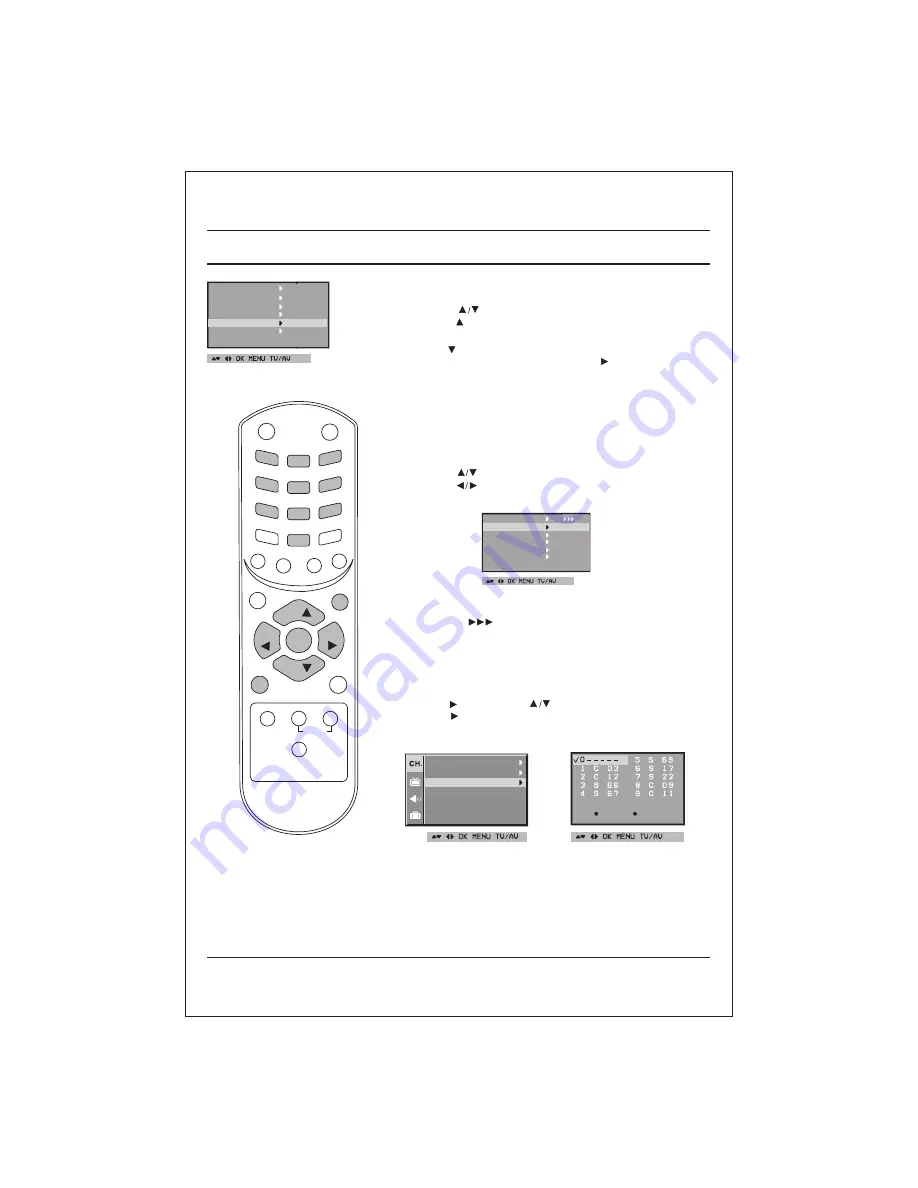
Assigning a programme


name

1.  Repeat the 'Manual programme tuning' steps 1 to 3. 
2.  Press the          button to select

 Name

.

3.  Press the    button on the 

Name

 pull-down menu. You can use a 

blank, +, -, the numeric 

0

 to 

9

 and the alphabet 

A

 to 

Z

With the    button you can select in the opposite direction.

4.  Select the next position by pressing the    button and then


take 

your choice of  the second character, then press 

OK

 button.

5.  Repeat the 'Manual programme tuning' steps 5 to 8.

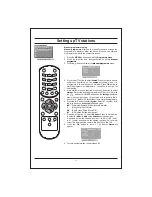
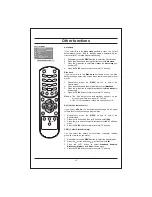
Fine tuning

Normally fine tuning is only necessary if reception is poor.

1.  Repeat the 'Manual programme tuning' steps 1 to 3. 
2.  Press the         button to select 

Fine

.

3.  Press the

button to fine tune for the best picture and sound 

on the 

Fine

 pull-down menu, then press 

OK 

button to store the 

setting.

4.  Press the TV/AV button to return to normal TV viewing.
5. Change of  “         ” from Yellow to red indicates tuning is proper.

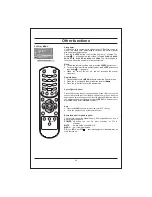
Programme edit

This function enables you to swap or skip the stored programmes.

1.  Repeatedly press the

 MENU

 button


to select the programme menu. 

2.  Press the     button and then         button to select 

programme edit

.

3.  Press the     button to display the 

programme edit

 menu.


Setting up TV stations

SEARCH

FINE

STORAGE

SYSTEM
NAME

CHANNEL

SEARCH
FINE
STORAGE

SYSTEM

NAME

CHANNEL

PROGRAMME MENU

SWAP      SKIP

POWER

MUTE

1

2

3

4

5

6

7

8

9

0

CBC

PSM

PR

Q-VIEW

LIST

SSM

SLEEP

MENU

PR

OK

VOL

VOL

TV/AV

EYE/*

ARC

I/II

SOUND  PICTURE

TURBO

EQ/*

AUTO PROGRAMME
MANUAL PROGRAMME

PROGRAMME MENU

PROGRAMME EDIT

Summary of Contents for 21FD56 Series

Page 1: ...hen you require service See the label attached on the back cover and quote this Record model number and serial number of the set Retain it for future reference Please read this manual carefully before operating your set P No 38289U0513A Rev No 00 Chassis MC 019E ...

Page 2: ...ion option Sound adjustment option 16 SSM Sound Status Memory Sound frequency adjustment Equalizer Equalizer Key Balance adjustment TURBO SOUND option CBC Calibrated Bass Control Option Sound output selection Other functions 18 Auto AV switching option Child lock Auto sleep Blue back AVL Auto Volume Leveler CSM Colour Status Memory Sleep timer Game option Space Fighter Option Aerial socket Audio V...

Page 3: ...Never leave the TV set ON when leaving the house Keep children from dropping or pushing objects into the TV cabinet openings Some internal parts carry hazardous voltages Do not add accessories that have not been designed for this TV set During a lighting storm or when the TV set is to be left unattended for an extended period of time unplug it from the wall outlet and extreme socket Do not bring m...

Page 4: ...service personnel Do not use this TV near water such as near bathtub washbowl kitchen sink laundary tub in a wet basement or near a swimming pool TV set are provided with ventilation openings in the cabinet to allow the release of heat generated during operation If these openings are blocked built up heat can cause failures which may result in a fire hazard There fore On Cleaning On Repacking Unpl...

Page 5: ...et on from standby Volume Up Down adjusts the volume adjusts menu settings OK accepts your selection or displays the current mode 6 Q VIEW returns to the previously viewed programme 7 PSM Picture Status Memory recalls your preferred picture setting 8 TURBO SOUND option selectsTURBO SOUND On Off 9 MUTE switches the sound On or Off 10 TV AV selectsTV orAV mode clears the menu text from the screen sw...

Page 6: ...d bass can be adjusted 17 TURBO PICTURE option SelectsTurbo picture 18 Equalizer option direct access key for equalizer COLOURED BUTTONS WhenMenuisOnsomeofthesebuttonsare usedforprogramme edit game Remarks 1 Some keys in remote can be non functional these keys are use in other models 2 Keys marked are non functional For Mono Models Location and function of controls POWER MUTE PSM ARC MENU Q VIEW L...

Page 7: ...icture according to the sur rounding conditions 8 HEADPHONE SOCKET option Connect the headphone plug to this socket 9 AUDIO VIDEO IN SOCKETS AV option Connect the audio video out sockets of external equipment to these sockets Note a If audio input is only Lor R select L Lor R R through I II key on Remote control b Front AV and rear AV not to be use Simultaneously FRONT PANEL SIDE PANEL Shown below...

Page 8: ...e volume Quick view Press the Q VIEW button to view the last programme Mute function Press the MUTE button The sound is switched Off and the display appears You can cancel it by pressing the MUTE SSM TURBO EQUALIZER CBC SOUND and button On screen language selection option The menu can be displayed on the screen in desired language First select your language 1 Repeatedly press the Menu button to se...

Page 9: ... higher level menu with OK button and to move to the lower level menu press the button Note a In the AV mode the Programme menu is not displayed b In mono models the Sound menu does not appear AUTO PROGRAMME MANUAL PROGRAMME PROGRAMME EDIT CONTRAST BRIGHTNESS colour PSM USER SHARPNESS EQUALIZER BALANCE SYSTEM STORAGE FROM M NORMAL SEARCH TURBO SEARCH SEARCH FINE STORAGE SYSTEM NAME CHANNEL CHILD L...

Page 10: ...ng programme number with the button or NUMBER buttons on the Storage from pull down menu Any number under 10 is entered with a numeric 00 in front of it i e 005 for 5 7 Press the button to select Normal or Turbo search Note a Turbo search is further faster than Normal Search and in some models these searches will automatically store all receivable stations b lf the programmed station has poor qual...

Page 11: ...l Press the button to select V UHF or Cable on the Channel pull down menu If possible select the channel number 1 to 69 V UHF and 1 to 47 cable directly with the number buttons Any number under10isenteredwithanumeric 0 infrontofiti e 05 for5 8 Press the OK button to store it The display Stored will appear 9 To store another station repeat steps 4 5 11 SEARCH FINE STORAGE SYSTEM NAME CHANNEL SEARCH...

Page 12: ...ress the button to fine tune for the best picture and sound on the Fine pull down menu then press OK button to store the setting 4 Press theTV AV button to return to normalTV viewing 5 Change of fromYellow to red indicates tuning is proper Programme edit This function enables you to swap or skip the stored programmes 1 Repeatedly press the MENU button to select the programme menu 2 Press the butto...

Page 13: ...stheTV AVbuttontoreturntonormalTVviewing Calling the programme table You can check the programmes stored in the memory by displaying the programme table Displaying programme table Press the LIST button to display the Programme table menu The programme table appears on the screen One programme table contains ten programmes as follow SEL PR2 AND PRESS SWAP SWAP PR 0 SOUND PICTURE TURBO EQ Note a You...

Page 14: ... directly pressing PSM button 4 Press the OK button to store it for the picture User 5 Press the TV AV button to return to normalTV viewing Eye option In some models the set will automatically adjust the picture according to the surrounding conditions This will enable you to enjoy the most suitable picture according to the surroundings Press the EYE button to switch the eye function on or off When...

Page 15: ...e Zoom You can enjoy the cinema in vast screen through the Zoom mode The screen 4 3 is magnified to the upper lower sides so that the screen 16 9 is full The bottom and top of the picture may be lost Note When you switch the set to standby or Off the wide or Zoom picture format is reset to the Standard 4 3 CONTRAST BRIGHTNESS COLOUR SHARPNESS PSM USER PICTURE MENU Picture adjustment EQ POWER MUTE ...

Page 16: ...TV viewing You can also recall a desired sound Flat Music Movie Speech or User with SSM button on the remote control The sound Flat Music Movie and Speech are programmed for good sound reproduction at the factory and cannot be changed EQUALIZER KEY Equalizer MENU can be accessed with this direct key Note If you press the SSM button after making appropriate adjustment in Equalizer menu the display ...

Page 17: ... L L Audio signal from audio L input is sent to left and right loudspeakers R R Audio signal from audio R input is sent to left and right loudspeakers TURBO SOUND option When this function is On sound will be more emphasized and amplified sound than normal sound You can enjoy the TURBO SOUND so much better than normal Sound Repeatedly press theTURBO SOUND button to switch On or Off CBC Calibrated ...

Page 18: ... the Special menu 2 Press the button and then button to select Child lock 3 Press the button to select On or Off on the Child lock pull down menu 4 Press the TV AV button to return to normalTV viewing When the child lock is On the display Child lock on appears on the screen if any button on the front panel is pressed while viewing the TV Note The display Child lock on will not appear on the screen...

Page 19: ...rs on the screen when there is no signal in TV mode b If any OSD appears on screen blue back will go Off AVL Auto Volume Leveler If you select AVL On the set automatically keeps On an equal volume level even if you change programmes 1 Repeatedly press the MENU button to select the Special menu 2 Press the button and then button to select AVL 3 Press the button to select On or Off on the AVL Pull d...

Page 20: ...e Special menu 2 Press the button and then button to select Game 3 Press the button to enter the game mode Space Fighter Option Press the button to shoot the space bugs Press to move the space craft to Left Right To kill the bug shoot at center If you kill all the bugs in given time you can go to next level by pressing OK button Game can be paused and resumed by pressing the RED key After game ove...

Page 21: ... By using these functions the set automatically switches on a preset programme on a preset volume level 1 SETONTIME Hrs Min PR NO VOLlevel 2 Press the button to select On programme On Volume 3 Select programme number by pressing buttons Select and adjust volume by pressing buttons 4 Repeatedly press the OK button to return normal viewing Off Time 1 After entering TIME FUNCTION select OFF TIME with...

Page 22: ...o cable from the VCR to the AUDIO L MONO socket onthe back of the set Euro scart socket option 1 Connect the Euro scart socket of the VCR to the Euro scart socket of the set 2 Press the PLAYbutton on the VCR If your VCR outputs a switching voltage connect to Euro scart socket the set will switch to AV mode automatically But if you want to keep on watching TV mode press the or NUMBER buttons Otherw...

Page 23: ...he patch automatically Please call service only in case this operation does not help Remote control does not work Check Audio Video sockets VCR only Check the batteries in remote control Adjust volume Adjust colour Adjust brightness Adjust contrast Check for local interference Check aerial Check aerial plugged into TV Check aerial broken lead Try another channel weak signal Is the TV switched on T...

Page 24: ......
Reviews: