background image

- 7 -

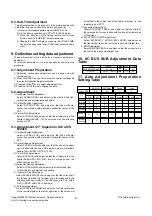
2) Before adjusting Static Convergence (STC), adjust the

focus first seeing to it that the WHITE color picture quality
is sharp enough.

3) Converge the RED vertical and BLUE vertical line in unity

(same line) by changing the angle between the 2 tabs of
4-pole magnet.

4) Converge the RED horizontal and BLUE horizontal line in

unity(same line) by turning the 2 tabs of the 4-pole
magnet. At this time, do not change the angle between
the 2 tabs.

5) Converge the R, G, B vertical line in unity (same line) by

changing the angle between the 2 tabs of the 6-pole
magnet.

6) Converge the R, G, B horizontal line in unity(same line) by

turning the 2 tabs of the 6-pole magnet. At this time, do
not change the angle between the 2 tabs.

(4) Dynamic Convergence (DYC) Adjustment

1) Y-axis Adjustment:

Adjust convergence of Y-axis (vertical) by moving the

deflection yoke (DY) left and right.

2) X-axis Adjustment:

Adjust convergence of X-axis (horizontal) by moving the

deflection yoke (DY) up and down.

6. White Balance Adjustment

6-1. Necessary Instrument

1) Automatic White Balance Meter (Low/High light Pattern

generator)

2) CRTColor Analyzer, CA -100: 1 set
3) Factory Remote Control

6-2. Adjustment Preparation

Prior to this adjustment, the Screen Voltage adjustment 
should be finished.

6-3. Automatic adjustment

1) Adjust using Auto White Balance Meter.
2) Enter CPU OFF Mode by pressing “IN-START” & “MUTE”

key of factor remote control in turn before adjustment.
Exit CPU OFF mode by press the “MUTE” key of factory
remote control after adjustment finished.

* In case there is excess RED color at screen voltage

adjustment, adjust it using “volume - (

F

) key of factory remote

control until the RED color disappear.

6-4. Manual adjustment

1) Adjust using white Balance meter and factory remote

control.

2) Enter white balance adjustment mode by pressing

“INSTART” key of factory remote control.

3) Use the CH

D

, CH

E

Key to choose adjustment item.

4) Use the VOL

F

, VOL

G

Key to change item data.

5) Adjustment Procedure

a. Make the picture luminance 45Ft-L by changing the

“CONTRAST” and “BRIGHTNESS”.

b. Adjust X data of High light with R-DRIVE and Y data of

high light with B-DRIVE to have the color temperature
as shown below.

c. Make the picture luminance 4.5Ft-L by changing the

“CONTRAST” and “BRIGHTNESS”.

d. Adjust X data of low light with R-BIAS and Y data of low

light with B-BIAS to have the color temperature as
shown below.

e. Repeat steps a~d until both low and high light have the

same readings as shown below.

7. Focus Voltage Adjustment

This adjustment must be done after operating the TV set
receiver sufficiently.

7-1. Adjustment Preparation

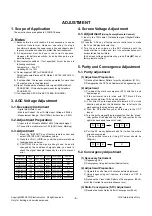
Receive the LG standard pattern (PAL: Digital pattern,   

480NC,13CH) and set the picture condition on “APC ON”  
(CLEAR) mode.

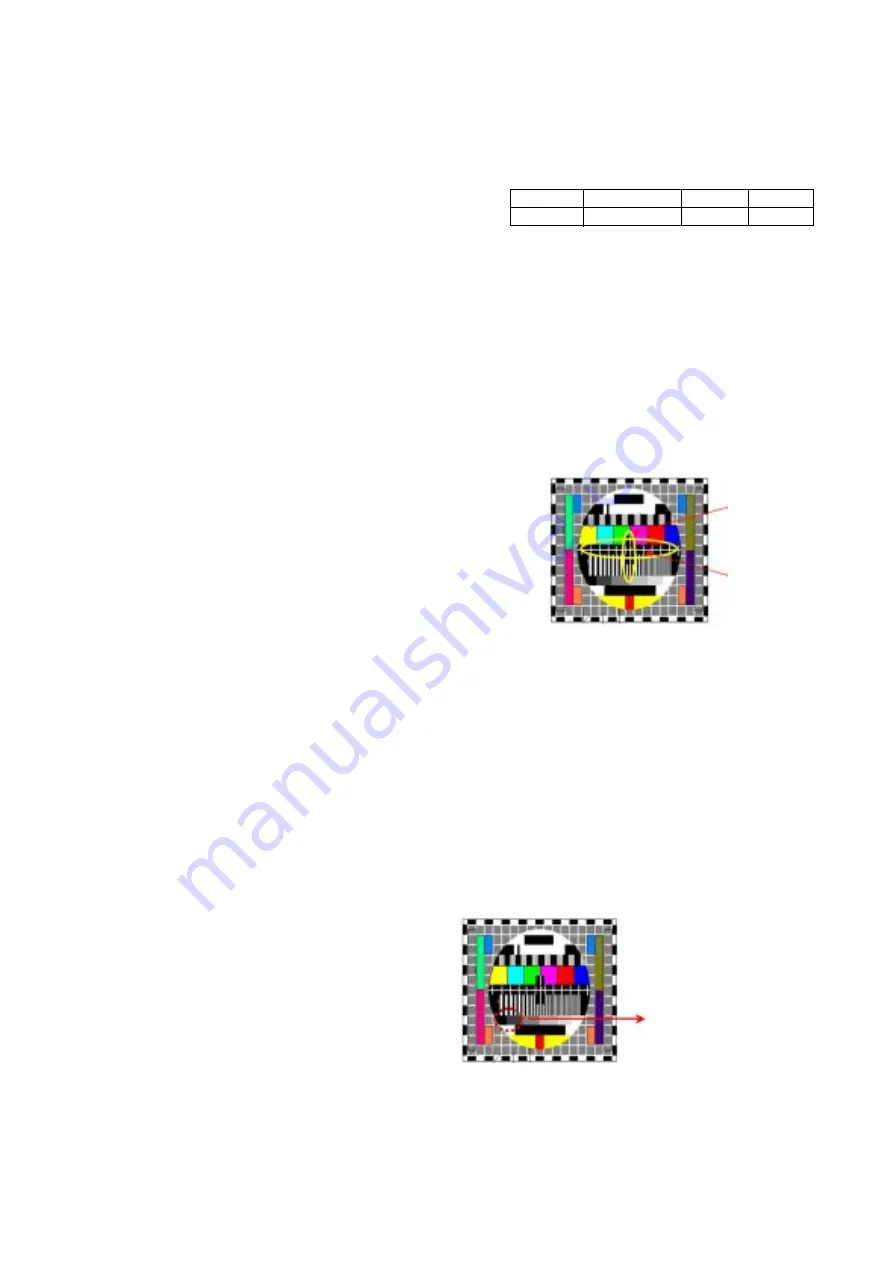
7-2. Adjustment

Turn the focus volume on the FBT upper direction to have
the best focus vertical line (Fig. 1(a)) and horizontal line (Fig.
1(b)) as shown below.

8. SUB-BRIGHTNESS Adjustment

This adjustment must be done after White balance adjustment.

8-1. Adjustment Preparation

1) Receive PAL B/G 5CH pattern.
2) Set the picture condition on “PSM ON” (DYNAMIC) mode.

8-2. Adjustment

1) Press the “ADJ” key of the factory remote control twice to

enter to “SUB-BRIGHTNESS” adjustment mode.

2) Change the Sub-Brightness data by pressing the VOL

F

,

VOL

G

key so that the 1th, 2th black level in gray scale of

PAL B/G 05CH pattern have a little bit of difference.
(See Fig. 2)

Market         Color Temperature        X-AXIS          Y-AXIS

ALL                   13,000                    268±5            273±5

(a)

(b)

<Fig. 1>

<Fig. 2> PAL B/G 05CH Signal

1th VS 2th

BLACK LEVEL have a bit of difference.

(In case of Vietnam Model 2th VS 3th)

Copyright©2008 LG Electronics.Inc. All right reserved.
Only for training and service purposes.

LGE Internal Use Only

Summary of Contents for 21FG5RG

Page 1: ...ION BEFORE SERVICING THE CHASSIS READ THE SAFETY PRECAUTIONS IN THIS MANUAL CHASSIS CW81B MODEL 21FG5RL RG RLG MODEL 21FG5RL RG RLG T4 Z4 website http biz LGservice com May 2008 Printed in China P NO MFL42115603 Internal Use Only ...

Page 2: ...ECAUTIONS 3 SPECIFICATIONS 4 ADJUSTMENT 6 TROUBLE SHOOTING 13 BLOCK DIAGRAM 17 PRINTED CIRCUIT BOARD 18 EXPLODED VIEW 20 Copyright 2008 LG Electronics Inc All right reserved Only for training and service purposes LGE Internal Use Only ...

Page 3: ...ic parts of the cabinet such as antennas terminals etc to be sure the set is safe to operate without damage of electrical shock Leakage Current Cold Check Antenna Cold Check With the instrument AC plug removed from AC source connect an electrical jumper across the two AC plug prongs Place the AC switch in the on position connect one lead of ohm meter to the AC plug prongs tied together and touch o...

Page 4: ...ing System Available Channel Input Voltage Market Screen Size Aspect Ratio Display Method Tuning System Operating Environment Storage Environment Specification PAL BG DK I NTSC M AV 3 58 4 43 PAL BG DK I NTSC M AV 3 58 4 43 SECAM DK PAL NM NTSC M AV 3 58 PAL BG DK I NTSC M AV 3 58 4 43 SECAM BG DK L VHF E2 E12 UHF E21 E69 CATV S1 S20 HYPER S21 S41 AC220V 50 60Hz AC100 240V 50 60Hz Korea Latin Amer...

Page 5: ...e System Channel Fine Search Name Copy Move Delete Skip 8 Channel Dynamic Standard Mild Game User Contrast Brightness Color Sharpness Tint NTSC M Only ON OFF Flat Music Movie Speech User 0 100 ON OFF Wide Range 191ch 88 0MHz 107 0MHz Off On Pr 1 VOL 30 Off On On Off English Indonesia Thai Vietnam TV AV1 AV2 Component On Off Remark Rear1 Front1 CVBS L R Tool Option For China Vietnam Thai CIS Rear R...

Page 6: ...s visible and turn it counterclockwise until horizontal line faintly visible Exit screen voltage adjustment by press Enter A key of factory remote control 5 Purity and Convergence Adjustment 5 1 Purity adjustment 1 Adjustment Preparation 1 Receive Red Raster Pattern for purity adjustment 51CH 2 Demagnetize the CPT and Cabinet with a degaussing coil 2 Adjustment 1 Pre adjust the static convergence ...

Page 7: ...and factory remote control 2 Enter white balance adjustment mode by pressing INSTART key of factory remote control 3 Use the CHD CHE Key to choose adjustment item 4 Use the VOLF VOLG Key to change item data 5 Adjustment Procedure a Make the picture luminance 45Ft L by changing the CONTRAST and BRIGHTNESS b Adjust X data of High light with R DRIVE and Y data of high light with B DRIVE to have the c...

Page 8: ...he size of the upper circle is alike with the one of the lower circle at LG standard pattern PAL EU05CH NTSC 13CH 3 Vertical Size Adjustment Select SVC02 VA and adjust so that the middle circle of the Digital Pattern PAL B G 5CH has 6 7mm gaps from the effective screen of CPT 4 Horizontal Position Adjustment Select SVC02 H POS and adjust so that the left and right vertival line are symmetrical as ...

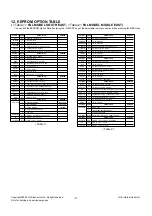
Page 9: ...ausss HOTEL 200Pr OPTION 3 NTSC DUAL SV PIPI SND1 FL1 SND1 FL2 SND2FL1 SND2 FL2 HIDEV OPTION 4 OSD LANG TXT LANG OPTION 5 Snd Mode AV Local Key REMARK REMARK REMARK REMARK REMARK CODE 0 1 0 1 0 1 0 1 0 1 0 1 0 1 0 1 CODE 0 1 0 1 0 1 0 1 0 1 0 1 0 1 0 1 CODE 0 1 0 1 0 1 0 1 0 1 0 1 0 1 0 1 CODE 0 1 2 0 1 2 3 CODE 0 1 2 0 1 2 0 1 2 DESCRIPTION 1 Slim Ultra 0 Normal Flat 1 With 0 Without 1 With 0 Wit...

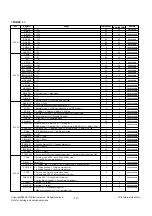
Page 10: ... SECAM stop 1 Forced DDS mode always work Delay Test 0 3 58MHz Trap 1 4 43MHz Trap 2 Wide mode 3 4 286MHz Trap 0 3 58MHz peaking 1 3 58MHz symmetrical 2 4 43MHz peaking 3 4 43MHz symmetrical 0 Chroma trap ON composite video mode 1 Chroma trap OFF YCbCr mode and YC mode 0 Coring OFF 1 Coring Gain 1 minimum 2 Coring Gain 2 middle 3 Coring Gain 3 maximum 0 narrow 3 wide 0 narrow 3 wide 0 WPL OFF 1 Hi...

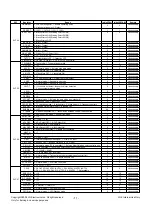
Page 11: ...0 Bypass OFF 1 Bypass ON used in Y C mode 0 Automatic mode TV in operation 1 Enforce killer ON when color control is min 0 TV in operation 1 Test mode killer circuit is not in operation 0 7 30dB 40dB 0 7 Auto green off level high 0 Normal mode 1 Tint control set center value cann t control tint 0 Easy to become NTSC 1 Easy to become PAL 0 7 0 Normal mode 1 VCO free run mode 0 FSC OUT 1 EHT 0 PAL N...

Page 12: ...ting Ext B Drive setting DDS Band Pass Filter Secam IC Only Secam IC Only Secam IC Only Secam IC Only Secam IC Only Secam IC Only Text Only Text Only 0 Cut off freq high 1 Cut off freq low 0 Normal 1 IC Test Mode 0 7 0 Normal 1 IC Test Mode 0 Normal 1 IC Test Mode 0 100 0 100 0 31 0 31 1 3 1 3 0 255 0 49 0 49 0 49 0 49 0 143 0 255 0 143 0 255 0 255 0 255 Initial PAL 0 0 1 4 0 0 8 100 0 0 15 1 1 0 ...

Page 13: ...C521 R528 RGB 9V C510 C511 R515 IF VCC C528 C526 L528 C547 VCC C518 L503 POWER SUPPLY SECTION 1 CHIP IC IC501 LV762XX 61 64 31 32 1 13 12 41 17 22 12500 VIDEO MICOM 46 49 TUNER NO CH SEARCH NO PICTURE NO SOUND X501 R537 OSC SECTION 4 43MHz SET Maneuver defectiveness Clock Error OSD Not Working MENU Picture Error L IN L221 C215 R IN L222 C222 IN L225 R226 IN C210 C211 C212 IN L221 C215 IN L222 C222...

Page 14: ...01 7 Vcc T X Pre Amp 110V D824 SFAF504G C831 330u 25V 11V D813 RU3AMV C826 1000u 16V R873 47 0 5W D Coil Relay MAIN IC 24 Vcc EEPROM 8 Vcc IC804 LV76213 9 Vcc D826 RU3AMV LV76213 20 Vcc LV76213 49 Vcc FBT B R833 RS 0 47 2W L802 82uH FR403 RF 1 2 2W Tuner 30V KIA78R09API 112 17V 395mA 110 1V 110 07V 109 63V 380mA 29 97V 10mA 3 3V 10mA 5 0V 13mA 8 0V 15mA 14V 25mA KIA78L05BP IC803 R620 RS 5 6 2W 5 0...

Page 15: ...PROTECTION ENABLE POWER OFF 15300 15301 15303 15305 15304 15306 15308 FR301 D301 C303 C309 C306 O STAGE V REF R305 R309 R311 C322 6 VERTICAL SECTION H O R Z D Y FBT T402 HORZ DRIVE SECTION R403 R401 Q401 T403 C404 H OUT 47V VCC DEFLECTI0N PROB POWER OFF HORZ O P SECTION Q402 C414 HORZ DEF COMPENSATION SECTION HEATER VOLTAGE FR401 X RAY WORKING SAFETY PROB ROLLING PICT 180V VOLTAGE FR501 D505 C540 ...

Page 16: ...O PROCESSING SECTION CPT e GUN ONE SIGNAL R G B MISSING NO PICTURE CPT Dead 16004 DISCHARGE PROTECTION CIRCUIT ONE SIGNAL R G B MISSING 16101 R G B Signal IN L902 L903 L904 16005 Spot Killer CIRCUIT SPOT TRAY C901 R902 D903 16002 Vcc 180V 1 5 GND R G B L902 L903 L904 R915 C907 R905 C904 R922 C902 R921 R906 R916 Q901 Q902 9V R908 L901 180V D902 9 CPT DRIVE SECTION The CPT BOARD assembly is composed...

Page 17: ... 5V 5 1V IC751 LA72730 STEREO Opt IC751 LA72730 STEREO Opt JA01 HIC291 Game Pack Game Opt HIC291 Game Pack Game Opt 4 5 6 8 7 From USOC Video Game Audio Game 54 SIF out IF 3 6 11 1 4 7 2 5 9 LA72702 BTSC IC701 LIN TV RIN TV 2 1 19 20 R L Out L OUT R OUT SAW SAW 5 9 10 IF IN Z102 10 11 13 14 15 12 SIF IN 32 61 V OUT Mono 18 17 18 2 7 50 Ext R L IN 49 RGB 9V SCL SDA 27 26 33V ST 5V 9v From IC804 9v ...

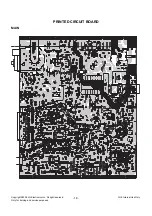
Page 18: ... 18 PRINTED CIRCUIT BOARD MAIN Copyright 2008 LG Electronics Inc All right reserved Only for training and service purposes LGE Internal Use Only ...

Page 19: ...d Only for training and service purposes LGE Internal Use Only CPT W2 h W Hh 7 5 h J H h 7 5he J Hhe 7 he he he he he he he 3 he N Lhe 3 1he N L h 3 1 h V Lh V4 h option 6X he N Xhe 3 1he N L h 3 1 h N Lh 1h h h h h h h 5h J Hh 7 5 h J H h 7 5he J Yhe 0Y he ...

Page 20: ...l and mechanical parts in this chassis have special safety related characteristics These parts are identified by in the Schematic Diagram and EXPLODED VIEW It is essential that these special safety parts should be replaced with the same components as recommended in this manual to prevent X RADIATION Shock Fire or other Hazards Do not modify the original design without permission of manufacturer IM...

Page 21: ...P NO 3854VA0196D 08 04 14 ...

Page 22: ...SVC SHEET 3854VA0196D S ...

Reviews: