background image

41

W

A

TCHING 

TV 

PR
OGR

AMME 

CONTR

OL

QUICK MENU

Your TV's OSD (On Screen Display) may differ slightly from that shown in this
manual.
Q.Menu (Quick Menu) is a menu of features which users might use frequently.

• 

A

Assp

peecctt   R

Raattiio

o: Selects your desired picture format.

For Zoom Setting, select 14:9, Zoom1 and Zoom2 in Ratio Menu. After completing
Zoom Setting, the display goes back to Q.Menu.

• 

PPo

ow

weerr   SSaavviinngg  (only Plasma TV Models): Adjusts screen brightness to reduce the power

consumption of the set.

• 

B

Baacckklliigghhtt  (only LCD TV Models)

:

Adjusts screen brightness. It returns to the default

settings brightness by changing mode source.

• 

PPiiccttuurree   M

Mo

od

dee : Selects your desired Picture Mode.

• 

SSo

ouunnd

d  M

Mo

od

dee : It is a feature to automatically set the sound combination which it deems the

best for the images being watched. Selects your desired Sound Mode.

• 

M

Muullttii   A

Auud

diio

o   ::  Selects the sound output.

• 

PPrro

oggrraam

mm

mee   EEd

diitt   ::  Adjusts the stored programmes by delete, copy, move or skip.

• 

SSlleeeep

p   T

Tiim

meerr : Selects the sleep timer.

MUTE

RETURN

AV MODE

FAV

TV

INPUT

STB

POWER

Q. MENU MENU

OK 

DVD

P

Press the Q

Q..M

ME

EN

NU

U button and then 

//

button to

display each menu.

Press the 

//

button to select your desired Source. 

Press the Q

Q..M

ME

EN

NU

U button to return to normal TV viewing.

1

2

3

Aspect Ratio

Power Saving

Backlight

Picture Mode

Sound Mode

Multi Audio

Programme Edit

Sleep Timer

F

F

4 : 3

G

G

Zoom Setting
0
0
Sport
Sport
L + R
To Set
Off

Q. MENU

D

DE

EF

F G

G

RETURN

* Only PLASMA TV models

* Only LCD TV models

Summary of Contents for 32LG6 Series

Page 1: ...ca panduan ini dengan baik sebelum mengoperasikan TV Simpanlahsebagaipeganganselanjutnya CatatnomormodeldannomorseriTVyangterterapada label di penutup belakang TV dan informasikan kepada dealer Anda apabila memerlukan jasa pelayanan 32LG6 37LG6 42LG6 47LG6 42LG7 47LG7 52LG7 32LG8 42LG8 50PG3 42PG6 50PG6 60PG6 50PG7 60PG7 ...

Page 2: ......

Page 3: ...el TV LCD Jepit Penyangga Kabel lihat hal 15 Model TV Plasma hanya 50 60PG6 50 60PG7 tutup pelindung lihat hal 12 32LG6 3EA 37LG6 4EA hanya 32 37LG6 4EA 2EA hanya 42LG6 4EA 1EA baut untuk merakit dudukan lihat hal 11 4 baut untuk merakit dudukan lihat hal 10 hanya 42PG6 hanya 50PG3 atau 42PG6 1EA 50PG3 2EA Jepit Penyangga Kabel Tutup Pelindung lihat hal 10 Pengikat Kabel hanya 32 37 42 47 52LG6 ha...

Page 4: ...omatis 43 Pemrograman Manual 44 Menyempurnakan Penerimaan 45 Memberi Nama pada Stasiun TV 46 Booster 47 Perubahan Program 48 MENGONTROL GAMBAR MENONTON TV KONTROL PROGRAM ASESORIS 1 Tombol tombol Kontrol Panel Depan 4 Informasi Panel Belakang 7 Memasang TV pada Meja 9 Pemasangan Dudukan 10 Penyusunan Kabel 13 Pasang Hati hati Agar TV Tidak Terjatuh 1 6 Pemasangan di Meja 17 Pemasangan pada Dinding...

Page 5: ...NICAM 89 Pemilihan Output Suara Speaker 89 Pemilihan Bahasa Menu pada Layar 90 LAMPIRAN Daftar Pelacakan Masalah 98 Perawatan 100 Spesifikasi Produk 101 Memprogram Remote Kontrol 103 Kode kode IR 105 Kontrol Eksternal RS 232C 107 MENGATUR WAKTU Pengaturan Jam 91 Pengaturan Waktu On Off Auto 92 Pengaturan Sleep Timer 93 Pengaturan Auto Shut off 94 TELETEXT Menghidupkan Mematikan 95 SIMPLE Text 95 T...

Page 6: ...akan kain pembersih Model TV Plasma OK MENU INPUT P OK MENU INPUT P Sensor Remote Kontrol POWER Indikator Power Standby berwarna merah pada mode standby berwarna hijau saat TV dihidupkan PROGRAM VOLUME MENU OK INPUT OK OK MENU MENU INPUT INPUT P DUDUKAN PUTAR Fitur ini tidak tersedia untuk semua model Setelah memasang TV Anda dapat mengatur arah TV secara manual ke kiri atau ke kanan sejauh 20 der...

Page 7: ...e standby berwarna putih saat TV dihidupkan Catatan Anda dapat mengatur Indikator Power pada menu Option POWER Indikator Power Standby berwarna merah pada mode standby berwarna biru saat TV dihidupkan Catatan Anda dapat mengatur Indikator Power pada menu Option P MENU INPUT OK PROGRAM VOLUME OK MENU INPUT Intelligent Sensor Mengatur gambar sesuai kondisi ruangan Sensor Remote Kontrol 42 47 52LG7 M...

Page 8: ...emote Kontrol Indikator Power Standby berwarna merah pada mode standby berwarna biru saat TV dihidupkan Catatan Anda dapat mengatur Indikator Power pada menu Option 32 42LG8 PROGRAM VOLUME MENU OK INPUT POWER OK MENU INPUT P ...

Page 9: ...woofer ke sistem suara surround pada TV Input Component Menghubungkan component dari perangkat video audio Input Antenna Menghubungkan Antena RF Soket Kabel Power TV ini menggunakan arus AC power Tegangan yang digunakan dapat dilihat pada halaman spesifikasi Jangan gunakan arus DC sebagai suplai daya Port Input RS 232C CONTROL Menghubungkan port serial dari perangkat kontrol ke jack RS 232C jack F...

Page 10: ...R AUDIO AUDIO AV VIDEO VIDEO IN 1 OUT VARIABLE VARIABLE AUDIO OUT AUDIO OUT ANTENNA IN 2 1 5 6 3 4 42 47 52LG7 32 37 42 47LG6 7 7 Input USB Input HDMI Menghubungkan sinyal HDMI ke HDMI IN Input S Video Menghubungkan output S Video dari perangkat S VIDEO Input Audio Video Menghubungkan output audio video dari perangkat eksternal PENDAHULUAN HDMI IN HDMI DVI IN 1 2 ANTENNA IN 1 2 VIDEO AUDIO RGB PC ...

Page 11: ...TV Input Component Menghubungkan component dari perangkat video audio Input Antena Menghubungkan Antena RF Soket Kabel Power TV ini menggunakan arus AC power Tegangan yang digunakan dapat dilihat pada halaman spesifikasi Jangan gunakan arus DC sebagai suplai daya 1 2 3 4 5 6 7 MEMASANG TV PADA MEJA hanya 32LG8 TV harus dikencangkan pada meja agar tidak dapat di dorong ke depan ke belakang yang dap...

Page 12: ...ada di bagian belakang TV 1 2 3 untuk 42PG6 Ketika memasang tipe dudukan meja periksa apakah baut sudah tepasang dengan kencang Jika tidak TV dapat miring ke depan setelah terpasang Jika Anda mengencangkan baut dengan tenaga berlebihan baut dapat menyimpang karena pengikisan pada bagian pengencangan Model TV Plasma Tidak Menggunakan Tipe Dudukan Meja Ketika memasang TV pada dinding gunakan tutup p...

Page 13: ... TV dari kerusakan 2 Pasang bagian Penyangga Badan dengan Alas dudukan pada TV Pasang TV seperti terlihat pada gambar Pasang dan kencangkan empat buah baut dengan benar pada lubang yang ada di bagian belakang TV Penyangga badan Alas dudukan 32LG6 37LG6 Penyangga badan Alas dudukan 42LG6 Penyangga badan Alas dudukan untuk 32 37 42LG6 ...

Page 14: ... buah baut dengan benar pada lubang yang ada di bagian belakang TV Penyangga badan Alas dudukan Untuk 42LG7 32 42LG8 Tidak Menggunakan Tipe Dudukan Meja Ketika memasang TV pada dinding gunakan tutup pelindung pada bagian untuk tipe dudukan meja Setelah melepas kertas pelindung dari tutup pelindung pasanglah pada TV seperti terlihat pada gambar Gambar mungkin berbeda dari TV Anda Pasang TUTUP PELIN...

Page 15: ...cedera atau kerusakan pada TV Melepas Jepit Penyangga Kabel Gambar yang ditunjukkan mungkin sedikit berbeda dari TV Anda JEPIT PENYANGGA KABEL Hubungkan kabel yang diperlukan Untuk menghubungkan dengan perangkat tambahan lihat bagian Menghubungkan Perangkat Eksternal 1 Pasang Jepit Penyangga Kabel seperti pada gambar 2 JEPIT PENYANGGA KABEL 42PG6 50 60PG6 50 60PG7 50 60PG6 50 60PG7 42PG6 Lepaskan ...

Page 16: ...enghubungkan Perangkat Eksternal Pasang Jepit Penyangga Kabel seperti pada gambar Jika TV Anda terdapat Pengikat Kabel pasanglah seperti terlihat dan ikat kabel 1 2 CATATAN G G Jangan gunakan JEPIT PENYANGGA KABEL untuk mengangkat TV Jika terjatuh akan mengakibatkan cedera atau kerusakan pada TV Pegang Jepit Penyangga Kabel dengan kedua tangan kemudian tarik ke atas 50PG3 JEPIT PENYANGGA KABEL PEN...

Page 17: ...BEL Putar JEPIT PENYANGGA KABEL seperti terlihat Catatan Penyangga kabel ini dapat rusak oleh tekanan yang berlebihan Hubungkan kabel yang diperlukan Untuk menghubungkan dengan perangkat tambahan lihat bagian Menghubungkan Perangkat Eksternal 1 Buka Jepit Penyangga Kabel seperti terlihat dan aturlah kabel 2 JEPIT PENYANGGA KABEL Pasang Jepit Penyangga Kabel seperti pada gambar 3 42 47 52LG7 32 42L...

Page 18: ...ekerup untuk memasang ke dinding seperti ditunjukkan gambar Jika pada TV terdapat baut pada posisi baut penggantung lepaskan dahulu sebelum memasang baut penggantung Pasang baut penggantung atau siku siku TV sekerup dan kencangkan dengan aman pada lubang Pasang dengan aman siku siku dan sekerup pada dinding Sesuaikan ketinggian dengan siku siku yang terpasang pada dinding 3 Gunakantaliyangkokohunt...

Page 19: ...s PENETRALAN ARUS LISTRIK EARTHING Pastikan TV Anda terhubung dengan kabel penetral arus listrik untuk mencegah kemungkinan bahaya sengatan listrik Jika tidak memungkinkan harap menghubungi teknisi ahli untuk memasang alat pemutus arus Jangan mencoba meng hubungkan kabel pada telepon penangkap petir atau pipa gas Pemasangan pada Dinding Horisontal Beri celah 4 inci 10cm antara masing masing sisi T...

Page 20: ...l tunggal Perumahan Hubungkan jack dalam dari antena luar Antena luar Soket Antena Dinding Kabel Coaxial RF 75 ohm Antena UHF VHF Pada daerah dengan sinyal yang lemah tambahkan penguat sinyal pada antena seperti terlihat pada gambar Jika sinyal yang diterima ingin dibagi dengan TV yang lain gunakan splitter sinyal pada koneksi antena Untuk mencegah kerusakan pada alat jangan memasang kabel power s...

Page 21: ...duan set top box digital Pilih sumber input Component1 menggunakan tombol INPUT pada remote kontrol Jika dihubungkan pada COMPONENT IN 2 pilih Component2 sebagai sumber input 2 3 4 1 Untuk mencegah kerusakan pada alat jangan memasang kabel power sampai anda selesai memasang semua peralatan Bagian ini secara umum menggunakan diagram gambar untuk model 42 50 60PG6 Gambar yang ditunjukkan mungkin sed...

Page 22: ...7LG6 32 42LG8 menggunakan tombol INPUT pada remote kontrol Hidupkan set top box digital Sesuai dengan buku panduan set top box digital 2 3 1 G TV dapat menerima sinyal video dan audio secara bersamaan menggunakan kabel HDMI G jika set top box digital mempunyai fungsi HDMI otomatis resolusi output dari perangkat secara otomatis adalah 1280x720p G Jika set top box digital tidak didukung fungsi HDMI ...

Page 23: ... jack AUDIO RGB DVI padaTV Hidupkan set top box digital Sesuai dengan buku panduan set top box digital Pilih sumber input HDMI1 DVI menggunakan tombol INPUT pada remote kontrol 2 3 4 1 Menghubungkan dengan kabel HDMI ke DVI G HDMI2 HDMI3 kecuali 32 37LG6 32 42LG8 tidak didukung sumber DVI G Jika Set Top Box memiliki output DVI tapi tidak memiliki output HDMI diperlukan hubungan audio terpisah G Ji...

Page 24: ...Terminal Component pada TV Y PB PR terminal output Video pada pemutar DVD Y Y Y Y PB B Y Cb Pb PR R Y Cr Pr Hubungkan output video Y PB PR dari DVD ke jack COMPONENT IN VIDEO padaTV Hubungkan output audio dari DVD ke jack COMPONENT IN AUDIO padaTV Hidupkan pemutar DVD lalu masukkan DVD Pilih sumber input Component1 menggunakan tombol INPUT pada remote kontrol Jika dihubungkan pada COMPONENT IN 2 p...

Page 25: ...EO padaTV Hubungkan output audio dari DVD ke jack input AUDIO padaTV Hidupkan pemutar DVD kemudian masukkan DVD Pilih sumber input AV2 menggunakan tombol INPUT pada remote kontrol Lihat panduan penggunaan pemutar DVD Anda untuk instruksi pengoperasian 2 3 4 5 1 AV IN 2 3 L R S VIDEO VIDEO OUTPUT SWITCH ANT IN ANT OUT 1 2 ...

Page 26: ...MI3 kecuali 32 37LG6 32 42LG8 menggunakan tombol INPUT pada remote kontrol Lihat panduan penggunaan pemutar DVD Anda untuk instruksi pengoperasian 1 2 3 G TV dapat menerima sinyal video dan audio secara bersamaan menggunakan kabel HDMI G Jika DVD mempunyai fungsi Auto HDMI resolusi gambar secara otomatis adalah 1280x720p G Jika DVD tidak didukung fungsi Auto HDMI Anda harus mengatur output resolus...

Page 27: ...ak yang cukup antara perangkat VCR dan TV Kadangkala terdapat gambar yang membekas dari VCR Jika menggunakan perbandingan gambar 4 3 dan menampilkan gambar tetap maka disisi layar akan meninggalkan bayangan Hubungkan soket ANT OUT dari VCR ke soket ANTENNA IN padaTV Hubungkan kabel antena ke soket ANT IN pada VCR Tekan tombol PLAY pada VCR dan sesuaikan program antara TV dan VCR untuk mengeluarkan...

Page 28: ... dan Audio kanan merah Masukkan kaset video ke dalam VCR kemudian tekan PLAY pada VCR Sesuaikan dengan panduan VCR Pilih sumber input AV1 menggunakan tombol INPUT pada remote kontrol Jika dihubungkan pada AV IN 2 pilih AV2 sebagai sumber input 1 2 3 G Jika VCR Anda bersistem suara mono hubungkan kabel audio dari VCR ke jack AUDIO L MONO pada TV CATATAN 1 26 MENGHUBUNGKAN PERANGKAT EKSTERNAL MENGHU...

Page 29: ... ANT OUT Menghubungkan dengan kabel S Video Hubungkan output S VIDEO dari VCR ke input S VIDEO padaTV Kualitasgambarakanmeningkat Bandingkan dengan menggunakan input kabel RCA Hubungkan output audio dari VCR ke jack input AUDIO padaTV Masukkan kaset video ke dalam VCR dan tekan PLAY pada VCR Sesuaikan dengan buku panduan VCR Pilih sumber input AV2 menggunakan tombol INPUT pada remote kontrol 2 3 4...

Page 30: ...jack AUDIO VIDEO antara TV dan perangkat eksternal Sesuaikan warna jack Video kuning Audio kiri putih dan Audio kanan merah Pilih sumber input AV2 menggunakan tombol INPUT pada remote kontrol Jika dihubungkan pada AV IN 1 pilih sumber input AV1 Operasikan hubungan dengan perangkat eksternal Sesuaikan dengan panduan pengoperasian perangkat eksternal 1 2 3 ...

Page 31: ...anlah speaker pada TV Anda G hal 86 G Pilih Variable Out di menu Audio untuk menghubungkan jack VARIABLE AUDIO OUT G hal 87 CATATAN Untuk menghubungkan amplifier eksternal atau menambah sub woofer pada sistem suara surround Anda Hubungkan jack input dari amplifier stereo ke jack VARIABLE AUDIO OUT padaTV Atur speaker Anda melalui amplifier stereo analog berdasarkan instruksi dari panduan amplifier...

Page 32: ...sebut untuk keterangan pemasangan input perangkat G Sumber input Component RGB HDMI tidak dapat digunakan untuk AV out G Disarankan untuk menggunakan jack AV OUT untuk merekam VCR CATATAN 2 1 1 L MONO R AUDIO AV VIDEO OUT VARIABLE AUDIO OUT L R S VIDEO VIDEO 1 PEMASANGAN OUTPUT AV TV ini memiliki kemampuan sinyal output khusus yang memungkin kan Anda untuk menggabungkan dengan TV atau monitor lain...

Page 33: ...2 PEMASANGAN PC TV ini mempunyai kemampuan Plug and Play dimana PC akan mengatur secara otomatis ke pengaturan TV Menghubungkan dengan kabel D sub 15 pin Hubungkan output RGB dari PC ke jack RGB PC padaTV Hubungkan output audio PC ke jack AUDIO RGB DVI padaTV Hidupkan PC dan TV Pilih sumber input RGB PC menggunakan tombol INPUT pada remote kontrol 2 3 4 1 ...

Page 34: ...e PC ke tingkat resolusi yang lain atau ubah refresh rate pada tingkat lain atau atur kontras dan terang pada menu hingga gam bar menjadi jernih Jika refresh rate pada kartu grafis tidak dapat diubah gantilah kartu grafis atau konsultasikan dengan pembuat kartu grafis Anda G Sinkronisasi input bentuk gelombang untuk frekuensi Horisontal dan Vertikal adalah terpisah G Jika resolusi PC melebihi SXGA...

Page 35: ...7 776 59 87 47 720 59 799 47 7 60 63 668 59 895 66 587 59 934 hanya 50 60PG6 hanya 50 60PG7 50PG3 Model TV Plasma Resolusi 720x480 720x576 1280x720 1920x1080i 1920x1080p mode HDMI DTV Frekuensi Frekuensi Horisontal kHz Vertikal Hz 31 47 59 94 31 50 60 00 31 25 50 00 44 96 59 94 45 00 60 00 37 50 50 00 33 72 59 94 33 75 60 00 28 125 50 00 67 432 59 94 67 5 60 56 250 50 27 24 33 75 30 Resolusi 640x3...

Page 36: ...umnya Secara otomatis mengatur posisi gambar dan meminimalkan gambar bergetar Setelah pengaturan jika gambar masih belum bagus TV Anda tetap dapat berfungsi tetapi perlu pengaturan lanjut Auto configure Fungsi ini secara otomatis mengatur posisi layar waktu dan phase Gambar yang ditampilkan akan tidak stabil selama beberapa detik selama proses pengaturan sedang berlangsung 1 2 3 4 5 1 3 4 Pengatur...

Page 37: ...an tombol untuk memilih menu Picture Tekan tombol lalu gunakan tombol untuk memilih Screen Tekan tombol lalu gunakan tombol untuk memilih Manual Config Tekan tombol lalu gunakan tombol untuk memilih Phase Clock H Position atau V Position Tekan tombol untuk pengaturan yang sesuai Tekan tombol MENU untuk kembali ke tampilan normal TV Tekan tombol RETURN untuk kembali ke tampilan menu sebelumnya 1 2 ...

Page 38: ...Tekan tombol MENU untuk kembali ke tampilan normal TV Tekan tombol RETURN untuk kembali ke tampilan menu sebelumnya Memilih mode XGA kecuali 42PG6 1 2 3 4 5 MENGHUBUNGKAN PERANGKAT EKSTERNAL MUTE RETURN AV MODE FAV TV INPUT STB POWER Q MENU MENU OK DVD P 1 3 4 Picture Mode Colour Temperature Advanced Aspect Ratio Picture Reset Screen Picture Screen Auto config Manual Config XGA Mode Reset XGA Mode...

Page 39: ...ekan tombol MENU untuk kembali ke tampilan normal TV Tekan tombol RETURN untuk kembali ke tampilan menu sebelumnya 1 2 3 4 5 Initializing Kembali ke pengaturan pabrik MUTE RETURN AV MODE FAV TV INPUT STB POWER Q MENU MENU OK DVD P 1 3 4 Picture Mode Colour Temperature Advanced Aspect Ratio Picture Reset Screen Picture Screen Auto config Manual Config XGA Mode Reset Reset G DE F G OK RETURN 2 Pictu...

Page 40: ...umber menu yang diinginkan dengan cepat Memilih menu Menghilangkan semua tampilan layar dan kembali ke tampilan normal TV dari sembarang menu Melihat daftar perangkat AV yang terhubung pada TV Ketika Anda menekan tombol ini menu Simplink akan muncul pada layar RETURN AV MODE Kembali satu langkah dari penggunaan yang sedang dijalankan atau fungsi interaksi yang lain masuk ke mode Membantu Anda untu...

Page 41: ...da menu Menampilkan tabel program Kembali ke tampilan program sebelumnya Memasang Baterai Buka penutup baterai pada bagian belakang dan masukkan baterai sesuai dengan posisi polaritasnya dengan dengan Pasang 2 baterai 1 5V AAA Jangan gabung baterai yang lama dengan yang baru Tutup kembali Tombol kontrol VCR DVD Mengontrol pemutar VCR atau DVD Mengontrol perangkat AV dengan menekan OK dan tombol un...

Page 42: ...LUMESUARA Tekan tombol P atau tombol ANGKA untuk memilih nomor program 2 3 1 1 Pengaturan awalan Catatan a Ini akan otomatis hilang setelah kira kira 40 detik jika tidak ada salah satu tombol yang ditekan b Mode In Store hanya untuk tampilan toko dan tidak untuk penggunaan umum c Mode Home adalah pengaturan terbaik untuk lingkungan rumah dan ini mode asal default dari TV d Mode In Store adalah pen...

Page 43: ... sumber mode Picture Mode Memilih mode gambar yang Anda inginkan Sound Mode Fitur untuk mengatur secara otomatis kombinasi suara yang dianggap terbaik untuk gambar yang sedang dilihat Pilih mode suara yang Anda inginkan Multi Audio Memilih output suara Programme Edit Mengatur program yang disimpan menghapus copy memindah atau melompati Sleep Timer Mengatur waktu mati MUTE RETURN AV MODE FAV TV INP...

Page 44: ...creen Display dapat berbeda dengan TV Anda karena pada manual hanya menampilkan ilustrasi dari operasional TV c Pada mode teletext menu tidak ditampilkan MENU Setup MENU Picture MENU Audio MENU Time MENU Option 1 2 3 Language SIMPLINK Key Lock ISM Method Power Saving Set ID Power Indicator Factory Reset Option Clock Off Time On Time Sleep Timer Auto Sleep Time Auto Tuning Manual Tuning Programme E...

Page 45: ...ngsung tersimpan Untuk menghentikan pemrograman otomatis tekan tombol RETURN Setelah pemrograman selesai menu Perbaikan Program akan muncul pada layar Lihat bagian Perbaikan Program untuk memperbaiki program yang telah tersimpan Tekan tombol MENU untuk kembali ke tampilan normal TV Tekan tombol RETURN untuk kembali ke tampilan menu sebelumnya 1 2 3 4 5 6 7 8 9 TV ini dapat menampung hingga 100 sta...

Page 46: ...h nomor program dengan menggunakan tombol atau tombol ANGKA jika memungkinkan pilih nomor program langsung menggunakan tombol angka Semua nomor dibawah 10 dimasukkan dengan angka 0 didepannya contoh 05 untuk 5 Tekan tombol untuk memilih Search Tekan tombol untuk memulai pencarian Jika stasiun telah ditemukan pencarian akan berhenti Tekan tombol OK untuk menyimpan Untuk menyimpan stasiun yang lain ...

Page 47: ...ol ME EN NU U untuk kembali ke tampilan normal TV Tekan tombol RE ETU URN N untuk kembali ke tampilan menu sebelumnya 1 2 3 4 5 6 Penyempurnaan penerimaan digunakan untuk penerimaan program yang kurang baik 3 4 5 MUTE RETURN AV MODE FAV TV INPUT STB POWER Q MENU MENU OK DVD P 1 2 Setup Auto Tuning Manual Tuning Programme Edit Favourite Programme To Set Manual Tuning G DE F G OK RETURN Auto Tuning ...

Page 48: ... dan huruf A Z Tekan tombol untuk memilih posisi lalu pilih karakter berikutnya dan begitu seterusnya Tekan tombol OK untuk menyimpan Tekan tombol MENU untuk kembali ke tampilan normal TV Tekan tombol RETURN untuk kembali ke tampilan menu sebelumnya 1 2 3 4 5 6 7 3 4 5 6 MUTE RETURN AV MODE FAV TV INPUT STB POWER Q MENU MENU OK DVD P 1 2 Setup Auto Tuning Manual Tuning Programme Edit Favourite Pro...

Page 49: ...alu gunakan tombol untuk memilih Booster Tekan tombol lalu gunakan tombol untuk memilih On atau Off Tekan tombol MENU untuk kembali ke tampilan normal TV Tekan tombol RETURN untuk kembali ke tampilan menu sebelumnya 1 2 3 4 5 MUTE RETURN AV MODE FAV TV INPUT STB POWER Q MENU MENU OK 1 2 3 4 5 6 DVD P 3 4 1 2 Setup Auto Tuning Manual Tuning Programme Edit Favourite Programme To Set Manual Tuning G ...

Page 50: ...mbol 4 Tekan tombol Kuning lagi untuk keluar dari fungsi ini A Meloncati Nomor Program 1 Pilih program yang akan diloncati dengan menekan tombol 2 Tekan tombol Biru Program yang diloncati akan berwarna biru 3 Tekan tombol Biru lagi untuk mengembalikan program yang diloncati Ketika nomor program sudah diloncati ini berarti Anda tidak dapat memilih program menggunakan tombol pada tampilan normal TV ...

Page 51: ... 0 di depannya misal 05 untuk program nomor 5 Untuk menyimpan program yang lain ulangi langkah nomor 4 sampai 5 Anda dapat menyimpan 8 nomor program Tekan tombol MENU untuk kembali ke tampilan normal TV Tekan tombol RETURN untuk kembali ke tampilan menu sebelumnya Fungsi ini memungkinkan Anda untuk memilih program favorit secara langsung Tekan tombol FAV berulang ulang untuk memilih program favori...

Page 52: ...ut A Memilih Program pada Tabel Program Pilih sebuah program dengan tombol Kemudian tekan tombol OK TV akan menampilkan nomor program yang telah dipilih A Membuka Program dalam Tabel Program Terdapat 10 tabel program yang berisi 100 program Tekan tombol beberapa kali untuk membuka setiap program Tekan tombol LIST untuk kembali ke tampilan normal TV CATATAN a Anda akan menemukan beberapa program de...

Page 53: ...kan ke TV menggunakan kabel HDMI tanpa kabel dan pengaturan tambahan Jika Anda tidak menginginkan menu SIMPLINK pilih Off Tekan tombol MENU lalu tekan tombol untuk memilih menu Option Tekan tombol lalu tekan tombol untuk memilih SIMPLINK Tekan tombol lalu tekan tombol untuk memilih On atau Off Tekan tombol MENU untuk kembali ke tampilan normal TV Tekan tombol RETURN untuk kembali ke tampilan menu ...

Page 54: ...ct t P Pl la ay y Setelah menghubungkan perangkat AV ke TV Anda dapat langsung mengontrol perangkat tanpa tambahan pengaturan S Se el le ec ct t A AV V d de ev vi ic ce e Memudahkan Anda untuk memilih salah satu perangkat AV yang terhubung pada TV dan mengoperasikannya P Po ow we er r o of ff f a al ll l d de ev vi ic ce es s Ketika Anda mematikan TV semua perangkat yang terhubung juga akan mati S...

Page 55: ... ini dapat digunakan untuk mencegah program TV yang tidak diinginkan Fitur ini diprogram untuk mengingat pilihan mana yang terakhir kali ditampilkan bahkan ketika Anda mematikan TV Tekan tombol MENU lalu tekan tombol untuk memilih menu Option Tekan tombol lalu tekan tombol untuk memilih Key Lock Tekan tombol lalu tekan tombol untuk memilih On atau Off Tekan tombol MENU untuk kembali ke tampilan no...

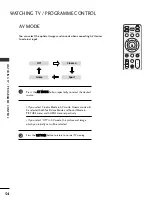
Page 56: ... MODE untuk memilih sumber mode yang diinginkan Jika Anda memilih mode Cinema pada mode AV mode Cinema akan terpilih untuk mode Picture dan mode Sound pada menu PICTURE dan menu AUDIO secara berurutan Jika Anda memilih Off pada mode AV gambar tampilan yang telah Anda atur pada awalan akan terpilih Tekan tombol RETURN untuk kembali ke tampilan normal TV 1 2 MUTE RETURN AV MODE FAV TV INPUT STB POWE...

Page 57: ... file FAT32 yang disediakan sistem operasi Windows Jika USB diformat dengan program lain yang tidak didukung oleh Windows kemungkinan tidak bisa dideteksi G Hubungkanlah daya pada perangkat USB yang memerlukan sumber daya eksternal Jika tidak perangkat tidak dapat terdeteksi G Hubungkan perangkat USB dengan kabel yang disediakan oleh pembuat USB Jika dihubungkan dengan kabel lain atau kabel yang t...

Page 58: ...ngatur menu pada layar ukuran penuh Anda dapat mengganti pengaturan untuk menampilkan foto yang disimpan pada USB pada layar penuh Perincian pengaturan ada pada layar ukuran penuh foto Aspek rasio dari foto mungkin berubah ukuran pada saat ditampilkan pada layar penuh 1 17 90 Hide Prev Next Stop 90 Rotate Memutar foto Menampilkan foto sebelumnya Menampilkan foto selanjutnya Berhenti melihat foto M...

Page 59: ...n tombol STOP 1 2 3 P RETURN Photo List OK Move Move Page Exit 1366x768 1 1 Preview JMJ003 List Up Folder KY102 JMJ001 JMJ002 JMJ003 4 Menampilkan slide Hide Stop Berhenti melihat tampilan slide Menyembunyikan menu pada layar penuh Untuk melihat menu pada layar penuh lagi tekan tombol OK P RETURN Photo List OK Move Move Page Exit 1366x768 1 1 Preview JMJ003 List Up Folder KY102 JMJ001 JMJ002 JMJ00...

Page 60: ...it Delete All 1 3 2 3 RETURN FAV P Music List Program List G 00 00 34 Up Folder KY104 KY108 JMJ009 OK Edit Move Page Exit Delete All a Jika Anda ingin mendengarkan musik gunakan tombol untukmemilih musik b Tekan tombol OK untuk memutar musik c Semua musik pada folder yang dipilih akan diputar a Jika Anda ingin mendengarkan sebagian musik secara berurutan gunakan tombol untuk memilih b Tekan tombol...

Page 61: ...rnet Kami tidak mempunyai hak untuk memberikan ijin garansi Ijin harus didapat dari pemegang hak cipta Pada saat loading beberapa tombol mungkin tidak berfungsi File MP3 yang dapat digunakan adalah seperti berikut Frekuensi Sampling 32 48kHz Bit rate 32 320kbps Jika Anda tidak menekan tombol apapun selama pemutaran kotak informasi seperti terlihat di bawah akan muncul sebagai screen saver Screen S...

Page 62: ... diaktifkan ketika USB terdeteksi Ini digunakan untuk memutar file film di TV Menampilkan daftar film pada folder USB dan dapat diputar Memungkinkan untuk memutar semua film dalam folder Tidak dapat menambah atau menghapus file Ini adalah daftar film yang ditampilkan pada folder informasi dan file Divx Komponen Layar Berpindah ke file di atasnya Sesuai tombol pada remote kontrol 1 2 1 2 ...

Page 63: ...g diputar Sync Mengatur waktu sinkronisasi teks film dari 5 det 5 det pada jarak 1 detik ketika film sedang diputar ARC Mengatur format gambar 4 3 atau 16 9 untuk melihat menu kembali pada layar penuh tekan tombol OK ON OFF Control Language Position Sync ARC D To Set Hide CATATAN Jika Anda tidak menekan tombol apapun selama 10 menit pada keadaan pause ini akan menghentikan film Pada saat loading b...

Page 64: ...mulai DivX Reg Code Tekan tombol RETURN untuk kembali ke tampilan normal TV Produk bersertifikat DivX resmi Memutar semua jenis video dari DivX video termasuk DivX 6 dengan standar playback file media DivX Produk DivX bersertifikat DivX DivX Certified dan logo yang berhubungan adalah adalah merek dagang dari DivX Inc dan dibawah izin 1 2 3 4 DivX Registration Code xxxxxxxx MUTE RETURN AV MODE FAV ...

Page 65: ...PICTURE PIP memungkinkan Anda menyaksikan 2 sumber input untuk TV pada waktu bersamaan Satu input akan menampilkan gambar penuh dan input yang lain berukuran kecil Fungsi PIP tersedia pada mode Component RGB HDMI Untuk model FHD dapat untuk mode TV AV1 AV2 Memilih Program untuk Sub Gambar Tekan tombol PIP lalu tekan tombol untuk memilih program pada sub gambar Program yang dipilih akan ditampilkan...

Page 66: ...t 16 9 Mode ini akan mengatur gambar pada bidang datar bagian yang tegak lurus untuk mengisi seluruh layar Format 4 3 berguna untuk format DVD Original Saat TV menerima sinyal layar lebar secara otomatis TV akan merubah ke format yang dikirim 4 3 Mode ini akan menyajikan gambar dengan rasio dimensi 4 3 dengan tanda batang pada sisi sebelah kanan dan kiri gambar 14 9 Anda dapat menikmati tampilan T...

Page 67: ...si pada satu gambar dimana salah satu bagian ber tambah dan lainnya terpotong dimana akan ter bagi antara yang terlihat dan bagian yang ter tutup Just Scan Format ini memungkinkan Anda untuk melihat gambar terbaik tanpa kehilangan gambar asli pada pada gambar beresolusi tinggi CATATAN G Anda hanya dapat memilih 4 3 16 9 Wide pada mode Component HDMI RGB PC G Pada mode HDMI Component lebih dari 720...

Page 68: ...ture 3 2 Picture Picture Mode Colour Temperature Advanced Aspect Ratio Picture Reset Screen Picture Mode G DE F G OK RETURN Intelligent Sensor Vivid Standard Cinema Sport Game User1 User2 DE F G OK RETURN MUTE RETURN AV MODE FAV TV INPUT STB POWER Q MENU MENU OK DVD P Mode Picture mengatur TV untuk menampilkan gambar terbaik Pilihlah nilai pengaturan ulang pada menu Picture Mode ber dasarkan dari ...

Page 69: ...mbol lalu tekan tombol untuk memilih Colour Temperature Tekan tombol lalu tekan tombol untuk memilih Cool Medium Warm atau User Tekan tombol MENU untuk kembali ke tampilan normal TV Tekan tombol RETURN untuk kembali ke tampilan menu sebelumnya 1 2 3 4 Mengatur Warna Otomatis Warm Medium Cool 1 3 2 MUTE RETURN AV MODE FAV TV INPUT STB POWER Q MENU MENU OK DVD P Picture Mode Colour Temperature Advan...

Page 70: ...bar Brightness Menambah atau mengurangi intensitas warna putih pada gambar Colour Mengatur intesitas pada semua warna Sharpness Mengatur tingkat kehalusan pada sisi antara area yang terang dan area yang gelap pada gambar Semakin rendah tingkatannya gambar akan semakin halus Tint Mengatur keseimbangan antara tingkat warna merah dan hijau CATATAN G Anda tidak dapat mengatur warna ketajaman dan pewar...

Page 71: ...ombol untuk memilih Red Green atau Blue Tekan tombol untuk melakukan pengaturan Tekan tombol MENU untuk kembali ke tampilan normal TV Tekan tombol RETURN untuk kembali ke tampilan menu sebelumnya 1 2 3 4 5 6 1 3 2 5 4 MUTE RETURN AV MODE FAV TV INPUT STB POWER Q MENU MENU OK DVD P Picture Mode Colour Temperature Advanced Aspect Ratio Picture Reset Screen Picture DE F G OK RETURN Picture Picture Mo...

Page 72: ...mbali ke tampilan menu sebelumnya XD adalah sebuah teknologi unik untuk memperbaiki kualitas gambar yang dimiliki LG Electronics yang dapat menampilkan sumber HD secara penuh melalui proses sinyal algoritma digital tingkat tinggi Fungsi ini tidak tersedia pada mode RGB PC A XD Contrast Mengoptimalkan kontras secara otomatis sesuai dengan kecerahan yang dipantulkan A XD Colour Mengatur pantulan war...

Page 73: ...amma Tekan tombol lalu tekan tombol untuk memilih Low Medium atau High Tekan tombol MENU untuk kembali ke tampilan normal TV Tekan tombol RETURN untuk kembali ke tampilan menu sebelumnya 1 2 3 4 5 1 3 2 4 MUTE RETURN AV MODE FAV TV INPUT STB POWER Q MENU MENU OK DVD P Picture Mode Colour Temperature Advanced Aspect Ratio Picture Reset Screen Picture DE F G OK RETURN Picture Picture Mode Colour Tem...

Page 74: ...l untuk memilih O On n O Of ff f Tekan tombol M ME EN NU U untuk kembali ke tampilan normal TV Tekan tombol R RE ET TU UR RN N untuk kembali ke tampilan menu sebelumnya 1 2 3 4 5 1 3 2 4 RETURN AV MODE TV INPUT STB POWER Q MENU MENU OK DVD Picture Mode Colour Temperature Advanced Aspect Ratio Picture Reset Screen Picture DE F G OK RETURN Picture Picture Mode Colour Temperature Advanced Aspect Rati...

Page 75: ... memilih Black Level Tekan tombol lalu tekan tombol untuk memilih Low atau High A Low Refleksi layar menjadi lebih gelap A High Refleksi layar menjadi lebih terang Tekan tombol MENU untuk kembali ke tampilan normal TV Tekan tombol RETURN untuk kembali ke tampilan menu sebelumnya 1 2 3 4 5 1 3 2 4 MUTE RETURN AV MODE FAV TV INPUT STB POWER Q MENU MENU OK DVD P Picture Mode Colour Temperature Advanc...

Page 76: ...ombol MENU untuk kembali ke tampilan normal TV Tekan tombol RETURN untuk kembali ke tampilan menu sebelumnya 1 2 3 4 5 1 3 2 4 MUTE RETURN AV MODE FAV TV INPUT STB POWER Q MENU MENU OK DVD P Picture Mode Colour Temperature Advanced Aspect Ratio Picture Reset Screen Picture DE F G OK RETURN Picture Picture Mode Colour Temperature Advanced Aspect Ratio Picture Reset Screen Advanced G DE F G OK RETUR...

Page 77: ...ini untuk penggunaan standar A A H Hi ig gh h Untuk pergerakan gambar yang lebih halus A A O Of ff f Gunakan jika hasil pengaturan High dan Low terjadi gangguan Tekan tombol M ME EN NU U untuk kembali ke tampilan normal TV Tekan tombol R RE ET TU UR RN N untuk kembali ke tampilan menu sebelumnya 1 2 3 4 5 Pada TruMotion kemungkinan terjadi gangguan pada gambar Jika terjadi gangguan atur TruMotion ...

Page 78: ...ali ke tampilan menu sebelumnya Kembali ke pengaturan awal pada pabrik untuk Mode Picture Colour Temperature XD Advanced lanjutan Aspect Ratio 1 3 2 1 2 3 4 MUTE RETURN AV MODE FAV TV INPUT STB POWER Q MENU MENU OK DVD P Picture Mode Colour Temperature Advanced Aspect Ratio Picture Reset Screen Picture DE F G OK RETURN Picture Picture Mode Colour Temperature Advanced Aspect Ratio Picture Reset Scr...

Page 79: ...mbol untuk memilih T Tr ru uM Mo ot ti io on n D De em mo o Tekan tombol untuk memulai T Tr ru uM Mo ot ti io on n D De em mo o Untuk menghentikan T Tr ru uM Mo ot ti io on n D De em mo o tekan tombol M ME EN NU U 1 2 3 4 3 2 Picture Picture Mode Colour Temperature Advanced Aspect Ratio Picture Reset Screen TruMotion Demo TruMotion Demo G DE F G OK RETURN To Start 1 MUTE RETURN AV MODE FAV TV INPU...

Page 80: ...ih sumber yang diinginkan Tekan tombol M ME EN NU U untuk kembali ke tampilan normal TV Tekan tombol R RE ET TU UR RN N untuk kembali ke tampilan menu sebelumnya Untuk mengatur kecerahan LED dan suara pada saat TV dihidupkan 1 2 3 4 RETURN AV MODE TV INPUT STB POWER Q MENU MENU OK DVD 1 3 2 Option Language SIMPLINK Key Lock Power Indicator Factory Reset Power Indicator G DE F G OK RETURN To Set La...

Page 81: ...hindari TV menampilkan gambar terlalu lama White Wash Fungsi ini dapat menghapus gambar permanen pada layar catatan Pada kasus tertentu gambar permanen tidak dapat dihilangkan seluruhnya oleh fungsi ini Orbiter Fungsi ini dapat menghindari terjadinya gambar berbayang Di sarankan untuk tidak membiarkan adanya gambar tetap pada layar Untuk itu atur agar gambar berganti maksimal setiap 2 menit Invers...

Page 82: ...kan tombol untuk memilih level power Tekan tombol MENU untuk kembali ke tampilan normal TV Tekan tombol RETURN untuk kembali ke tampilan menu sebelumnya 1 2 3 4 1 3 2 MUTE RETURN AV MODE FAV TV INPUT STB POWER Q MENU MENU OK DVD P Option Language SIMPLINK Key Lock ISM Method Power Saving Set ID Factory Reset Power Saving G DE F G OK RETURN Level 0 Level 1 Level 2 Level 3 Level 4 Language SIMPLINK ...

Page 83: ...kan tombol lalu tekan tombol untuk memilih Factory Reset Tekan tombol lalu tekan tombol untuk memilih YES atau NO Tekan tombol MENU untuk kembali ke tampilan normal TV Tekan tombol RETURN untuk kembali ke tampilan menu sebelumnya 1 2 3 4 Option Language SIMPLINK Key Lock ISM Method Power Saving Set ID Power Indicator Factory Reset Factory Reset G DE F G OK RETURN Language SIMPLINK Key Lock ISM Met...

Page 84: ...me Tekan tombol lalu tekan tombol untuk memilih On atau Off Tekan tombol MENU untuk kembali ke tampilan normal TV Tekan tombol RETURN untuk kembali ke tampilan menu sebelumnya Auto Volume secara otomatis menjaga level volume yang sama meskipun Anda mengganti program 1 2 3 4 3 2 Audio Sound Mode Auto Volume Balance 0 TV Speaker Audio Out Auto Volume G DE F G OK RETURN Off On DE F G OK RETURN MUTE R...

Page 85: ... memilih menu Audio Tekan tombol lalu tekan tombol untuk memilih Sound Mode Tekan tombol lalu tekan tombol untuk memilih SRS TSXT Clear Voice Standard Music Cinema Sport Game atau User Tekan tombol MENU untuk kembali ke tampilan normal TV Tekan tombol RETURN untuk kembali ke tampilan menu sebelumnya 1 2 3 4 1 3 2 MUTE RETURN AV MODE FAV TV INPUT STB POWER Q MENU MENU OK DVD P Sound Mode Auto Volum...

Page 86: ...ian suara dengan menekan tombol Tekan tombol MENU untuk kembali ke tampilan normal TV Tekan tombol RETURN untuk kembali ke tampilan menu sebelumnya Mengatur kerataan equalizer suara 1 2 3 4 5 6 MUTE RETURN AV MODE FAV TV INPUT STB POWER Q MENU MENU OK DVD P Sound Mode Auto Volume Balance 0 TV Speaker Audio Out Audio Audio Sound Mode Auto Volume Balance 0 TV Speaker Audio Out Sound Mode G DE F G OK...

Page 87: ...milih Balance Tekan tombol lalu tekan tombol untuk pengaturan yang diinginkan Tekan tombol MENU untuk kembali ke tampilan normal TV Tekan tombol RETURN untuk kembali ke tampilan menu sebelumnya 1 2 3 4 1 3 2 MUTE RETURN AV MODE FAV TV INPUT STB POWER Q MENU MENU OK DVD P Sound Mode Auto Volume Balance 0 TV Speaker Audio Out Audio DE F G OK RETURN Audio Sound Mode Auto Volume Balance TV Speaker Aud...

Page 88: ... pada TV Tekan tombol MENU lalu tekan tombol untuk memilih menu Audio Tekan tombol lalu tekan tombol untuk memilih TV Speaker Tekan tombol lalu tekan tombol untuk memilih On atau Off Tekan tombol MENU untuk kembali ke tampilan normal TV Tekan tombol RETURN untuk kembali ke tampilan menu sebelumnya 1 2 3 4 MUTE RETURN AV MODE FAV TV INPUT STB POWER Q MENU MENU OK DVD P Sound Mode Auto Volume Balanc...

Page 89: ...n tombol lalu tekan tombol untuk memilih Monitor Out atau Variable out Tekan tombol MENU untuk kembali ke tampilan normal TV Tekan tombol RETURN untuk kembali ke tampilan menu sebelumnya 1 2 3 4 MUTE RETURN AV MODE FAV TV INPUT STB POWER Q MENU MENU OK DVD P Sound Mode Auto Volume Balance 0 TV Speaker Audio Out Audio DE F G OK RETURN Audio Sound Mode Auto Volume Balance 0 TV Speaker Audio Out Audi...

Page 90: ...atau DUAL I II DUAL I Untuk memilih bahasa utama dari stasiun broadcast pada speaker DUAL II Untuk memilih bahasa kedua dari stasiun broadcast pada speaker DUAL I II Untuk memisahkan bahasa pada masing masing speaker Broadcast Mono Stereo Dual On Screen Display MONO STEREO DUAL I DUAL II DUAL I II Penerimaan Stereo Dual Ketika suatu program dipilih Informasi suara stasiun akan muncul setelah nomor...

Page 91: ...o Multiplex maka TV dapat menerima suara stereo digital kualitas tinggi Output suara dapat dipilih sesuai dengan tipe yang diterima stasiun broadcast Pemilihan Output Suara Speaker Pada mode AV Component RGB dan HDMI Anda dapat memilih output suara untuk loudspeaker kiri dan kanan Pilihlah output suara L R Sinyal audio dari input audio L dikirimkan ke loudspeaker sebelah kiri dan sinyal audio dari...

Page 92: ... TEXT PIP P Menu dapat dimunculkan pada layar dengan bahasa yang diinginkan Pilihlah bahasa Anda Tekan tombol MENU lalu tekan tombol untuk memilih menu Option Tekan tombol lalu tekan tombol untuk memilih Language Tekan tombol lalu tekan tombol untuk memilih bahasa yang diinginkan Tekan tombol OK Tekan tombol MENU untuk kembali ke tampilan normal TV Tekan tombol RETURN untuk kembali ke tampilan men...

Page 93: ...li ke tampilan normal TV Tekan tombol RETURN untuk kembali ke tampilan menu sebelumnya Anda harus mengatur jam dengan benar sebelum menggunakan fungsi waktu hidup mati Jika pengaturan waktu terhapus karena penurunan daya atau karena kabel TV tercabut atur kembali jam 1 2 3 4 5 1 3 4 2 Time Clock Off Time On Time Sleep Timer Auto Sleep Clock G DE F G OK RETURN Clock Off Time On Time Sleep Timer Aut...

Page 94: ...gsi waktu Off secara otomatis akan mematikan TV ke posisi standby pada waktu yang telah ditentukan Dua jam setelah TV dihidupkan dengan fungsi waktu On secara otomatis akan kembali ke mode standby jika tidak ada sembarang tombol yang ditekan Sekali waktu telah diatur maka fungsi ini akan terus bekerja setiap hari pada waktu yang sama Fungsi waktu Off akan menonaktifkan fungsi waktu On jika dimasuk...

Page 95: ...MODE FAV TV INPUT STB POWER Q MENU MENU OK DVD P 1 4 3 2 Tekan tombol MENU lalu tekan tombol untuk memilih menu Time Tekan tombol lalu tekan tombol untuk memilih Sleep Timer Tekan tombol lalu tekan tomboln untuk mengatur menit Tekan tombol MENU untuk kembali ke tampilan normal TV Tekan tombol RETURN untuk kembali ke tampilan menu sebelumnya 1 2 3 4 Time Clock Off Time On Time Sleep Timer Auto Slee...

Page 96: ... lalu tekan tomboln untuk memilih Auto Sleep Tekan tombol lalu tekan tomboln untuk memilih ON OFF Tekan tombol MENU untuk kembali ke tampilan normal TV Tekan tombol RETURN untuk kembali ke tampilan menu sebelumnya 1 1 2 3 4 2 3 MUTE RETURN AV MODE FAV TV INPUT STB POWER Q MENU MENU OK DVD P Time Clock Off Time On Time Sleep Timer Auto Sleep Auto Sleep G DE F G OK RETURN Clock Off Time On Time Slee...

Page 97: ...enekan angka yang salah anda harus melengkapi tiga digit angka lalu tekan lagi tiga angka yang benar Tombol P dapat digunakan untuk memilih nomor halaman sebelum atau sesudahnya SIMPLE TEXT 1 2 Fungsi ini tidak dapat digunakan disemua negara Teletext adalah program yang diberikan oleh kebanyakan stasiun TV yang menayangkan informasi terakhir berupa laporan berita cuaca program acara TV pasar uang ...

Page 98: ...gsi untuk kembali ke pilihan sebelumnya Tombol P dapat digunakan sebagai alternatif A Pemilihan halaman secara langsung Seperti pada mode SIMPLE teletext mode anda dapat memilih nomor halaman dengan memasukkan tiga digit angka dengan menekan tombol ANGKA pada mode TOP 4 1 2 3 FASTEXT Halaman teletext diberi tanda kode warna sepanjang bagian bawah layar TV dan dapat dipilih dengan menekan tombol de...

Page 99: ...pilan sebelumnya A UPDATE Menampilkan program TV sambil menunggu tampilnya halaman teletext yang baru Tampilan TV akan muncul dibagian kiri atas layar Saat halaman teletext yang baru muncul maka tampilan akan berubah menjadi nomor halaman Tekan tombol ini untuk melihat halaman teletext terbaru A REVEAL Tekan tombol ini untuk menampilkan informasi tersembunyi seperti jawaban teka teki atau puzzle T...

Page 100: ...iksa apakah kabel video telah terpasang dengan benar Aktifkan fungsi pada produk untuk mengembalikan kecerahan gambar Periksa adanya gangguan lokal seperti peralatan listrik atau perangkat daya Masalah pada stasiun TV cobalah pindahkan ke stasiun TV lain Sinyal stasiun lemah arahkan antena untuk mendapatkan sinyal yang lebih kuat Periksa kemungkinan adanya gangguan dari sumber lain Periksa antena ...

Page 101: ...il atau hanya muncul satu warna muncul garis belang pada latar gangguan horisontal posisi kurang pas Fungsi audio tidak bekerja Tekan tombol atau atau V Vo ol lu um me e Suara tidak keluar Tekan tombol M MU UT TE E Coba pindah saluran kemungkinan masalah pada sistem siaran Periksa apakah kabel audio telah terpasang dengan benar Atur keseimbangan suara dari speaker pada pilihan menu Perubahan suhu ...

Page 102: ... cairan pelembut atau deterjen pembersih Peras kain lap tersebut hingga kering kemudian bersihkan layar dengan kain lap Pastikan air tidak menempel pada layar biarkan kering terlebih dahulu sebelum Anda menyalakan TV Membersihkan Bingkai Depan TV Jika ingin menghilangkan kotoran atau debu pada bingkai TV gunakan kain yang lembut kering dan bebas bulu Mohon jangan menggunakan kain lap basah Jika An...

Page 103: ...ari 80 20 60 C 4 140 F Kurang dari 85 dengan dudukan tanpa dudukan dengan dudukan tanpa dudukan Dimensi Lebar x Tinggi x Dalam Berat Kebutuhan Daya dengan dudukan tanpa dudukan dengan dudukan tanpa dudukan 1044 4 x 735 4 x 308 0 mm 41 1x 28 9 x 12 1 inci 1044 4 x 680 6 x 79 6 mm 41 1 x 26 7 x 3 1 inci 28 kg 61 7 pon 25 kg 55 1 pon AC100 240V 50 60Hz 1235 6 x 849 3 x 364 1 mm 48 6 x 33 4x 14 3inci ...

Page 104: ...00 240V 50 60Hz 929 x 706 9x 374 7mm 36 6x 27 8 x 14 8 inci 929 x 665x 98 7 mm 36 6x 26 2 x 3 9 inci 18 1 kg 39 9 pon 21 2 kg 46 7 pon AC100 240V 50 60Hz 32LG6 32LG60UR TA 37LG6 37LG60UR TA 1 140 4 x 820 1 x 342 9 mm 44 8 x 32 2 x 13 5 inci 1 140 4 x 764 8 x 129 0 mm 44 8 x 30 1 x 5 0 inci 30 1 kg 66 3 pon 25 4 kg 55 9 pon AC100 240V 50 60Hz 1284 4 x 898 6 x 342 9 mm 50 5 x 35 3 x 13 5 inci 1284 4...

Page 105: ...kontrol Tombol remote kontrol untuk komponen yang diinginkan akan menyala Tekan tombol MENU dan MUTE secara bersamaan remote kontrol siap diprogram sesuai dengan kode yang ada Masukkan nomor kode menggunakan tombol ANGKA pada remote kontrol Nomor nomor kode pemro graman untuk beberapa komponen dapat dilihat pada halaman selanjutnya Jika kode yang dimasukkan benar komponen akan mati Tekan tombol ME...

Page 106: ...38 040 057 058 093 094 095 096 097 098 099 100 122 ELECTRO HOME 089 EUROPLUS 1 14 FUJITSU 017 021 022 027 133 134 GENERAL INSTRUMENT 003 004 016 029 031 059 101 HITACHI 139 140 HOUSTON TRACKER 033 037 039 051 057 104 HUGHES 068 Humax SL 158 JANIEL 060 147 JERROLD 061 KATHREIN 108 LEGEND 057 LG 001 LUTRON 132 LUXOR 062 144 MACOM 010 059 063 064 065 MEMOREX 057 NEXTWAVE 028 124 125 NORSAT 069 070 PA...

Page 107: ... D7 D0 D1 D2 D3 D4 D5 D6 D7 Kode awal Kode biasa rendah Kode biasa tinggi Kode data Kode data Kode ulangan Tf 4 5 ms 9 ms 2 25 ms 9 ms 0 55 ms 0 56 ms 1 12 ms 0 56 ms 2 24 ms Tf Tf Tf 108ms 455KHz Bit 0 Bit 1 1 Cara Menghubungkan A HubungkankabelremotekontrolAndakeportremotekontrolpadaTV 2 Kode kode IR Remote Kontrol A Bentuk sinyal gelombang output Pulsa tunggal termodulasi dengan sinyal 37 917KH...

Page 108: ...ombol R C 02 Tombol R C 03 Tombol R C 00 P Tombol R C 01 P Tombol R C 30 AV MODE Tombol R C 7C Tombol R C 09 MUTE Tombol R C 53 LIST Tombol R C 10 19 Tombol angka 0 9 Tombol R C 1E FAV Tombol R C 1A Q VIEW Tombol R C 20 TEXT Tombol R C B0 SIZE Tombol R C 8F INDEX Tombol R C B1 TIME Tombol R C BD REVEAL Tombol R C 8E HOLD Tombol R C BA UPDATE Tombol R C 7E SIMPLINK Tombol R C B1 A Stop Tombol R C B...

Page 109: ...rminal seri dari perangkat kontrol ke jack RS 232C yang berada di panel belakang TV Kabel koneksi RS 232C tidak disediakan bersama paket TV AUDIO RGB DVI RGB PC RGB IN RS 232C IN CONTROL HDMI IN HDMI DVI IN HDMI DVI IN Jenis Konektor D Sub 9 Pin No Nama Pin 1 Tidak ada koneksi 2 RXD Data terima 3 TXD Data Transmisi 4 DTR Sisi DTE siap 5 GND 6 DSR Sisi DCE siap 7 RTS Siap untuk dikirim 8 CTS Aman u...

Page 110: ...ilang bolak balik Tekan tombol MENU lalu gunakan tombole untuk memilih menu OPTION Tekan tombol lalu gunakan tombole untuk memilih Set ID Tekan tombol lalu gunakan tombole untuk mengatur Set ID untuk memilih nomor ID TV Rentang pengaturan SET ID adalah 1 99 Tekan tombol MENU untuk kembali ke tampilan normal TV Tekan tombol RETURN untuk kembali ke tampilan menu sebelumnya Gunakan fungsi ini untuk m...

Page 111: ... non aktif atau kesalahan komunikasi Perintah 2 sebagai perintah Set ID untuk karakter kecil jika set ID 1 0 TV akan mengirim 0 a Data untuk karakter kecil jika data 0xab TV akan mengirim a b NG untuk karakter besar Perintah 1 Perintah 2 Set ID Data Cr Perintah 2 Set ID OK Data x Perintah 2 Set ID NG Data x PERINTAH 1 PERINTAH 2 DATA Hexadesimal PERINTAH 1 PERINTAH 2 15 Keseimbangan k t 00 64 16 S...

Page 112: ...OK NG Data x 04 Mute Volume Perintah k e Untuk mengaktifkan mematikan mute volume Anda juga dapat mengaturnya menggunakan tombol MUTE pada remote kontrol Data 00 Mute volume aktif Volume mati Data 01 Mute volume mati Volume aktif Transmisi k e Set ID Data Cr Pernyataan e Set ID OK NG Data x 05 Kontrol Volume Perintah k f Untuk mengatur volume suara Anda juga dapat mengatur volume dengan meng gunak...

Page 113: ...tah k t Untuk mengatur Keseimbangan Anda juga dapat mengaturnya pada menu Audio Data Min 00 Maks 64 Lihat Pemetaan data riil 1 halaman 112 Transmisi k t Set ID Data Cr Pernyataan t Set ID OK NG Data x 10 Ketajaman perintah k k Untuk mengatur ketajaman warna pada layar Anda juga dapat mengaturnya pada menu Picture Data Min 00 Maks 64 Lihat Pemetaan data riil 1 halaman 112 Transmisi k k Set ID Data ...

Page 114: ... ID OK NG Data x 23 Konfigurasi Otomatis Perintah j u Untuk mengatur posisi gambar dan mengurangi bayangan Hanya bekerja pada mode RGB PC Data 01 Untuk pengaturan Transmisi j u Set ID Data Cr Pernyataan u Set ID OK NG Data x Pemetaan data riil 1 00 Langkah 0 A Langkah 10 F Langkah 15 10 Langkah 16 64 Langkah 100 6E Langkah 1 10 73 Langkah 1 15 74 Langkah 1 16 C7 Langkah199 FE Langkah 254 FF Langka...

Page 115: ...bar utama Untuk memilih sumber input TV Data Struktur Transmisi x b Set ID Data Cr Nomor Input Data 0 0 0 0 Input1 0 0 1 1 Input4 0 0 1 0 Input3 0 0 0 1 Input2 25 Tune Command Perintah m a Mengubah Program mengikuti nomor Fisik mayor minor Data 0 Min 00H Maks 63H Dihantarkan dengan kode Hexadesimal Data 1 Abaikan Data 2 0 Utama 1 Sub Transmisi m a Set ID Data0 Data1 Data2 Cr Pernyataan a Set ID OK...

Page 116: ......

Page 117: ...PLASMA TV MODELS 50PG3 42PG6 50PG6 60PG6 50PG7 60PG7 Please read this manual carefully before operating your set Retain it for future reference Record model number and serial number of the set Refer to the label on the back cover and quote this information To your dealer when requiring service ENGLISH ...

Page 118: ......

Page 119: ...T TV V m mo od de el ls s Cable management clip Refer to p 15 P PL LA AS SM MA A T TV V m mo od de el ls s only 50 60PG6 50 60PG7 Protection cover Refer to p 12 32LG6 3EA 37LG6 4EA only 32 37LG6 4EA 2EA only 42LG6 4EA 1EA bolts for stand assembly Refer to p 11 4 bolts for stand assembly Refer to p 10 only 42PG6 only 50PG3 or 42PG6 1EA 50PG3 2EA only Cable management clip protection cover Refer to ...

Page 120: ...Adjustment 42 Auto Programme Tuning 43 Manual Programme Tuning 44 Fine Tuning 45 Assigning a Station Name 46 Booster 47 Programme Edit 48 PICTURE CONTROL WATCHING TV PROGRAMME CONTROL A AC CC CE ES SS SO OR RI IE ES S 1 Front Panel Controls 4 Back Panel Information 7 Attaching the TV to a desk 9 Stand Installation 10 Back Cover for Wire Arrangement 13 Please set it up carefully so the product does...

Page 121: ...ption 89 Speaker Sound Output Selection 89 On Screen Menu Language Selection 90 APPENDIX Troubleshooting 98 Maintenance 100 Product Specifications 101 Programming the Remote Control 103 IR Codes 105 External Control Through RS 232C 107 TIME SETTING Clock Setup 91 Auto On Off Timer Setting 92 Sleep Timer Setting 93 Auto Shut off Setting 94 TELETEXT Switch On Off 95 SIMPLE Text 95 TOP Text 96 FASTEX...

Page 122: ...hing cloth Plasma TV Models OK MENU INPUT P OK MENU INPUT P Remote Control Sensor POWER Power Standby Indicator illuminates red in standby mode illuminates green when the TV is switched on PROGRAMME VOLUME MENU OK INPUT OK OK MENU MENU INPUT INPUT P Swivel Stand This feature is not available for all models After installing the TV you can adjust the TV set manually to the left or right direction by...

Page 123: ... White when the TV is switched on Note You can adjust Power Indicator in the Option menu POWER Power Standby Indicator illuminates red in standby mode illuminates blue when the TV is switched on Note You can adjust P Po ow we er r I In nd di ic ca at to or r in the Option menu P MENU INPUT OK PROGRAMME VOLUME OK MENU INPUT Intelligent Sensor Adjusts picture according to the surrounding conditions ...

Page 124: ...er Standby Indicator illuminates red in standby mode illuminates blue when the TV is switched on Note You can adjust P Po ow we er r I In nd di ic ca at to or r in the Option menu 32 42LG8 PROGRAMME VOLUME MENU OK INPUT POWER OK MENU INPUT P ...

Page 125: ...er to your surround sound system Component Input Connect a component video audio device to these jacks Antenna Input Connect RF antenna to this jack Power Cord Socket This TV operates on an AC power The voltage is indicated on the Specifications page Never attempt to operate the TV on DC power RS 232C Input CONTROL Port Connect the serial port of the control devices to the RS 232C jack This featur...

Page 126: ...MONO R AUDIO AUDIO AV VIDEO VIDEO IN 1 OUT VARIABLE VARIABLE AUDIO OUT AUDIO OUT ANTENNA IN 2 1 5 6 3 4 42 47 52LG7 32 37 42 47LG6 7 7 USB Input HDMI Input Connect a HDMI signal to HDMI IN S Video Input Connect S Video out from an S VIDEO device Audio Video Input Connect audio video output from an external device to these jacks PREPARATION HDMI IN HDMI DVI IN 1 2 ANTENNA IN 1 2 VIDEO AUDIO RGB PC ...

Page 127: ...ponent Input Connect a component video audio device to these jacks Antenna Input Connect RF antenna to this jack Power Cord Socket This TV operates on an AC power The voltage is indicated on the Specifications page Never attempt to operate the TV on DC power 1 2 3 4 5 6 7 ATTACHING THE TV TO A DESK Only 32LG8 The TV must be attached to desk so it cannot be pulled in a forward backward direction po...

Page 128: ... the desk type stand check whether the bolt is fully tightened If not tightened fully the product can tilt forward after the product installation If you tighten the bolt with excessive force the bolt can deviate from abrasion of the tightening part of the bolt Plasma TV models Not Using the Desk type Stand When installing the wall mounted unit use the protection cover for desk type stand installat...

Page 129: ...en from damage 2 Assemble the parts of the S St ta an nd d B Bo od dy y with C Co ov ve er r B Ba as se e of the TV Assemble the TV as shown Fix the 4 bolts securely using the holes in the back of the TV Stand Body Cover Base 32LG6 37LG6 Stand Body Cover Base 42LG6 Stand Body Cover Base only 32 37 42LG6 ...

Page 130: ...ecurely using the holes in the back of the TV Stand Body Cover Base only 42LG7 32 42LG8 Not Using the Desk type Stand When installing the wall mounted unit use the protection cover for desk type stand installation After removing the protection paper from the protection cover adhere it to the TV as shown Image shown may differ from your TV Insert the P PR RO OT TE EC CT TI IO ON N C CO OV VE ER R i...

Page 131: ...ed you may be injured or the TV may be damaged How to remove the cable management clip Image shown may differ from your TV CABLE MANAGEMENT CLIP Connect the cables as necessary To connect additional equipment see the E Ex xt te er rn na al l E Eq qu ui ip pm me en nt t S Se et tu up p section 1 Install the C CA AB BL LE E M MA AN NA AG GE EM ME EN NT T C CL LI IP P as shown 2 CABLE MANAGEMENT CLIP...

Page 132: ... section Install the CABLE MANAGEMENT CLIP as shown If your TV has the CABLE HOLDER install it as shown and bundle the cables 1 2 NOTE G G Do not use the CABLE MANAGEMENT CLIP to lift the TV If the TV is dropped you may be injured or the TV may be damaged Hold the C CA AB BL LE E M MA AN NA AG GE EM ME EN NT T C CL LI IP P with both hands and pull it upward 50PG3 CABLE MANAGEMENT CLIP CABLE HOLDER...

Page 133: ...n the C CA AB BL LE E M MA AN NA AG GE EM ME EN NT T C CL LI IP P as shown Note This cable management can be broken by excessive pressure Connect the cables as necessary To connect additional equipment see the External Equipment Setup section of the manual 1 Open the C CA AB BL LE E M MA AN NA AG GE EM ME EN NT T C CL LI IP P as shown and manage the cables 2 CABLE MANAGEMENT CLIP Fit the C CA AB B...

Page 134: ...hildren do not climb or hang from the TV NOTE G When moving the TV undo the cords first G Use a platform or cabinet string and large enough to support the size and weight of the TV G To use the TV safely make sure that the height of the bracket on the wall and on the TV is the same 3 1 2 Use the eye bolts or TV brackets bolts to fix the product to the wall as shown in the picture If your TV has bo...

Page 135: ...G Ensure that you connect the earth wire to prevent possi ble electric shock If grounding methods are not possible have a qualified electrician install a separate circuit breaker Do not try to earth the TV by connecting it to telephone wires lightening rods or gas pipes WALL MOUNT HORIZONTAL INSTALLATION For adequate ventilation allow a clearance of 4 10cm all around the TV We recommend that you u...

Page 136: ...tdoor antenna Outdoor Antenna Wall Antenna Socket RF Coaxial Wire 75 ohm Antenna UHF VHF In poor signal areas to achieve better picture quality it may be necessary to install a signal amplifier to the antenna as shown above If signal needs to be split for two TVs use an antenna signal splitter for connection To prevent damage do not connect to the mains outlet until all connections are made betwee...

Page 137: ...efer to the owner s manual for the digital set top box Select C Co om mp po on ne en nt t1 1 input source using the I IN NP PU UT T button on the remote control If connected to C CO OM MP PO ON NE EN NT T I IN N 2 2 select C Co om mp po on ne en nt t2 2 input source 2 3 4 1 To avoid damaging any equipment never plug in any power cords until you have finished connecting all equipment This section o...

Page 138: ... 32 37LG6 32 42LG8 input source using the I IN NP PU UT T button on the remote control Turn on the digital set top box Refer to the owner s manual for the digital set top box 2 3 1 G G TV can receive the video and audio signal simultaneously with using a HDMI cable G G If the digital set top box supports Auto HDMI function the output resolution of the source device will be automatically TV to 1280...

Page 139: ...IO O R RG GB B D DV VI I jack on the TV Turn on the digital set top box Refer to the owner s manual for the digital set top box Select H HD DM MI I1 1 D DV VI I input source using the I IN NP PU UT T button on the remote control 2 3 4 1 Connecting with a HDMI to DVI cable G G HDMI2 HDMI3 except 32 37LG6 32 42LG8 source does not support DVI source G G If the set top box has a DVI output and no HDMI...

Page 140: ...B B Y Cb Pb PR R Y Cr Pr Connect the video outputs Y PB PR of the DVD to the C CO OM MP PO ON NE EN NT T I IN N V VI ID DE EO O jacks on the TV Connect the audio outputs of the DVD to the C CO OM MP PO ON NE EN NT T I IN N A AU UD DI IO O jacks on the TV Turn on the DVD player insert a DVD Select C Co om mp po on ne en nt t1 1 input source using the I IN NP PU UT T button on the remote control If ...

Page 141: ...puts of the DVD to the A AU UD DI IO O input jacks on the TV Turn on the DVD player insert a DVD Select A AV V2 2 input source using the I IN NP PU UT T button on the remote control Refer to the DVD player s manual for operating instructions 2 3 4 5 1 HDMI IN VI IN HDMI IN DVI IN 2 HDMI IN HDMI DVI IN AV IN 2 3 L R S VIDEO VIDEO OUTPUT SWITCH ANT IN ANT OUT 1 2 ...

Page 142: ...I3 3 except 32 37LG6 32 42LG8 input source using the I IN NP PU UT T button on the remote control Refer to the DVD player s manual for operating instructions 1 G G The TV can receive video and audio signals simultaneously when using a HDMI cable G G If the DVD player supports Auto HDMI function the output resolu tion of the source device will be automatically TV to 1280x720p G G If the DVD player ...

Page 143: ...R and TV Typically a frozen still picture from a VCR If 4 3 picture format is used for an extended period the fixed images on the sides of the screen may remain visible Connect the A AN NT T O OU UT T socket of the VCR to the A AN NT TE EN NN NA A I IN N socket on the TV Connect the antenna cable to the A AN NT T I IN N socket of the VCR Press the P PL LA AY Y button on the VCR and match the appro...

Page 144: ...ck colours Video yellow Audio Left white and Audio Right red Insert a video tape into the VCR and press PLAY on the VCR Refer to the VCR owner s manual Select A AV V1 1 input source using the I IN NP PU UT T button on the remote control If connected to A AV V I IN N 2 2 select A AV V2 2 input source 1 2 3 G G If you have a mono VCR connect the audio cable from the VCR to the A AU UD DI IO O L L M ...

Page 145: ...deo cable Connect the S VIDEO output of the VCR to the S S V VI ID DE EO O input on the TV The picture quality is improved compared to normal composite RCA cable input Connect the audio outputs of the VCR to the A AU UD DI IO O input jacks on the TV Insert a video tape into the VCR and press PLAY on the VCR Refer to the VCR owner s manual Select A AV V2 2 input source using the I IN NP PU UT T but...

Page 146: ... EO O jacks between TV and external equipment Match the jack colours Video yellow Audio Left white and Audio Right red Select A AV V2 2 input source using the I IN NP PU UT T button on the remote control If connected to A AV V I IN N 1 1 select A AV V1 1 input source Operate the corresponding external equipment Refer to external equipment operating guide 1 2 3 ...

Page 147: ... bl le e O Ou ut t in A Au ud di io o menu to connect the V VA AR RI IA AB BL LE E A AU UD DI IO O O OU UT T jacks G G p p 8 87 7 NOTE Use to connected either an external amplifier or add a sub woofer to your surround sound system Connect the input jack of the stereo amplifier to the V VA AR RI IA AB BL LE E A AU UD DI IO O O OU UT T jacks on the TV Set up your speakers through your analog stereo ...

Page 148: ... IN HDMI DVI IN L MONO R AUDIO AV VIDEO OUT VARIABLE AUDIO OUT L R S VIDEO VIDEO Connect the second TV or monitor to the TV s A AV V O OU UT T jacks See the Operating Manual of the second TV or monitor for further details regarding that device s input settings G G Component RGB HDMI input sources cannot be used for AV out G G We recommend to use the AV OUT jacks for VCR recording NOTE 2 1 1 ...

Page 149: ... Plug and Play capability meaning that the PC adjusts automatically to the TV s settings Connecting with a D sub 15 pin cable Connect the RGB output of the PC to the R RG GB B P PC C jack on the TV Connect the PC audio output to the A AU UD DI IO O R RG GB B D DV VI I jack on the TV Turn on the PC and the TV Select R RG GB B P PC C input source using the I IN NP PU UT T button on the remote contro...

Page 150: ... resolu tion or change the refresh rate to another rate or adjust the brightness and contrast on the menu until the picture is clear If the refresh rate of the PC graphic card can not be changed change the PC graphic card or consult the man ufacturer of the PC graphic card G G The synchronization input waveform for Horizontal and Vertical frequencies are separate G G If the resolution of PC is ove...

Page 151: ...9 87 47 720 59 799 47 7 60 63 668 59 895 66 587 59 934 Only 50 60PG6 Only 50 60PG7 50PG3 Plasma TV models Resolution 720x480 720x576 1280x720 1920x1080i 1920x1080p HDMI DTV mode Horizontal Vertical Frequency kHz Frequency Hz 31 47 59 94 31 50 60 00 31 25 50 00 44 96 59 94 45 00 60 00 37 50 50 00 33 72 59 94 33 75 60 00 28 125 50 00 67 432 59 94 67 5 60 56 250 50 27 24 33 75 30 Resolution 640x350 7...

Page 152: ... RN N button to move to the previous menu screen Automatically adjusts picture position and minimizes image instability After adjustment if the image is still not correct your TV is functioning properly but needs further adjustment A Au ut to o c co on nf fi ig gu ur re e This function is for automatic adjustment of the screen position clock and phase The displayed image will be unstable for a few...

Page 153: ...u Press the button and then use button to select S Sc cr re ee en n Press the button and then use button to select M Ma an nu ua al l C Co on nf fi ig g Press the button and then use button to select P Ph ha as se e C Cl lo oc ck k H H P Po os si it ti io on n or V V P Po os si it ti io on n Press the button to make appropriate adjustments Press the M ME EN NU U button to return to normal TV viewi...

Page 154: ...the desired XGA resolution Press the M ME EN NU U button to return to normal TV viewing Press the R RE ET TU UR RN N button to move to the previous menu screen Selecting XGA mode except 42PG6 1 2 3 4 5 EXTERNAL EQUIPMENT SETUP MUTE RETURN AV MODE FAV TV INPUT STB POWER Q MENU MENU OK DVD P 1 3 4 Picture Mode Colour Temperature Advanced Aspect Ratio Picture Reset Screen Picture Screen Auto config M...

Page 155: ... EN NU U button to return to normal TV viewing Press the R RE ET TU UR RN N button to move to the previous menu screen 1 2 3 4 5 Initializing Reset to original factory settings MUTE RETURN AV MODE FAV TV INPUT STB POWER Q MENU MENU OK DVD P 1 3 4 Picture Mode Colour Temperature Advanced Aspect Ratio Picture Reset Screen Picture Screen Auto config Manual Config XGA Mode Reset Reset G DE F G OK RETU...

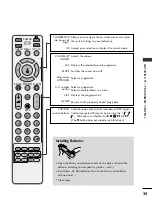
Page 156: ...he desired quick menu source Selects a menu Clears all on screen displays and returns to TV viewing from any menu See a list of AV devices connected to TV When you toggle this button the Simplink menu appears at the screen RETURN AV MODE Allows the user to move return one step in an interac tive application or other user interaction function Enter to the mode It helps you select and set images and...

Page 157: ... the previously viewed programme Installing Batteries Open the battery compartment cover on the back and install the batteries matching correct polarity with with Install two 1 5V AAA batteries Do not mix old or used batteries with new ones Close cover VCR DVD control buttons Controls some video cassette recorders or DVD players Control connected AV devices by pressing the OK buttons and buttons f...

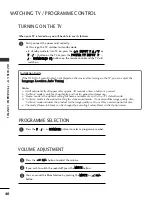
Page 158: ...l switch on 1 VOLUME ADJUSTMENT Press the P P or N NU UM MB BE ER R buttons to select a programme number 2 3 1 1 Installation Guide Note a It will automatically disappear after approx 40 seconds unless a button is pressed b In Store mode is only for shop display and not for general customer use c Home mode is the optimal setting for home environments and is the TV s default mode d In Store mode is...

Page 159: ...e Selects your desired Picture Mode S So ou un nd d M Mo od de e It is a feature to automatically set the sound combination which it deems the best for the images being watched Selects your desired Sound Mode M Mu ullt tii A Au ud diio o Selects the sound output P Pr ro og gr ra am mm me e E Ed diit t Adjusts the stored programmes by delete copy move or skip S Slle ee ep p T Tiim me er r Selects t...

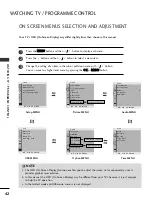
Page 160: ... OSD On Screen Display may be different from your TV s because it is just example to help the TV operation c In the teletext mode and USB mode menus are not displayed Setup MENU Picture MENU Audio MENU Time MENU Option MENU 1 2 3 Language SIMPLINK Key Lock ISM Method Power Saving Set ID Power Indicator Factory Reset Option Clock Off Time On Time Sleep Timer Auto Sleep Time Auto Tuning Manual Tunin...

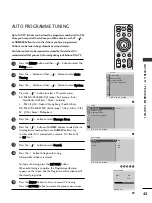
Page 161: ...l receivable stations are stored To stop auto tuning press the R RE ET TU UR RN N button When auto tuning is complete the Programme edit menu appears on the screen See the Programme edit section to edit the stored programme Press the M ME EN NU U button to return to normal TV viewing Press the R RE ET TU UR RN N button to move to the previous menu screen 1 2 3 4 5 6 7 8 9 Up to 100 TV stations can...

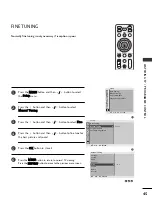
Page 162: ...nn ne el l You can select the desired programme number with the button or NUMBER buttons If possible select the programme number directly with the number buttons Any number under 10 is entered with a numeric 0 in front of it i e 0 05 5 for 5 Press the button to select S Se ea ar rc ch h Press the button to commence searching If a station is found the search will stop Press the O OK K button to sto...

Page 163: ...ress the M ME EN NU U button to return to normal TV viewing Press the R RE ET TU UR RN N button to move to the previous menu screen 1 2 3 4 5 6 Normally fine tuning is only necessary if reception is poor 3 4 5 MUTE RETURN AV MODE FAV TV INPUT STB POWER Q MENU MENU OK DVD P 1 2 Setup Auto Tuning Manual Tuning Programme Edit Favourite Programme To Set Manual Tuning G DE F G OK RETURN Auto Tuning Man...

Page 164: ...abet A A to Z Z Press the button to select the position and make your choice of the second character and so on Press the O OK K button to store it Press the M ME EN NU U button to return to normal TV viewing Press the R RE ET TU UR RN N button to move to the previous menu screen 1 2 3 4 5 6 7 3 4 5 6 MUTE RETURN AV MODE FAV TV INPUT STB POWER Q MENU MENU OK DVD P 1 2 Setup Auto Tuning Manual Tunin...

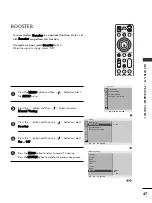
Page 165: ...en use button to select B Bo oo os st te er r Press the button and then use button to select O On n or O Of ff f Press the M ME EN NU U button to return to normal TV viewing Press the R RE ET TU UR RN N button to move to the previous menu screen 1 2 3 4 5 MUTE RETURN AV MODE FAV TV INPUT STB POWER Q MENU MENU OK 1 2 3 4 5 6 DVD P 3 4 1 2 Setup Auto Tuning Manual Tuning Programme Edit Favourite Pro...

Page 166: ...amme to the desired programme number with the button 4 Press the YELLOW button again to release this function A A S Sk ki ip pp pi in ng g a a p pr ro og gr ra am mm me e n nu um mb be er r 1 Select a programme number to be skipped with the button 2 Press the BLUE button The skipped programme turns to blue 3 Press the BLUE button again to release the skipped programme When a programme number is sk...

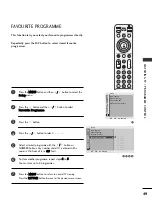
Page 167: ...umber under 10 is entered with a numeric 0 in front of it i e 0 05 5 for 5 To store another programme repeat steps 4 4 to 5 5 You can store up to 8 programmes Press the M ME EN NU U button to return to normal TV viewing Press the R RE ET TU UR RN N button to move to the previous menu screen This function lets you select your favourite programmes directly Repeatedly press the FAV button to select s...

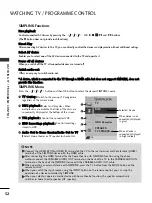
Page 168: ...r ro og gr ra am mm me e i in n t th he e p pr ro og gr ra am mm me e l li is st t Select a programme with the button Then press the O OK K button The TV switches to the chosen programme number A A P Pa ag gi in ng g t th hr ro ou ug gh h a a p pr ro og gr ra am mm me e l li is st t There are 10 programme table pages in which contain 100 pro grammes Pressing the button repeatedly turns the pages P...

Page 169: ...cables and settings If you do not require the SIMPLINK menu select Off Press the M ME EN NU U button and then button to select the O Op pt ti io on n menu Press the button and then button to select S SI IM MP PL LI IN NK K Press the button and then button to select O On n or O Of ff f Press the M ME EN NU U button to return to normal TV viewing Press the R RE ET TU UR RN N button to move to the pr...

Page 170: ... ct t A AV V d de ev vi ic ce e Enables you to select one of the AV devices connected to the TV and operate it P Po ow we er r o of ff f a al ll l d de ev vi ic ce es s When you switch off the TV all connected devices are turned off S Sw wi it tc ch h a au ud di io o o ou ut t Offers an easy way to switch audio out A A d de ev viic ce e w wh hiic ch h iis s c co on nn ne ec ct te ed d t to o t th ...

Page 171: ... to control it This feature can be used to prevent unauthorized viewing This TV is programmed to remember which option it was last set to even if you turn the TV off Press the M ME EN NU U button and then button to select the O Op pt ti io on n menu Press the button and then button to select K Ke ey y L Lo oc ck k Press the button and then button to select O On n or O Of ff f Press the M ME EN NU ...

Page 172: ...ton repeatedly to select the desired source If you select Cinema Mode in AV mode Cinema mode will be selected both for Picture Mode and Sound Mode in PICTURE menu and AUDIO menu respectively If you select Off in AV mode the picture and image which you initially set will be selected Press the R RE ET TU UR RN N button to return to normal TV viewing 1 2 MUTE RETURN AV MODE FAV TV INPUT STB POWER Q M...

Page 173: ...with the Windows operating system In case of a storage device formatted as a different utility programme which is not supported by Windows it may not be recognized G G Please connect power to a USB storage device which requires an external power supply If not the device may not be recognized G G Please connect a USB storage device with cable is offered by USB maker If connected with cable is not o...

Page 174: ... change the settings to display photos stored on a USB device on a full sized screen Detailed operations are available on full sized photo view screen The aspect ratio of a photo may change the size of the photo displayed on the screen in full size 1 17 90 Hide Prev Next Stop 90 R Ro ot ta at te e Rotate photos Display the previous photo viewing Display the next photo viewing Stop the viewing the ...

Page 175: ...STOP button 1 2 3 P RETURN Photo List OK Move Move Page Exit 1366x768 1 1 Preview JMJ003 List Up Folder KY102 JMJ001 JMJ002 JMJ003 4 Viewing the Slide show Hide Stop Stop the viewing the slide show Hide the menu on the full sized screen To see the menu again on the full sized screen press OK button Stop Hide P RETURN Photo List OK Move Move Page Exit 1366x768 1 1 Preview JMJ003 List Up Folder KY10...

Page 176: ... 2 3 RETURN FAV P Music List Program List G G 00 00 34 Up Folder KY104 KY108 JMJ009 OK Edit Move Page Exit Delete All a If you want to listen to music use the button to select music b Press the O OK K button to play the music c All music in selected folder is played repeatedly a If you want to listen to several music in sequence use the button to select music b Press FAV button and then use O OK K...

Page 177: ...nternet Our company has no right to quarantee such permission Permission should always be sought from the copyright owner When loading some buttons may not work MP3 files are supported as follows Sampling Frequency 32 48kHz Bit rate 32 320kbps If you don t press any button for a while during the playing the play information box as shown in the below will float as a screen saver The Screen Saver Sc...

Page 178: ...s detected It is used when playing movie files on TV Displays the movies in the USB folder and supports Play Allows playback of all movies in the folder and user desired files Editing such as delete and add is not allowed It is a movie list that displays folder information and Divx file Screen Components Moves to upper level file Corresponding buttons on the remote control 1 2 1 2 ...

Page 179: ...r down during movie play S Sy yn nc c Adjusts the time synchronisation of the subtitle from 5 secs 5 secs by steps of 1 secs during movie play A AR RC C Adjusts the picture formats 4 3 or 16 9 To see the menu again on the full sized screen press OK button ON OFF Control Language Position Sync ARC D D To Set Hide NOTE If you do not press any button for 10 minutes during Pause state it will be stopp...

Page 180: ...utton to start D Di iv vX X R Re eg g C Co od de e Press the R RE ET TU UR RN N button to return to normal TV viewing Official DivX Certified Product Plays all versions of DivX video including DivX 6 with standard playback of DivX media files DivX Certified products DivX DivX Certified and associated logos are trademarks of DivX Inc and are used under license 1 2 3 4 DivX Registration Code xxxxxxx...

Page 181: ...iew 2 different inputs sources on your TV screen at the same time One source will be large and the other source will show a smaller inset image PIP function is available in the Component RGB HDMI mode For FHD models it can support TV AV1 AV2 mode Programme Selection for Sub Picture Press the P PI IP P button and then press the button to select a programme for the sub picture The selected programme...

Page 182: ...you to adjust the picture horizontally in linear proportion to fill the entire screen useful for viewing 4 3 formatted DVDs O Or riig giin na all When your TV receives a wide screen signal it will automatically change to the picture for mat to be broadcast 4 4 3 3 The following selection will allow you to view a picture with an original 4 3 aspect ration grey bars will appear on both the left and ...

Page 183: ... be altered both horizontally extended and vertically cropped The picture adopting a compromise between alteration and screen converage J Ju us st t S Sc ca an n Following Selection will lead to you view the picture of best quality without loss of original picture in high resolution image Zoom1 DE Zoom2 DE NOTE G G You can only select 4 4 3 3 1 16 6 9 9 Wide in Component HDMI RGB PC mode G G In HD...

Page 184: ...1 Picture Mode Colour Temperature Advanced Aspect Ratio Picture Reset Screen Picture 3 2 Picture Picture Mode Colour Temperature Advanced Aspect Ratio Picture Reset Screen Picture Mode G DE F G OK RETURN Intelligent Sensor Vivid Standard Cinema Sport Game User1 User2 DE F G OK RETURN MUTE RETURN AV MODE FAV TV INPUT STB POWER Q MENU MENU OK DVD P Picture Mode adjusts the TV for the best picture ap...

Page 185: ... ol lo ou ur r T Te em mp pe er ra at tu ur re e Press the button and then button to select either C Co oo ol l M Me ed di iu um m W Wa ar rm m or U Us se er r Press the M ME EN NU U button to return to normal TV viewing Press the R RE ET TU UR RN N button to move to the previous menu screen 1 2 3 4 Auto Colour Tone Control Cool Medium Warm 1 3 2 MUTE RETURN AV MODE FAV TV INPUT STB POWER Q MENU M...

Page 186: ...ss of LCD panel C Co on nt tr ra as st t Adjusts the difference between light and dark levels in the picture B Br ri ig gh ht tn ne es ss s Increases or decreases the amount of white in the picture C Co ol lo ou ur r Adjusts intensity of all colours S Sh ha ar rp pn ne es ss s Adjusts the level of crispness in the edges between the light and dark areas of the picture The lower the level the softer...

Page 187: ...hen button to select R Re ed d G Gr re ee en n or B Bl lu ue e Press the button to make appropriate adjustments Press the M ME EN NU U button to return to normal TV viewing Press the R RE ET TU UR RN N button to move to the previous menu screen 1 2 3 4 5 6 1 3 2 5 4 MUTE RETURN AV MODE FAV TV INPUT STB POWER Q MENU MENU OK DVD P Picture Mode Colour Temperature Advanced Aspect Ratio Picture Reset S...

Page 188: ...ME EN NU U button to return to normal TV viewing Press the R RE ET TU UR RN N button to move to the previous menu screen XD is LG electronic s unique picture improving technology to display a real HD source through an advanced digital signal processing algorithm It is not possible to use this function in RGB PC mode A A X XD D C Co on nt tr ra as st t Optimises the contract automatically according...

Page 189: ...the button and then button to select L Lo ow w M Me ed di iu um m or H Hi ig gh h Press the M ME EN NU U button to return to normal TV viewing Press the R RE ET TU UR RN N button to move to the previous menu screen 1 2 3 4 5 1 3 2 4 MUTE RETURN AV MODE FAV TV INPUT STB POWER Q MENU MENU OK DVD P Picture Mode Colour Temperature Advanced Aspect Ratio Picture Reset Screen Picture DE F G OK RETURN Pic...

Page 190: ... select O On n or O Of ff f Press the M ME EN NU U button to return to normal TV viewing Press the R RE ET TU UR RN N button to move to the previous menu screen 1 2 3 4 5 1 3 2 4 RETURN AV MODE TV INPUT STB POWER Q MENU MENU OK DVD Picture Mode Colour Temperature Advanced Aspect Ratio Picture Reset Screen Picture DE F G OK RETURN Picture Picture Mode Colour Temperature Advanced Aspect Ratio Pictur...

Page 191: ...ck k L Le ev ve el l Press the button and then button to select L Lo ow w or H Hi ig gh h A A L Lo ow w The reflection of the screen gets darker A A H Hi ig gh h The reflection of the screen gets brighter Press the M ME EN NU U button to return to normal TV viewing Press the R RE ET TU UR RN N button to move to the previous menu screen 1 2 3 4 5 1 3 2 4 MUTE RETURN AV MODE FAV TV INPUT STB POWER Q...

Page 192: ...n button to select E Ey ye e C Ca ar re e Press the button and then button to select O On n or O Of ff f Press the M ME EN NU U button to return to normal TV viewing Press the R RE ET TU UR RN N button to move to the previous menu screen 1 2 3 4 5 1 3 2 4 MUTE RETURN AV MODE FAV TV INPUT STB POWER Q MENU MENU OK DVD P Picture Mode Colour Temperature Advanced Aspect Ratio Picture Reset Screen Pictu...

Page 193: ...ting for standard use A A H Hi ig gh h Provides smoother picture movement A A O Of ff f Use this setting when High and Low setting result in noise Press the M ME EN NU U button to return to normal TV viewing Press the R RE ET TU UR RN N button to move to the previous menu screen 1 2 3 4 5 If you enable TruMotion noise may appear on the screen If this occurs set TruMotion to Off 4 Gamma Real Cinema...

Page 194: ... return to normal TV viewing Press the R RE ET TU UR RN N button to move to the previous menu screen Returns to the default factory setting for Picture Mode Colour Temperature XD Advanced Aspect Ratio 1 2 3 4 1 3 2 MUTE RETURN AV MODE FAV TV INPUT STB POWER Q MENU MENU OK DVD P Picture Mode Colour Temperature Advanced Aspect Ratio Picture Reset Screen Picture DE F G OK RETURN Picture Picture Mode ...

Page 195: ...tton and then button to select T Tr ru uM Mo ot ti io on n D De em mo o Press the button to begin T Tr ru uM Mo ot ti io on n D De em mo o To stop T Tr ru uM Mo ot ti io on n D De em mo o press the M ME EN NU U button 1 2 3 4 3 2 Picture Picture Mode Colour Temperature Advanced Aspect Ratio Picture Reset Screen TruMotion Demo TruMotion Demo G DE F G OK RETURN To Start 1 MUTE RETURN AV MODE FAV TV ...

Page 196: ...red Source Press the M ME EN NU U button to return to normal TV viewing Press the R RE ET TU UR RN N button to move to the previous menu screen It helps you adjust the brightness of moving LED and sound when power is turned on 1 2 3 4 RETURN AV MODE TV INPUT STB POWER Q MENU MENU OK DVD 1 3 2 Option Language SIMPLINK Key Lock Power Indicator Factory Reset Power Indicator G DE F G OK RETURN To Set ...

Page 197: ...ange the image Avoid allowing a fixed image to remain on the screen for prolonged periods W Wh hi it te e W Wa as sh h White wash removes permanent images from the screen Note An excessive permanent image may be impossible to clear entirely with White Wash O Or rb bi it te er r Orbiter may help prevent ghost images However it is best not to allow any fixed image to remain on the screen To avoid a ...

Page 198: ...Press the button and then button to select power levels Press the M ME EN NU U button to return to normal TV viewing Press the R RE ET TU UR RN N button to move to the previous menu screen 1 2 3 4 1 3 2 MUTE RETURN AV MODE FAV TV INPUT STB POWER Q MENU MENU OK DVD P Option Language SIMPLINK Key Lock ISM Method Power Saving Set ID Factory Reset Power Saving G DE F G OK RETURN Level 0 Level 1 Level ...

Page 199: ...to select F Fa ac ct to or ry y R Re es se et t Press the button and then button to select Y YE ES S or N NO O Press the M ME EN NU U button to return to normal TV viewing Press the R RE ET TU UR RN N button to move to the previous menu screen 1 2 3 4 Option Language SIMPLINK Key Lock ISM Method Power Saving Set ID Power Indicator Factory Reset Factory Reset G DE F G OK RETURN Language SIMPLINK Ke...

Page 200: ...um me e Press the button and then button to select O On n or O Of ff f Press the M ME EN NU U button to return to normal TV viewing Press the R RE ET TU UR RN N button to move to the previous menu screen Auto Volume automatically remains on the same level of volume if you change programmes 1 2 3 4 3 2 Audio Sound Mode Auto Volume Balance 0 TV Speaker Audio Out Auto Volume G DE F G OK RETURN Off On...

Page 201: ... di io o menu Press the button and then button to select S So ou un nd d M Mo od de e Press the button and then button to select S SR RS S T TS SX XT T C Cl le ea ar r V Vo oi ic ce e S St ta an nd da ar rd d M Mu us si ic c C Ci in ne em ma a S Sp po or rt t G Ga am me e or U Us se er r Press the M ME EN NU U button to return to normal TV viewing Press the R RE ET TU UR RN N button to move to the...

Page 202: ...utton Set the desired sound level with the button Press the M ME EN NU U button to return to normal TV viewing Press the R RE ET TU UR RN N button to move to the previous menu screen Adjusting the audio equalizer 1 2 3 4 5 6 MUTE RETURN AV MODE FAV TV INPUT STB POWER Q MENU MENU OK DVD P Sound Mode Auto Volume Balance 0 TV Speaker Audio Out Audio Audio Sound Mode Auto Volume Balance 0 TV Speaker A...

Page 203: ... nc ce e Press the button and then button to make desired adjustment Press the M ME EN NU U button to return to normal TV viewing Press the R RE ET TU UR RN N button to move to the previous menu screen 1 2 3 4 1 3 2 MUTE RETURN AV MODE FAV TV INPUT STB POWER Q MENU MENU OK DVD P Sound Mode Auto Volume Balance 0 TV Speaker Audio Out Audio DE F G OK RETURN Audio Sound Mode Auto Volume Balance 0 TV S...

Page 204: ...en button to select the A Au ud di io o menu Press the button and then button to select T TV V S Sp pe ea ak ke er r Press the button and then button to select O On n or O Of ff f Press the M ME EN NU U button to return to normal TV viewing Press the R RE ET TU UR RN N button to move to the previous menu screen 1 2 3 4 MUTE RETURN AV MODE FAV TV INPUT STB POWER Q MENU MENU OK DVD P Sound Mode Auto...

Page 205: ... Press the button and then button to select M Mo on ni it to or r O Ou ut t or V Va ar ri ia ab bl le e o ou ut t Press the M ME EN NU U button to return to normal TV viewing Press the R RE ET TU UR RN N button to move to the previous menu screen 1 2 3 4 MUTE RETURN AV MODE FAV TV INPUT STB POWER Q MENU MENU OK DVD P Sound Mode Auto Volume Balance 0 TV Speaker Audio Out Audio DE F G OK RETURN Audi...

Page 206: ... II D DU UA AL L I I Sends the primary broadcast language to the loudspeakers D DU UA AL L I II I Sends the secondary broadcast language to the loudspeakers D DU UA AL L I I I II I Sends a separate language to each loudspeaker B Br ro oa ad dc ca as st t Mono Stereo Dual O On n S Sc cr re ee en n D Di is sp pl la ay y M MO ON NO O S ST TE ER RE EO O D DU UA AL L I I D DU UA AL L I II I D DU UA AL ...

Page 207: ...the TV is equipped with a receiver for NICAM reception high quality NICAM Near Instantaneous Companding Audio Multiplex digital sound can be received Sound output can be selected according to the type of broadcast received Speaker Sound Output Selection In AV Component RGB and HDMI mode you can select output sound for the left and right loud speakers Select the sound output L L R R Audio signal fr...

Page 208: ...screen in the selected language First select your language Press the M ME EN NU U button and then use button to select the O Op pt ti io on n menu Press the button and then use button to select L La an ng gu ua ag ge e Press the button and then use button to select your desired language Press the O OK K button Press the M ME EN NU U button to return to normal TV viewing Press the R RE ET TU UR RN ...

Page 209: ...U U button to return to normal TV viewing Press the R RE ET TU UR RN N button to move to the previous menu screen You must set the time correctly before using on off timer function If current time setting is erased by a power failure or the TV is unplugged reset the clock 1 2 3 4 5 1 3 4 2 Time Clock Off Time On Time Sleep Timer Auto Sleep Clock G DE F G OK RETURN Clock Off Time On Time Sleep Time...

Page 210: ...iewing Press the R RE ET TU UR RN N button to move to the previous menu screen The Off time function automatically switches the TV to standby at a preset time Two hours after the TV is switched on by the on time function it will automatically switch back to standby mode unless a button has been pressed Once the on time off time is set these functions operate daily at the preset time The Off time f...

Page 211: ...U MENU OK DVD P 1 4 3 2 Press the M ME EN NU U button and then button to select the T Ti im me e menu Press the button and then button to select S Sl le ee ep p T Ti im me er r Press the button and then button to set the minute Press the M ME EN NU U button to return to normal TV viewing Press the R RE ET TU UR RN N button to move to the previous menu screen 1 2 3 4 Time Clock Off Time On Time Sle...

Page 212: ...on to select A Au ut to o S Sl le ee ep p Press the button and then button to select O On n or O Of ff f Press the M ME EN NU U button to return to normal TV viewing Press the R RE ET TU UR RN N button to move to the previous menu screen 1 1 2 3 4 2 3 MUTE RETURN AV MODE FAV TV INPUT STB POWER Q MENU MENU OK DVD P Time Clock Off Time On Time Sleep Timer Auto Sleep Auto Sleep G DE F G OK RETURN Clo...

Page 213: ...ber you must complete the three digit number and then re enter the correct page number The P P button can be used to select the preceding or following page SIMPLE TEXT 1 2 T Th hi is s f fe ea at tu ur re e i is s n no ot t a av va ai il la ab bl le e i in n a al ll l c co ou un nt tr ri ie es s Teletext is a free service broadcast by most TV stations which gives up to the minute information on ne...

Page 214: ...turn to the previous selection Alternatively the P P button can be used A A Direct page selection As with SIMPLE teletext mode you can select a page by entering it as a three digit number using the NUMBER buttons in TOP mode 4 4 1 2 3 FASTEXT The teletext pages are colour coded along the bottom of the screen and are selected by pressing the correspond ing coloured button A A Page selection Press t...

Page 215: ...ys the TV picture on the screen while waiting for a new teletext page The display will appear at the top left hand corner of the screen When the updated page is available then display will change to the page number Press this button again to view the updated teletext page A A R RE EV VE EA AL L Press this button to display concealed information such as solutions to riddles or puzzles Press this bu...

Page 216: ...CR Try another channel The problem may be with the broadcast Are the video cables installed properly Activate any function to restore the brightness of the picture Check for local interference such as an electrical appliance or power tool Station or cable channel experiencing problems tune to another station Station signal is weak reposition the antenna to receive weaker stations Check for sources...

Page 217: ... e o or r s si in ng gl le e c co ol lo ou ur r V Ve er rt ti ic ca al l b ba ar r o or r s st tr ri ip pe e o on n b ba ac ck kg gr ro ou un nd d H Ho or ri iz zo on nt ta al l N No oi is se e I In nc co or rr re ec ct t p po os si it ti io on n T Th he e a au ud di io o f fu un nc ct ti io on n d do oe es s n no ot t w wo or rk k Press the o or r V Vo ol lu um me e button Sound muted Press M MU ...

Page 218: ...water and a little fabric softener or dish washing detergent Wring the cloth until it s almost dry and then use it to wipe the screen Ensure there is no excess water on the screen Allow any water or dampness to evaporate before switching on Cleaning the Cabinet To remove dirt or dust wipe the cabinet with a soft dry lint free cloth Do not to use a wet cloth Extended Absence If you expect to leave ...

Page 219: ...4 F Less than 80 20 60 C 4 140 F Less than 85 with stand without stand with stand without stand Dimensions Width x Height x Depth Weight Power requirement with stand without stand with stand without stand 1044 4 x 735 4 x 308 0 mm 41 1x 28 9 x 12 1 inches 1044 4 x 680 6 x 79 6 mm 41 1 x 26 7 x 3 1 inches 28 kg 61 7 lbs 25 kg 55 1 lbs AC100 240V 50 60Hz 1235 6 x 849 3 x 364 1 mm 48 6 x 33 4x 14 3in...

Page 220: ... 50 60Hz 929 x 706 9x 374 7mm 36 6x 27 8 x 14 8 inches 929 x 665x 98 7 mm 36 6x 26 2 x 3 9 inches 18 1 kg 39 9 lbs 21 2 kg 46 7 lbs AC100 240V 50 60Hz 32LG6 32LG60UR TA 37LG6 37LG60UR TA 1 140 4 x 820 1 x 342 9 mm 44 8 x 32 2 x 13 5 inches 1 140 4 x 764 8 x 129 0 mm 44 8 x 30 1 x 5 0 inches 30 1 kg 66 3 lbs 25 4 kg 55 9 lbs AC100 240V 50 60Hz 1284 4 x 898 6 x 342 9 mm 50 5 x 35 3 x 13 5 inches 128...

Page 221: ...tton such as a D DV VD D or S ST TB B on the remote control The remote control button of the desired device is illumintated Press the M ME EN NU U and M MU UT TE E buttons simultaneously the remote control is ready to be programmed with the code Enter a code number using the number buttons on the remote control Programming code numbers for the corresponding component can be found on the following ...

Page 222: ...HOSTAR 038 040 057 058 093 094 095 096 097 098 099 100 122 ELECTRO HOME 089 EUROPLUS 1 14 FUJITSU 017 021 022 027 133 134 GENERAL INSTRUMENT 003 004 016 029 031 059 101 HITACHI 139 140 HOUSTON TRACKER 033 037 039 051 057 104 HUGHES 068 Humax SL 158 JANIEL 060 147 JERROLD 061 KATHREIN 108 LEGEND 057 LG 001 LUTRON 132 LUXOR 062 144 MACOM 010 059 063 064 065 MEMOREX 057 NEXTWAVE 028 124 125 NORSAT 06...

Page 223: ...C4 C5 C6 C7 D0 D1 D2 D3 D4 D5 D6 D7 D0 D1 D2 D3 D4 D5 D6 D7 Lead code Low custom code High custom code Data code Data code Repeat code Tf 4 5 ms 9 ms 2 25 ms 9 ms 0 55 ms 0 56 ms 1 12 ms 0 56 ms 2 24 ms Tf Tf Tf 108ms 455KHz Bit 0 Bit 1 1 How to Connect A Connect your wired remote control to the Remote Control port on the TV 2 Remote Control IR Codes A Output waveform Single pulse modulated with 3...

Page 224: ...Button 02 R C Button 03 R C Button 00 P R C Button 01 P R C Button 30 AV MODE R C Button 7C R C Button 09 MUTE R C Button 53 LIST R C Button 10 19 Number Key 0 9 R C Button 1E FAV R C Button 1A Q VIEW R C Button 20 TEXT R C Button B0 SIZE R C Button 8F INDEX R C Button B1 TIME R C Button BD REVEAL R C Button 8E HOLD R C Button BA UPDATE R C Button 7E SIMPLINK R C Button B1 A Stop R C Button B0 G P...

Page 225: ... serial port of the control device to the RS 232C jack on the TV back panel RS 232C connection cables are not supplied with the TV AUDIO RGB DVI RGB PC RGB IN RS 232C IN CONTROL HDMI IN HDMI IN HDMI DVI IN HDMI DVI IN Type of Connector D Sub 9 Pin Male HDMI IN No Pin Name 1 No connection 2 RXD Receive data 3 TXD Transmit data 4 DTR DTE side ready 5 GND 6 DSR DCE side ready 7 RTS Ready to send 8 CT...

Page 226: ...nd then use button to select the O OP PT TI IO ON N menu Press the button and then use button to select S Se et t I ID D Press the button and then use button to adjust S Se et t I ID D to choose the desired TV ID number The adjustment range of SET ID is 1 99 Press the M ME EN NU U button to return to normal TV viewing Press the R RE ET TU UR RN N button to move to the previous menu screen Use this...

Page 227: ...ID use the small character if set ID is 1 0 TV will send the 0 a Data use the small character if data is 0xab TV will send the a b NG use the large character C Co om mm ma an nd d1 1 C Co om mm ma an nd d2 2 S Se et t I ID D D Da at ta a C Cr r C Co om mm ma an nd d2 2 S Se et t I ID D O OK K D Da at ta a x x C Co om mm ma an nd d2 2 S Se et t I ID D N NG G D Da at ta a x x C CO OM MM MA AN ND D1 ...

Page 228: ... M Mu ut te e C Co om mm ma an nd d k k e e To control volume mute on off You can also adjust mute using the MUTE button on remote control Data 00 Volume mute on Volume off Data 01 Volume mute off Volume on Transmission k e Set ID Data Cr Acknowledgement e Set ID OK NG Data x 0 05 5 V Vo ollu um me e C Co on nt tr ro oll C Co om mm ma an nd d k k f f To adjust volume You can also adjust volume wit...

Page 229: ... t t To adjust balance You can also adjust balance in the Audio menu Data Min 00 Max 64 Refer to Real data mapping 1 See page 1 12 Transmission k t Set ID Data Cr Acknowledgement t Set ID OK NG Data x 1 10 0 S Sh ha ar rp pn ne es ss s C Co om mm ma an nd d k k k k To adjust the screen sharpness You can also adjust sharpness in the Picture menu Data Min 00 Max 64 Refer to Real data mapping 1 See p...

Page 230: ...gement q Set ID OK NG Data x 2 23 3 A Au ut to o C Co on nf fiig gu ur re e C Co om mm ma an nd d jj u u To adjust picture position and minimize image shaking automatically It works only in RGB PC mode Data 01 To set Transmission j u Set ID Data Cr Acknowledgement u Set ID OK NG Data x R Re ea al l d da at ta a m ma ap pp pi in ng g 1 1 00 Step 0 A Step 10 F Step 15 10 Step 16 64 Step 100 6E Step ...

Page 231: ...re e I In np pu ut t To select input source for TV Data Structure Transmission x b Set ID Data Cr Input Number Data 0 0 0 0 Input1 0 0 1 1 Input4 0 0 1 0 Input3 0 0 0 1 Input2 2 25 5 T Tu un ne e C Co om mm ma an nd d C Co om mm ma an nd d m m a a Tune Channel to following Physical major minor number Data 0 Min 00H Max 63H transmit by Hexadecimal code Data 1 Don t care Data 2 0 Main 1 Sub Transmis...

Page 232: ......

Reviews: