background image

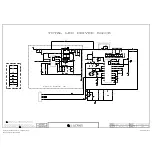
THERMAL

THE    SYMBOL MARK OF THIS SCHEMETIC DIAGRAM INCORPORATES
SPECIAL FEATURES IMPORTANT FOR PROTECTION FROM X-RADIATION.
FIRE AND ELECTRICAL SHOCK HAZARDS, WHEN SERVICING IF IS 
ESSENTIAL THAT ONLY MANUFACTURES SPECIFIED PARTS BE USED FOR
THE CRITICAL COMPONENTS IN THE    SYMBOL MARK OF THE SCHEMETIC.

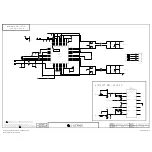
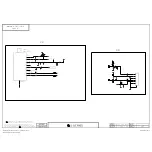
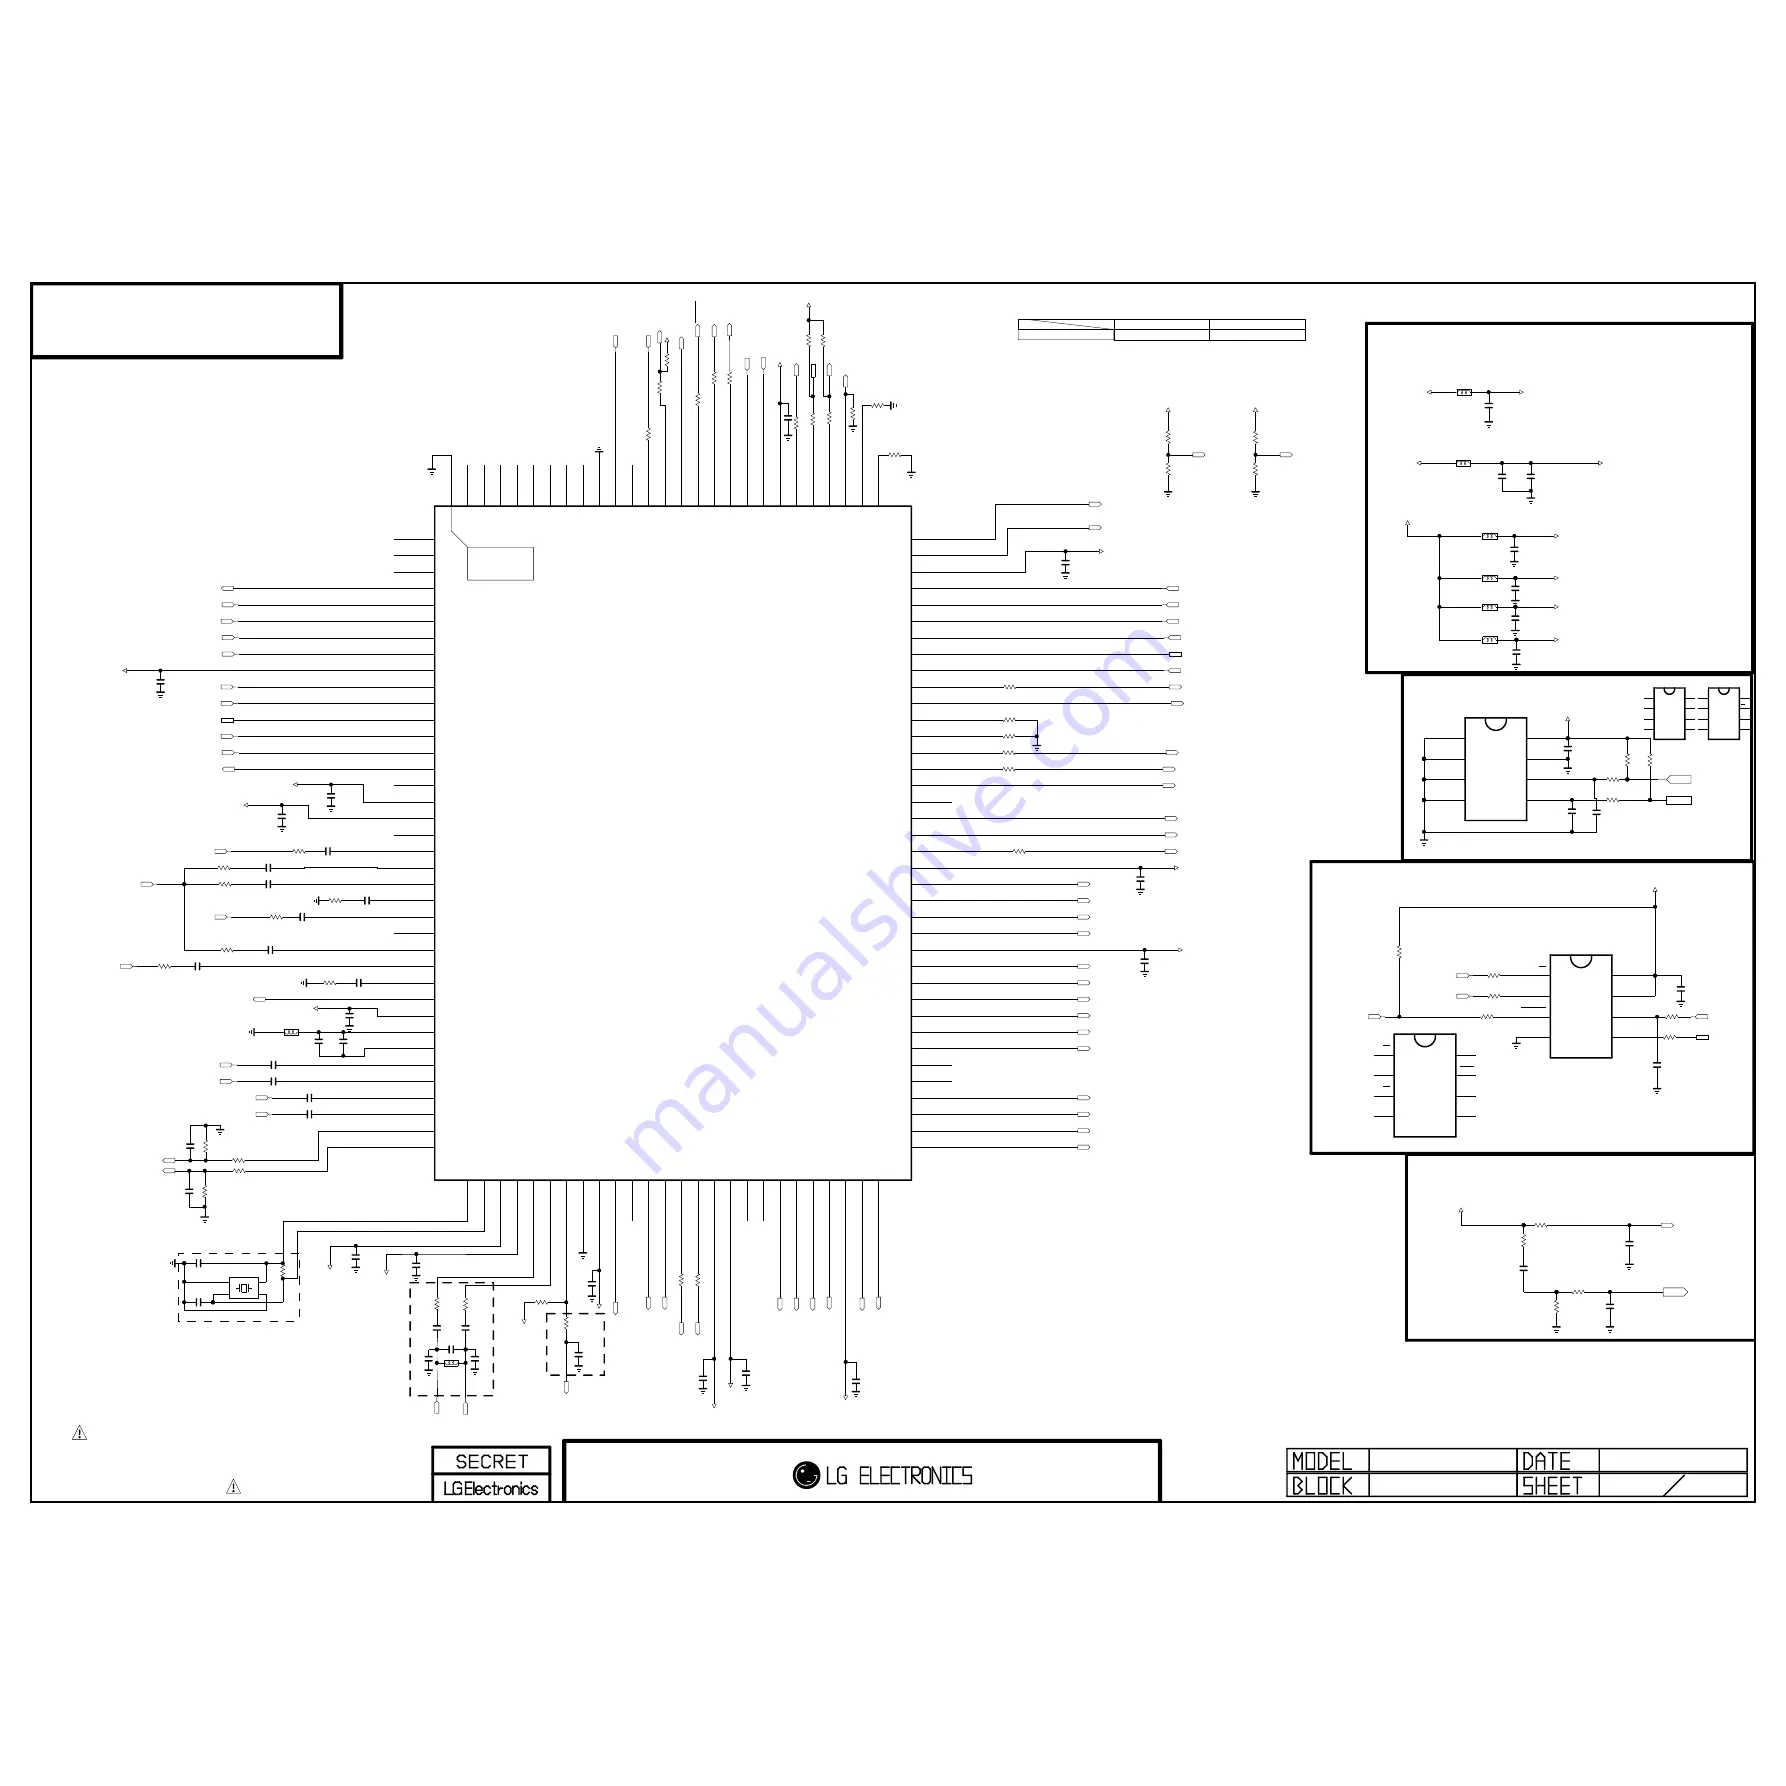
MAIN SOC

POWER_SW

RXA3+

RXA3-

RXACK+

RXACK-

RXA2+

RXA2-

RXA1+

RXA1-

RXA0+

RXA0-

RXB3+

RXB3-

RXBCK+

RXBCK-

RXB2+

RXB2-

RXB1+

RXB1-

RXB0+

RXB0-

R551

100

R511

68

C507

0.047uF

IF_AGC

R503

33

SPI_DO

LED

C505

2.2uF

R560

4.7K

R557

22

IR

SPI_DI

H

HDMI1_SCL

EEP_SDA

H

KEY2

VDDC

R509

33

R530

22

KEY1

HDMI1_SDA

C506

2.2uF

IF_N

MNT_R_AMP

R552

100

COMMON_LIN

SPI_DI

HDMI1_D0-

+1.2V_VDDC

DSUB_SCL

IF_P

R559

4.7K

R561

100

+3.3V_M

USB_DN

I2S_MCLK

+1.8V_M

EEP_SCL

HW_RESET

SPI_CZ

HDMI1_D2-

USB_DP

SPI_CLK

COMMON_VIN

HDMI1_HPD

SPI_DO

SPI_CZ

C519

0.047uF

HDMI1_CK-

R508

1M

H

R558

22

AVDD_DDR

COMP_PR

R529

22

DSUB_SDA

COMMON_RIN

H

VDDC_3.3

MNT_L_AMP

C513

0.047uF

HDMI1_D1-

MNT_VOUT

SPI_CLK

AUAMP/VCOM_SDA

100

R526

100

R523

AUAMP/VCOM_SCL

SW_RESET

EEP_SDA

EEP_SCL

RL_ON

PWM_DIM

RXA0+

RXA0-

RXA1+

RXA1-

RXA2+

RXA2-

RXACK+

RXACK-

RXA3+

RXA3-

R531

4.7K

R528

4.7K

R515

10K

R502
220K

R501
220K

C501

220pF

C500

220pF

R506

100

R507

100

C520

0.047uF

R510

33

COMP_PB

C522

0.047uF

R512

68

C509

0.047uF

C508
1000pF

R505

33

R540

100

FLASH_WP

PANEL_ON

POWER_SW

R537

100

INV_ON

R533

1K

R534

1K

AVDD33_DEMOD

R532

0

AV2_VIN

C502

0.047uF

R500

33

C517
0.1uF

C516
10uF

AV2_RIN

C511

2.2uF

AV2_LIN

C512

2.2uF

HW_OPT1

C541

10uF

6.3V

VDDC

C537

0.1uF

VDDC

C532

0.1uF

VDDC

C521

0.1uF

C540
10uF

6.3V

C533

0.1uF

AVDD_DDR

C546

10uF

6.3V

VDDC_3.3

C535

0.1uF

AU_3.3V

3.3V_DMPLL

AU_3.3V

C518

0.1uF

C503

0.1uF

VDDC_3.3

C514

0.1uF

VDDC_3.3

C536

0.1uF

VDDC_3.3

VDDC_3.3

C534

0.1uF

C531

0.1uF

VDDC_3.3

AVDD33_DEMOD

3.3V_DMPLL

C515

0.1uF

C525

0.1uF

FLASH_WP

RXB3-

RXB3+

RXBCK-

RXBCK+

RXB2+

RXB2-

RXB0-

RXB0+

RXB1-

RXB1+

C548
22pF

READY

C551

22pF

READY

C547

4.7uF

0.1uF

C528

0.1uF

C524

R543
4.7K

FHD

R542
4.7K

HD

+3.3V_M

HW_OPT1

R522

100

L503

120-ohm

L506

120-ohm

L505

120-ohm

L504

120-ohm

L502

120-ohm

L507

120-ohm

L500

120-ohm

R520

4.7K

R519

100

MUTE_AOUT

TUNER_SDA

100

R517

TUNER_SCL

100

R521

I2S_SCK

I2S_SDO

I2S_WS

C530

0.1uF

AVDD_DDR

C549

0.1uF

16V

R562

100

R504

33

0

R516

C526

220pF

OPT

50V

L501
100NH

OPT

R513

100

R514

100

C529
22000pF
50V

POWER_DET

R539

100

R535

10K

R527

1K

IC500

LGE6841 (ATV_13)

1

DDCDD_CK

2

RX2N_D

3

RX2P_D

4

HOTPLUG_A

5

RXCKN_A

6

RXCKP_A

7

RX0N_A

8

RX0P_A

9

AVDD_MOD_1

10

RX1N_A

11

RX1P_A

12

DDCDA_DA

13

RX2N_A

14

RX2P_A

15

DDCDA_CK

16

ARC

17

VDD

18

AVDD3P3_ADC

19

HSYNC1

20

BIN1P

21

SOGIN1

22

GIN1P

23

GIN1M

24

RIN1P

25

VSYNC1

26

CVBS1

27

CVBS0

28

VCOM

29

CVBSOUT1

30

AVDD_AU33

31

AUREF

32

VAG

33

LINEIN_L1

34

LINEIN_R1

35

LINEIN_L3

36

LINEIN_R3

37

LINEOUTL3

38

LINEOUTR3

39

XTALO

40

XTALI

41

AVDD3P3_DMPLL

42

AVDD3P3_DADC

43

VIFP

44

VIFM

45

IFAGC

46

VSS

47

AVDD_DDR

48

GPIO55/I2S_OUT_WS

49

GPIO56

50

GPIO57/I2S_OUT_BCK

51

GPIO58/I2S_OUT_SD

52

GPIO60

53

GPIO61

54

VDDP

55

VDDC_1

56

LVA4P

57

LVA4M

58

LVA3P

59

LVA3M

60

LVACLKP

61

LVACLKM

62

AVDD_MOD_2

63

LVA2P

64

LVA2M

65

LVA1P

66

LVA1M

67

LVA0P

68

LVA0M

69

LVB4P

70

LVB4M

71

LVB3P

72

LVB3M

73

LVBCKP

74

LVBCKM

75

LVB2P

76

LVB2M

77

AVDD_MOD_3

78

LVB1P

79

LVB1M

80

LVB0P

81

LVB0M

82

VDDC_2

83

INT/GPIO65

84

GPIO7

85

GPIO6

86

GPIO5

87

GPIO4

88

GPIO3

89

GPIO2

90

GPIO1

91

GPIO0

92

PWM2/GPIO24

93

PWM3/GPIO25

94

SPI_CK

95

SPI_DI

96

SPI_DO

97

SPI_CZ

98

USB0_DM

99

USB0_DP

100

AVDD_MOD_4

101

GPIO63

102

GPIO64

103

TESTPIN

104

PWM0/GPIO26

105

PWM1/GPIO25

106

DDCA_CK

107

DDCA_DA

108

GPIO67

109

AVDD_DDR_2

110

SAR0/GPIO75

111

SAR1/GPIO74

112

SAR2/GPIO73

113

SAR3/GPIO72

114

GPIO68

115

GPIO69/I2S_OUT_MCK

116

GPIO70

117

IRIN

118

CEC

119

HWRESET

120

GND

121

HOTPLUG_D

122

RXCKN_D

123

RXCKP_D

124

RX0N_D

125

RX0P_D

126

DDCDD_DA

127

RX1N_D

128

RX1P_D

129

[EP]

C523

33pF

50V

C527
33pF

IC502

W25Q64FVSSIG

WINBOND

3

WP[IO2]

2

DO[IO1]

4

GND

1

CS

5

DI[IO0]

6

CLK

7

%HOLD[IO3]

8

VCC

R550

100

R549

10K

C553

0.1uF

16V

C552

0.1uF

16V

READY

HW_RESET

C550

0.1uF

16V

POWER_DET

R554

10K

R553

470

C542

4.7uF

10V

R556

10

IC502-*1

MX25L6406EM2I-12G 

MACRONIX

3

WP

2

SO/SIO1

4

GND

1

CS

5

SI/SIO0

6

SCLK

7

HOLD

8

VCC

IC503

BR24G256FJ-3 

ROHM_EEPROM

3

A2

2

A1

4

GND

1

A0

5

SDA

6

SCL

7

WP

8

VCC

IC503-*1

AT24C256C-SSHL-T

ATML_EEPROM

3

A2

2

A1

4

GND

1

A0

5

SDA

6

SCL

7

WP

8

VCC

+3.3V_M

R545
4.7K

BIG INCH

R544
4.7K

SMALL INCH

HW_OPT2

HW_OPT2

C545

10uF

6.3V

C544

10uF

6.3V

C543

10uF

6.3V

+3.3V_ST

+3.3V_ST

+3.3V_ST

+3.3V_ST

+3.3V_ST

+3.3V_ST

IC503-*2

M24256-BRMN6TP

ST_EEPROM

3

E2

2

E1

4

VSS

1

E0

5

SDA

6

SCL

7

WC

8

VCC

0.1uF

C538

16V

R538
4.7K

R536
4.7K

R555

470K

C504

8pF

C510

8pF

X500

24MHz

4

GND_2

1

X-TAL_1

2

GND_1

3

X-TAL_2

R518

1K

MAIN SOC

5  8

SERIAL FLASH(2MB)

EEPROM(64K)

*H/W OPTION

Close to MSTAR

MSTAR Vcc

ST 1.26V

DDR 1.8V

Close to MSTAR

ST 3.3V

HD

FHD

LOW

HIGH

HW_OPT

H/W RESET

EAX66783401

155_ECI_M8RR

2015/03/03

LB56H/LT56H

Closed to SoC

Copyright © 2015 LG Electronics. Inc. All rights reserved. 

Only for training and service purposes

LGE Internal Use Only

Summary of Contents for 43LF513A-TA

Page 1: ...UAL North Latin America http aic lgservice com Europe Africa http eic lgservice com Asia Oceania http biz lgservice com Internal Use Only CHASSIS LB56A MODEL 43 49LF513A 43 49LF513A TA CAUTION BEFORE SERVICING THE CHASSIS READ THE SAFETY PRECAUTIONS IN THIS MANUAL ...

Page 2: ...eserved Only for training and service purposes CONTENTS CONTENTS 2 SAFETY PRECAUTIONS 3 SERVICING PRECAUTIONS 4 SPECIFICATION 6 ADJUSTMENT INSTRUCTION 9 DISASSEMBLY 13 BLOCK DIAGRAM 14 EXPLODED VIEW 15 SCHEMATIC CIRCUIT DIAGRAM APPENDIX TROUBLE SHOOTING GUIDE APPENDIX ...

Page 3: ...inals etc to be sure the set is safe to operate without damage of electrical shock Leakage Current Cold Check Antenna Cold Check With the instrument AC plug removed from AC source connect an electrical jumper across the two AC plug prongs Place the AC switch in the on position connect one lead of ohm meter to the AC plug prongs tied together and touch other ohm meter lead in turn to each exposed m...

Page 4: ...ctrostatic charge on your body by touching a known earth ground Alter natively obtain and wear a commercially available discharg ing wrist strap device which should be removed to prevent potential shock reasons prior to applying power to the unit under test 2 After removing an electrical assembly equipped with ES devices place the assembly on a conductive surface such as aluminum foil to prevent e...

Page 5: ...he solder joints of the two original leads If they are not shiny reheat them and if necessary apply additional solder Fuse and Conventional Resistor Removal Replacement 1 Clip each fuse or resistor lead at top of the circuit board hollow stake 2 Securely crimp the leads of replacement component around notch at stake top 3 Solder the connections CAUTION Maintain original spacing between the replace...

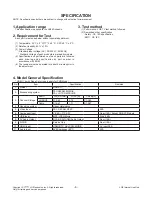
Page 6: ...in accordance with BOM 5 The receiver must be operated for about 5 minutes prior to the adjustment 3 Test method 1 Performance LGE TV test method followed 2 Demanded other specification Safety CE IEC specification EMC CE IEC 4 Model General Specification HDMI 1 4 with Deep Color is only apply for FHD Model No Item Specification Remarks 1 Market NON EU 2 Broadcasting system PAL SECAM B G D K PAL I ...

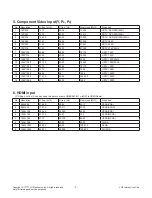
Page 7: ... 720 37 50 50 00 74 25 HDTV 720P 50Hz 10 1920 1080 28 125 50 00 74 250 HDTV 1080I 50Hz 11 1920 1080 33 72 59 94 74 176 HDTV 1080I 12 1920 1080 33 75 60 00 74 25 HDTV 1080I 13 1920 1080 56 25 50 148 5 HDTV 1080P 14 1920 1080 67 432 59 94 148 350 HDTV 1080P 15 1920 1080 67 5 60 00 148 5 HDTV 1080P 6 HDMI input PC Spec out but it can be shown the picture at only HDMI DVI IN 1 via DVI to HDMI Cable No...

Page 8: ... 720 480 31 5 60 00 27 027 SDTV 480P 6 720 576 31 25 50 00 27 SDTV 576P 7 1280 720 44 96 59 94 74 176 HDTV 720P 8 1280 720 45 60 00 74 25 HDTV 720P 9 1280 720 37 5 50 00 74 25 HDTV 720P 10 1920 1080 28 125 50 00 74 25 HDTV 1080I 11 1920 1080 33 72 59 94 74 176 HDTV 1080I 12 1920 1080 33 75 60 00 74 25 HDTV 1080I 13 1920 1080 56 25 50 00 148 5 HDTV 1080P 14 1920 1080 67 43 59 94 148 350 HDTV 1080P ...

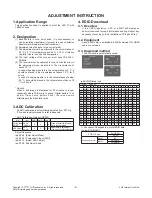
Page 9: ...EDID Download 4 1 Overview It is a VESA regulation A PC or a MNT will display an optimal resolution through information sharing without any necessity of user input It is a realization of Plug and Play 4 2 Equipment Since EDID data is embedded EDID download JIG HDMI cable are not need 4 3 Download method The EDID data is automatically saved 8bit FHD large inch ⓐ Checksum Changeable b y total EDID d...

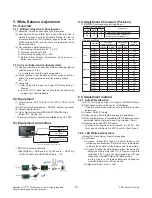
Page 10: ...sed during auto adj 2 Adjustment Map 5 5 Adjustment method 5 5 1 Auto WB calibration 1 Set TV in ADJ mode using P Only key or POWER ON key 2 Place optical probe on the center of the display It need to check probe condition of zero calibration before adjustment 3 Connect RS 232C Cable 4 Select mode in ADJ Program and begin a adjustment 5 When WB adjustment is completed with OK message check adjustm...

Page 11: ... 1 KHz sine wave signal 0 4 Vrms 8 2 Specification 9 GND and HI POT Test 9 1 GND HI POT auto check preparation 1 Check the POWER CABLE and SIGNAL CABE insertion condition 9 2 GND HI POT auto check 1 Pallet moves in the station POWER CORD AV CORD is tightly inserted 2 Connect the AV JACK Tester 3 Controller GWS103 4 on 4 GND Test Auto If Test is failed Buzzer operates If Test is passed execute next...

Page 12: ...s ADJUST ADC please confirm Support Int ADC at TOOL OPTION2 11 2 Manual White balance Adjustment 11 2 1 Adj condition and cautionary items 1 Lighting condition in surrounding area surrounding lighting should be lower 10 lux Try to isolate adj area into dark surrounding 2 Probe location Color Analyzer CA 210 probe should be within 10cm and perpendicular of the module surface 80 100 3 Aging time 1 A...

Page 13: ...embly of Back cover 1 Unscrew bolts in the set 2 Check both right and left hole 3 Attach tape to Long nose pliers Scratch can be caused without tape 4 Put long nose into the hole 5 Open B C with push pulling long nose to upper and lower sides 6 Disassemble Back cover Disassemble it from left to right for top side hook on Back cover ...

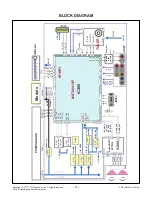
Page 14: ... 50 51 113 112 Audio_SCL Audio_SDA LVDS Output P Dim Inv ON RL On D13 2V TU_3 3V IC700 BD9D321EFJ 3 3V_ST Panel_Vcc 10 11 7 8 9 38 I2S_MCLK I2S_WS I2S_SCK I2S_SDO P450 108 111 117 IR KEY1 Led_PWR 102 105 101 53 52 45 85 84 EEP SDA EEP SCL 94 95 97 96 SPI_CLK SPI_DI SPI_CZ SPI_DO 32 40 LPF JK204 USB_5V 110 KEY2 3 3V_ST 4 5 6 IC703 1 8V REG Main_1 8V 1 2V_VDDC Q704 DMP2130L Panel_Vcc IC701 BD9D321EF...

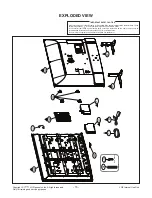
Page 15: ...l and mechanical parts in this chassis have special safety related characteristics These parts are identified by in the Schematic Diagram and EXPLODED VIEW It is essential that these special safety parts should be replaced with the same components as recommended in this manual to prevent Shock Fire or other Hazards Do not modify the original design without permission of manufacturer IMPORTANT SAFE...

Page 16: ...16 1 4W JK101 PPJ239 26 5J YL GN O SPRING 6J YL GN E LUG 4J YL GN CONTACT 7K BL E LUG S 5K BL O SPRING 7L RD1 E LUG S 5L RD1 O SPRING 5M WH1 O SPRING 4N RD2 CONTACT 5N RD2 O SPRING 6N RD2 E LUG 6D WH2 E LUG 5D WH2 O SPRING 7E RD3 E LUG S 5E RD3 O SPRING 7F YL E LUG S 5F YL O SPRING 4F YL CONTACT 5G WH3 O SPRING 4H RD4 CONTACT 5H RD4 O SPRING 6H RD4 E LUG VA108 20V R118 12K R105 1K R108 220K VA101 ...

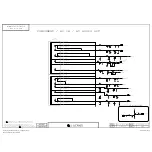
Page 17: ...READY VA207 READY L200 120OHM D205 IP4283CZ10 TBA ESD_HDMI2_IP4283 3 GND_1 2 TMDS_CH1 4 TMDS_CH2 1 TMDS_CH1 5 TMDS_CH2 6 NC_1 7 NC_2 8 GND_2 9 NC_3 10 NC_4 D204 IP4283CZ10 TBA ESD_HDMI2_IP4283 3 GND_1 2 TMDS_CH1 4 TMDS_CH2 1 TMDS_CH1 5 TMDS_CH2 6 NC_1 7 NC_2 8 GND_2 9 NC_3 10 NC_4 D204 1 IP4294CZ10 TBR ESD_HDMI_IP4294 1 8 2 7 3 6 4 5 9 10 AR203 5 1 1 16W AR204 5 1 1 16W R220 100 R219 100 R215 4 7K...

Page 18: ... 0 1uF C311 50V 0 1uF C310 50V C318 390pF 50V I2S_WS R303 100 C320 390pF 50V C300 33pF 50V R313 12 C304 0 1uF 16V R314 12 C314 22000pF 50V R307 100 READY C321 1uF 10V C308 22000pF 50V R309 12 I2S_SDO C317 390pF 50V R312 12 I2S_MCLK AUAMP VCOM_SCL C307 1000pF 50V R300 4 7K R301 4 7K 3 3V_M 0 1uF C306 16V R306 100 R304 100 R305 100 3 3V_M R308 100 C305 10uF 6 3V POWER_DET R328 4 7K R329 4 7K R330 4 ...

Page 19: ...SCL TUNER_SDA L401 BLM18PG121SN1D R406 2 2K R407 2 2K R403 33 R404 33 C408 10uF 6 3V R401 10 R402 10 VR403 OPT C411 1000pF 50V 3 3V_ST KEY1 C412 100pF 50V LED AR401 10K 1 16W R408 100 P401 12507WR 06L 1 2 3 4 5 6 7 L402 PZ1608U121 2R0TF VR401 OPT VR402 OPT C409 0 1uF 16V OPT 3 3V_ST C410 0 1uF 16V IR KEY2 3 3V_ST R409 3 3K OPT TU401 TDJS G101D 6 NC_2 7 IF N 8 IF P 9 SHIELD 1 SCL 2 SDA 3 B 3 3V 4 N...

Page 20: ... HOTPLUG_A 5 RXCKN_A 6 RXCKP_A 7 RX0N_A 8 RX0P_A 9 AVDD_MOD_1 10 RX1N_A 11 RX1P_A 12 DDCDA_DA 13 RX2N_A 14 RX2P_A 15 DDCDA_CK 16 ARC 17 VDD 18 AVDD3P3_ADC 19 HSYNC1 20 BIN1P 21 SOGIN1 22 GIN1P 23 GIN1M 24 RIN1P 25 VSYNC1 26 CVBS1 27 CVBS0 28 VCOM 29 CVBSOUT1 30 AVDD_AU33 31 AUREF 32 VAG 33 LINEIN_L1 34 LINEIN_R1 35 LINEIN_L3 36 LINEIN_R3 37 LINEOUTL3 38 LINEOUTR3 39 XTALO 40 XTALI 41 AVDD3P3_DMPLL...

Page 21: ...6V L600 120OHM VCOM_SDA VCOM_SCL VCOM_SDA VCOM_SCL AUAMP VCOM_SCL R601 0 OPT R602 0 OPT VCOM_SDA VCOM_SCL AUAMP VCOM_SDA P600 SP14 11592 01 51Pin FHD 1 2 3 4 5 6 7 8 9 10 11 12 13 14 15 16 17 18 19 20 21 22 23 24 25 26 27 28 29 30 31 32 33 34 35 36 37 38 39 40 41 42 43 44 45 46 47 48 49 50 51 52 HD_PANEL_VCC HD_PANEL_VCC P601 10031HR 30 1 2 3 4 5 6 7 8 9 10 11 12 13 14 15 16 17 18 19 20 21 22 23 2...

Page 22: ...7K 1 C714 0 1uF 16V C723 10uF 10V C713 0 1uF 16V C724 0 1uF 16V C701 2 2uF 25V C718 10uF 10V R702 47K C709 0 1uF 50V R725 1K 1 R705 68 C716 10uF 16V C719 10uF 16V R711 10K R701 100K R716 1K 1 C708 0 1uF 50V R715 56K R704 68 C702 10uF 25V R707 47K OPT IC701 MP2315GJ 3 SW 2 IN 4 GND 1 AAM 5 BST 6 EN SYNC 7 VCC 8 FB R717 3 3K 1 C711 0 47uF 16V OPT C715 10uF 16V L701 10uH R718 11K 1 C722 0 1uF 25V ZD7...

Page 23: ...47 100 R832 100K C801 47uF 25V C810 330pF 50V R812 3 9K 1 L803 33uH 43_49 inch C813 33uF 100V C835 4700pF 50V Q802 MMBT3904 NXP E B C C807 0 22uF 16V C830 220pF 100V C811 220pF 100V C812 220pF 100V C814 220pF 100V OPT P801 SMAW200 04 1 2 3 4 C827 1uF 100V 43_49inch C828 1uF 100V 49 inch R840 15K 1 32inch R841 3 6K 1 32inch R837 30K 1 32inch R837 1 13K 1 43inch R840 1 12K 1 43inch R841 1 10K 1 43in...

Page 24: ......

Page 25: ...Trouble shooting guide Copyright 2015 LG Electronics Inc All rights reserved Only for training and service purposes LGE Internal Use Only ...

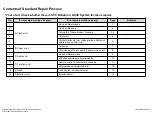
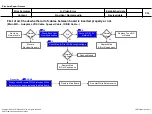
Page 26: ... viewing power auto on off 8 8 C Audio error No audio Normal video 9 9 Wrecked audio discontinuation noise 10 10 D Function error Remote control Local switch checking 11 11 External device recognition error 12 12 E Noise Circuit noise mechanical noise 13 13 F Exterior error Exterior defect 14 First of all Check whether there is SVC Bulletin in GCSC System for these model Contents of Standard Repai...

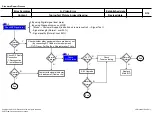
Page 27: ... replacing the Main Board Replace Main Board Re enter White Balance value Precaution A4 A1 A2 A3 A6 First of all Check whether all of cables between board is inserted properly or not Main B D Adaptor LVDS Cable Speaker Cable IR B D Cable Normal Audio On Y N Normal Voltage Normal Voltage Y N Y N Error Symptom A Video Error Established date 1 14 Content No video Normal audio Revised date Standard Re...

Page 28: ...r parts Replace Adaptor Normal Voltage Y N Error Symptom A Video Error Established date 2 14 Content No video No audio Revised date Standard Repair Process A13 Copyright 2015 LG Electronics Inc All rights reserved Only for training and service purposes LGE Internal Use Only ...

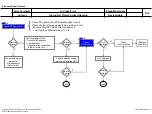
Page 29: ...stics menu on OSD Menu Customer Support red button on remote control Signal Test Signal strength Normal over 50 Signal quality Normal over 50 Y Contact with signal distributor or broadcaster Cable or Air N N Y N A6 End Normal Signal Normal Picture Normal Picture Normal Picture SVC Bulletin End End Normal Picture Error Symptom A Video Error Established date 3 14 Content Tuning fail Picture broken f...

Page 30: ...ite setting Check LNB frequency Check satellite Check Satellite connection DiSEqC motor etc Contact with signal distributor or broadcaster Cable or Air N Check Tuner soldering Replace Main B D Normal Picture Normal Picture Normal Setting SVC Bulletin Normal Signal End End Error Symptom A Video Error Established date 4 14 Content Tuning fail Picture broken freezing Revised date Standard Repair Proc...

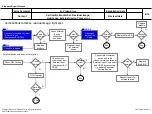
Page 31: ... Main B D N A7 N Y Replace module Request repair for external device cable Check Test pattern A10 A8 A9 End Color error Color error External device Cable Normal External Input Component HDMI error Error Symptom A Video Error Established date 5 14 Content Color error Revised date Standard Repair Process Copyright 2015 LG Electronics Inc All rights reserved Only for training and service purposes LGE...

Page 32: ... Replace Main B D Check screen condition by input External Input Component AV HDMI Request repair for external device Check S W Version Y N S W Upgrade Y N Y N Replace Main B D Replace Module A7 A8 A9 Check Test pattern N End Screen normal Screen normal Screen normal Screen normal Screen normal End End Check Version Normal Screen External Input error Error Symptom A Video Error Established date 6 ...

Page 33: ...n B D N Y Check ST BY 3 5V N Replace Adaptor or Main B D Y A11 A17 Stand By Red Power LED On Normal Voltage Normal Operati on Error Symptom B Power Error Established date 7 14 Content No power Revised date Standard Repair Process End Copyright 2015 LG Electronics Inc All rights reserved Only for training and service purposes LGE Internal Use Only ...

Page 34: ...MER Power off by ON TIMER POWEROFF_RS232C Power off by RS232C POWEROFF_RESREC Power off by Reservated Record POWEROFF_RECEND Power off by End of Recording POWEROFF_SWDOWN Power off by S W Download POWEROFF_UNKNOWN Power off by unknown status except listed case Abnormal POWEROFF_ABNORMAL1 Power off by abnormal status except CPU trouble POWEROFF_CPUABNORMAL Power off by CPU Abnormal Please refer to ...

Page 35: ... Replace Speaker or Main B D Connec tion Error Symptom C Audio Error Established date 9 14 Content No audio Normal video Revised date Standard Repair Process A15 Normal Audio End Y N Copyright 2015 LG Electronics Inc All rights reserved Only for training and service purposes LGE Internal Use Only ...

Page 36: ... Replace Main B D N A13 End Signal Normal Normal Voltage Normal Audio Wrecked Audio Discontinuation Noise for all audio Wrecked Audio Discontinuation Noise only for D TV Wrecked Audio Discontinuation Noise only for Analog Wrecked Audio Discontinuation Noise only for External Input N Replace Main B D Error Symptom C Audio Error Established date 10 14 Content Wrecked audio Discontinuation Noise Revi...

Page 37: ...Main B D A17 N N Check Voltage 19V of Adaptor A13 Check IR Output signal N Y Replace IR B D N A17 Replace Main B D Y A17 End Normal Operating Normal Voltage Normal Signal Normal Operating Normal Operating End Y Error Symptom D Function Error Established date 11 14 Content Remote control Local switch checking Revised date Standard Repair Process Copyright 2015 LG Electronics Inc All rights reserved...

Page 38: ...al information Signal Input Technical information External Input and Component Recognition error HDMI Recognition error Error Symptom D Function Error Established date 12 14 Content External device recognition error Revised date Standard Repair Process Copyright 2015 LG Electronics Inc All rights reserved Only for training and service purposes LGE Internal Use Only ...

Page 39: ... without any fix information provide the description or Mechanical noise is a natural phenomenon and apply the 1st level description When the customer does not agree apply the process by stage Describe the basis of the description in Part related to nose in the Owner s Manual Circuit noise Mechanical noise Error Symptom E Noise Established date 13 14 Content Circuit noise Mechanical noise Revised ...

Page 40: ...nd Standard Repair Process Module damage Cabinet damage Remote control damage Stand damage Error Symptom F Exterior Defect Established date 14 14 Content Exterior defect Revised date Copyright 2015 LG Electronics Inc All rights reserved Only for training and service purposes LGE Internal Use Only ...

Page 41: ... LVDS reconnection condition A8 A9 9 Adjustment Test pattern ADJ Key A10 10 11 A Video error_Vertical Horizontal bar residual image light spot Connection diagram A8 12 Check Link Cable LVDS reconnection condition A8 A9 13 Adjustment Test pattern ADJ Key A10 14 Appendix Defected Type caused by T Con Inverter Module Exchange T Con Board 1 A 1 5 15 Exchange T Con Board 2 A 2 5 16 Exchange LED driver ...

Page 42: ... MODE checking method A14 24 C Audio error_No audio Normal video Checking method in menu when there is no audio A15 25 D Function error_ No response in remote control key error Remote control operation checking method A17 Contents of Standard Repair Process Detail Technical Manual First of all Check whether there is SVC Bulletin in GCSC System for these model Copyright 2015 LG Electronics Inc All ...

Page 43: ... back case check lighting Error Symptom A Video Error No Video Normal Audio Established date A1 Content Check Back Light On with Naked eye Revised date Copyright 2015 LG Electronics Inc All rights reserved Only for training and service purposes LGE Internal Use Only ...

Page 44: ...g to LED backlight from Main B D Error Symptom A Video Error No Video Normal Audio Established date A2 Content Power Board to LED back light Voltage Revised date Copyright 2015 LG Electronics Inc All rights reserved Only for training and service purposes LGE Internal Use Only ...

Page 45: ...mptom A Video Error No Video Normal Audio Established date A4 Content Power Board Voltage Measuring Method Revised date HD Model 27 30 pin FHD Model 48 51 pin Copyright 2015 LG Electronics Inc All rights reserved Only for training and service purposes LGE Internal Use Only ...

Page 46: ...reen condition by signal Jack spec depending on Model Error Symptom A Video Error Vertical Horizontal bar Residual Image Light spot Established date A7 Content connection diagram Revised date Copyright 2015 LG Electronics Inc All rights reserved Only for training and service purposes LGE Internal Use Only ...

Page 47: ...ocess Detail Technical Manual Error Symptom A Video Error Color Error Established date A8 A9 Content Check and replace Link Cable LVDS and contact condition Revised date Copyright 2015 LG Electronics Inc All rights reserved Only for training and service purposes LGE Internal Use Only ...

Page 48: ...n Solder defect CNT Broken Solder defect CNT Broken Solder defect CNT Broken Abnormal Power Section Solder defect Short Crack Abnormal Power Section Solder defect Short Crack Appendix Exchange T Con Board 1 Copyright 2015 LG Electronics Inc All rights reserved Only for training and service purposes LGE Internal Use Only ...

Page 49: ...ower Section Solder defect Short Crack Fuse Open Abnormal power section Noise GRADATION GRADATION Abnormal Display Appendix Exchange T Con Board 2 Copyright 2015 LG Electronics Inc All rights reserved Only for training and service purposes LGE Internal Use Only ...

Page 50: ...Press damage Crosstalk Crosstalk Press damage Panel Mura Light leakage Press damage Un repairable Cases In this case please exchange the module Copyright 2015 LG Electronics Inc All rights reserved Only for training and service purposes LGE Internal Use Only ...

Page 51: ...lock Source TAB IC Defect Horizontal Block Gate TAB IC Defect Horizontal line Gate TAB IC Defect Gate TAB IC Defect Horizontal Block Gate TAB IC Defect Appendix Exchange the Module 2 Un repairable Cases In this case please exchange the module Copyright 2015 LG Electronics Inc All rights reserved Only for training and service purposes LGE Internal Use Only ...

Page 52: ... Front LED control Menu Option Standby Light On Off Error Symptom B Power Error No Power Established date A11 Content Check front Display LED Revised date Copyright 2015 LG Electronics Inc All rights reserved Only for training and service purposes LGE Internal Use Only ...

Page 53: ...ltage 19V of Adaptor Power Error Symptom B Power Error No Power Established date A12 A13 Content Checking Method When Power is ON Revised date Copyright 2015 LG Electronics Inc All rights reserved Only for training and service purposes LGE Internal Use Only ...

Page 54: ...tem 3 Standard Repair Process Detail Technical Manual Error Symptom B Power Error Off when on off whiling viewing Established date A14 Content Power off Mode checking method Revised date Copyright 2015 LG Electronics Inc All rights reserved Only for training and service purposes LGE Internal Use Only ...

Page 55: ...l Technical Manual Error Symptom C Audio Error No Audio Normal Video Established date A15 Content Checking method in menu when there is no audio Revised date Copyright 2015 LG Electronics Inc All rights reserved Only for training and service purposes LGE Internal Use Only ...

Page 56: ...e Analog Tester needle moves slowly and defective when it does not move at all Standard Repair Process Detail Technical Manual P4600 Sub Ass y Main Ass y Error Symptom D Function Error No Response in remote control Key error Established date A17 Content Remote control operation checking method Revised date Copyright 2015 LG Electronics Inc All rights reserved Only for training and service purposes...

Reviews: