- 16 -
7. White Balance adjustment
7-1. Using device
A. Color Analyzer : CA-210 (CH 9)
When adjusting the LCD white balance, use CS-1000 as the
color analyzer (CA-210) and channel 9 corrected of Matrix
(corrected for White, Red, Green, Blue) and the adjustment
must be done in accordance with the White balance
adjustment coordinate.
B. Automatic adjuster (Necessary for automatic adjustment, must
be able to communicate with RS-232C, Baud Rate : 115200)
C. Video Signal Generator MSPG-925F 720p, 216Gray(Model :
217, Pattern 78
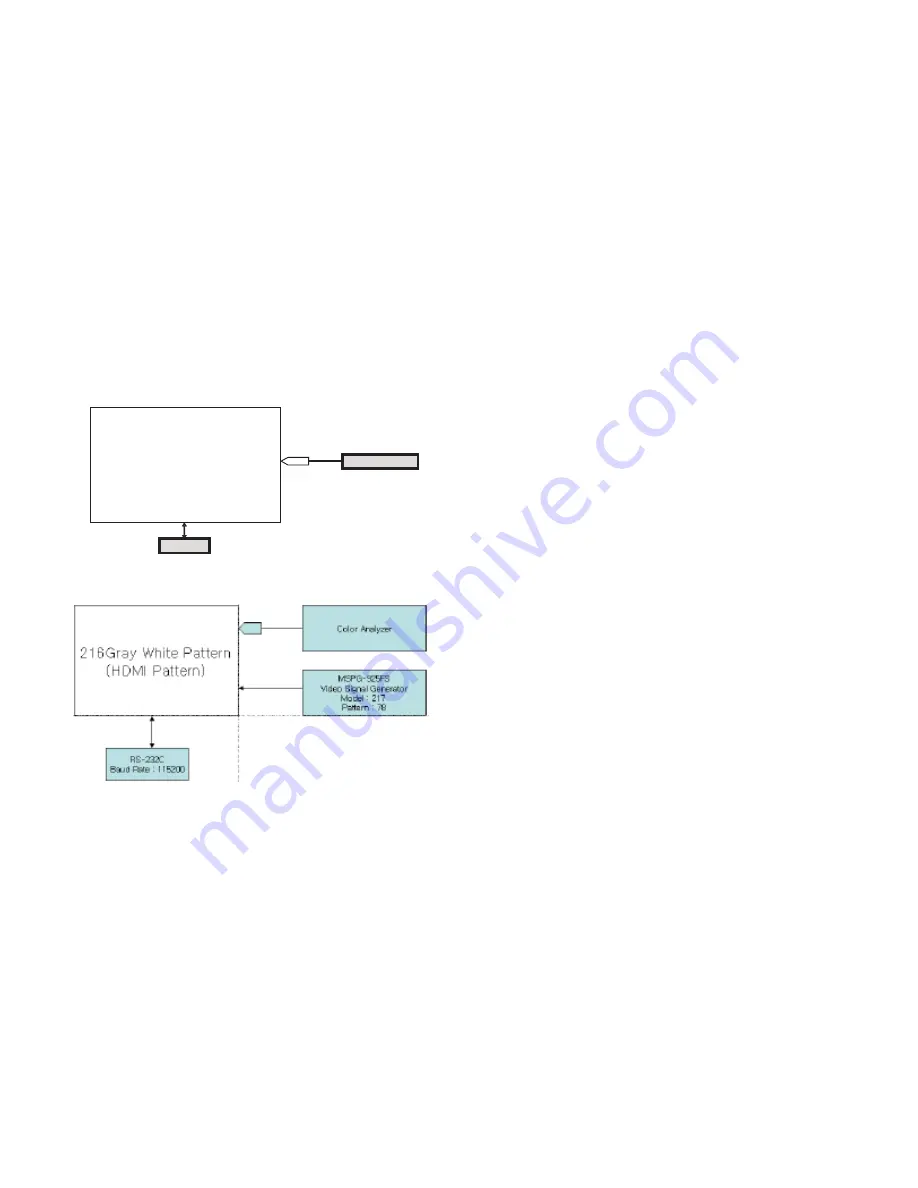
7-2. Measuring device connection diagram
(for automatic adjustment)
=> Connection diagram for internal pattern
=> Connection diagram for HDMI input
7-3. White Balance adjustment method
Basically it uses the internal pattern but when internal pattern is
not possible, you can select HDMI input for adjustment. Through
the option at the most bottom part of the Ez Adjust Menu 7.White
Balance menu, you can select NONE, INNER and HDMI, and the
default is set to INNER. When the adjustment cannot be done
with the internal pattern, you can select HDMI input for
adjustment.
For manual adjustment, press the ADJ KEY of the adjustment
R/C to enter Ez Adjust 7.White-Balance, and the pattern is
automatically displayed. (When you set the Option to INNER, the
default is always set to INNER)
A. Connect the set according to the internal pattern or HDMI
input in accordance with 4.3.2 measuring device connection
diagram.
B. Set the Baud Rate of RS-232C to 115200. It is set to 115200
as default.
C. Connect the RS-232C Cable to the set.
D. Connect the HDMI Cable to the set. (Limited to the set with
HDMI option)
E. Select and adjust the model applicable to LA73A chassis from
the adjuster
Caution)
For automatic adjustment, RS-232C Command and
Chassis are commonly applied
7.3.1 White Balance adjustment (For automatic adjustment)
- Execute Power Only Key of the adjustment R/C to execute
automatic adjustment. Set the Baud Rate to 115200.
: Always start adjustment with "wb 00 00" and end
adjustment with "wb 00 ff"
: Adjust the offset if necessary.
7-4. White Balance adjustment
(For manual adjustment)
O
Using device: CA-210
=> When adjusting the plasma white balance, use CS-1000
as the color analyzer (CA-210) and channel 9 corrected of
Matrix (corrected for White, Red, Green, Blue) and the
adjustment must be done in accordance with the below
White balance adjustment coordinate.
O
Manual adjustment must be done in the following order
A. Press the ADJ of adjustment R/C to enter ‘EZ-ADJUST’.
B. Select 10.TEST PATTERN using the CH + / - KEY and
press the Enter KEY to execute a heat run for more than
30 minutes.
C. Execute a Zero Calibration for CA-210 and put it at
distance of less than 10Cm from the LCD module surface
center during the adjustment.
D. Press the ADJ of adjustment R/C, select ‘7.White-Balance’
of ‘Ez – Adjust’ and enter the adjustment mode using the
right key (
G
).
(When you press the ¢
∫
button, the screen enters the full
white internal pattern..)
E. The adjustment is executed in 3 different white balance of
COOL, MEDIUM and WARM.
F. When the white balance is Cool,
Fix B Gain 192, fix R-Cut / G-Cut / B-Cut 64,
and use R Gain / G Gain to adjust the High Light.
When the white balance is Medium,
Fix R Gain 192, fix R-Cut / G-Cut / B-Cut 64,
and use G Gain / B Gain to adjust the High Light.
When the white balance is Warm
Fix R Gain 192, fix R-Cut / G-Cut / B-Cut 64,
and use G Gain / B Gain to adjust High Light.
G. Use the +, - key for adjustment.
H. When the adjustment is completed, press the OK (
Á
KEY)
button to move to the Ez –Adjust screen. Press the ADJ
KEY to exit the adjustment mode.
C A -100+
C O L O R
A N A L Y Z E R
T Y PE ; C A -100+
F u l l W h i t e P at t er n
R S-232C


