background image

ENGLISH

9

TABLE OF CONTENTS

59  MAKING CONNECTIONS

59 

Connecting to an antenna or cable

60 

Connection Overview

61 

Connecting to a HD receiver, DVD, or 
VCR player

61 

-  HDMI Connection

62 

-  Component Connection

63 

-  Composite Connection

64 

Connecting to a PC

64 

-  HDMI Connection

65 

Connecting to an Audio System

65 

-  Digital Optical Audio Connection

66 

Connecting to a USB

67 

SIMPLINK Connection

67 

-  Activating and Using the SIMPLINK 

menus

68  MAINTENANCE

68 

Cleaning Your TV

68 

-  Screen, frame, cabinet and stand

68 

-  Power cord

68 

Preventing “Image burn” or “Burn-in” on 
your TV screen

69  TROUBLESHOOTING

71  SPECIFICATIONS

75  IR CODES

y

y

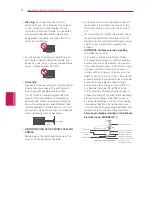
Image shown may differ from your TV.

y

y

Your TV’s OSD (On Screen Display) may 
differ slightly from that shown in this 
manual.

y

y

The available menus and options may differ 
from the input source or product model that 
you are using.

y

y

New features may be added to this TV in 
the future.


NOTE

Summary of Contents for 47LS4500

Page 1: ... set and retain it for future reference LED LCD TV MODELS 32LS3400 22LS3500 22LS3510 47LS4500 42LS3400 26LS3500 26LS3510 55LS4500 32LS3410 32LS3500 32LS3510 32LS3450 42LS3450 P NO MFL67468111 1208 REV08 Printed in Mexico LCD TV MODELS 32CS460 32CS560 32CS461 37CS560 42CS530 42CS560 www lg com ...

Page 2: ...THE RISK OF FIRE AND ELECTRIC SHOCK DO NOT EXPOSE THIS PRODUCT TO RAIN OR MOISTURE WARNING This product contains chemicals known to the State of California to cause cancer and birth defects or other reproductive harm Wash hands after handling Read these instructions Keep these instructions Heed all warnings Follow all instructions Do not use this apparatus near water Clean only with a dry cloth Do...

Page 3: ...sit the nearest hospital Additionally vinyl packing can cause suffocation Keep it out of the reach of children CAUTION concerning the Power Cord Can differ by country It is recommended that appliances be placed upon a dedicated circuit that is a single outlet circuit which powers only that appliance and has no additional outlets or branch circuits Check the specification page of this owner s manua...

Page 4: ...e unit is turned off Do not attempt to modify this product in any way without written authorization from LG Electronics Unauthorized modification could void the user s authority to operate this product ANTENNAS Outdoor antenna grounding Can differ by country If an outdoor antenna is installed follow the precautions below An outdoor antenna system should not be located in the vicinity of overhead p...

Page 5: ... Dot Defect The Plasma or LCD panel is a high technology product with resolution of two million to six million pixels In a very few cases you could see fine dots on the screen while you re viewing the TV Those dots are deactivated pixels and do not affect the performance and reliability of the TV Generated Sound Cracking noise A cracking noise that occurs when watching or turning off the TV is gen...

Page 6: ...mage buri or Bgrb in on your TV screen If a fixed image displays on the TV screen for a long period of time it will be imprinted and become a permanent disfigurement on the screen This is image burn or burn in and not covered by the warranty If the aspect ratio of the TV is set to 4 3 for a long period of time image burn may occur on the letterboxed area of the screen Avoid displaying a fixed imag...

Page 7: ...ce complies with part 15 of the FCC Rules Operation is subject to the following two conditions 1 this device may not cause harmful interference and 2 this device must accept any interference received including interference that may cause undesired operation of the device Any changes or modifications in construction of this device which are not expressly approved by the party responsible for compli...

Page 8: ...er 34 HDMI Connection 35 Component Connection 36 Composite Connection 37 Connecting to a PC 37 HDMI Connection 38 Connecting to an A udio System 38 Digital O ptical Audio Connectio n 39 Connecting to a USB 40 REMOTE CONTROL 42 WATCHING TV 42 Connecting to the AC DC adapter 42 Turning the TV on for the first time 43 TROUBLESHOOTING 43 OPEN SOURCE SOFTWARE NOTICE 44 SPECIFICATIONS 0 NOTE Image shown...

Page 9: ...re not covered by the warranty In case of some model the thin film on screen is a part of TV So don t take it off Power Cord Installation Guide If the power cord provided with the TV looks like the below picture please ensure that it is inserted in the correct direction Power Cord Correct Wrong r QNoTE I The items supplied with your product may vary depending on the model II Product specifications...

Page 10: ...3400 LS341 0 series Remote control Batteries AAA See p 40 a Stand Body See p 21 r 1l L _ Protection cover See p 28 Owner s manual CD manual ___ _ _ __ _ _ I Stand Base See p 21 lDesk mount Screw See p 29 Power Cord Stand Screws 8 EA M4 X 20 See p 21 ...

Page 11: ...S3450 Stand Screws 2 EA P4 X 16 4 EA M4 X 20 See p 22 for 32LS3450 Protection cover See p 28 Owner s manual CD manual for 42LS3450 Stand Body I Stand Base See p 23 for 42LS3450 Stand Screws 4 EA P4 X 16 4 EA M4 X 14 See p 23 ASSEMBLING AND PREPARING 11 Power Cord Desk mount Screw See p 29 Cable holder See p 32 ...

Page 12: ...ING For CS530 CS560 series Remote control Batteries AAA See p 40 Stand Body See p 24 Protection cover See p 28 Owner s manual CD manual Stand Base See p 24 Desk mount Screw See p 29 Power Cord Stand Screws 8 EA M4 X 20 See p 24 ...

Page 13: ... p 40 Stand Body See p 25 For 26LS3500 26LS351 0 Stand Screws 2 EA M4 x 14 See p 25 Owner s manual CD manual Stand Base See p 25 Cable holder See p 32 ASSEMBLING AND PREPARING 13 Power Cord For 22LS3500 22LS351 0 Stand Screws 2 EA P4 X 16 See p 25 AC DC Adapter ...

Page 14: ...For 32LS3500 32LS3510 Remote control Batteries AAA See p 40 Stand Body See p 26 Desk mount Screw See p 29 Owner s manual CD manual Stand Base See p 26 Cable holder See p 32 Power Cord Stand Screws 4 EA P4 x 16 4 EA M4 X 14 See p 26 ...

Page 15: ...J See p 40 Stand Body See p 27 for 47LS4500 i Desk mount Screw See p 29 Owner s manual CD manual Stand Base See p 27 Cable holder See p 32 ASSEMBLING AND PREPARING 15 Wall Mount Inner Spacers 4 EA See p 31 Stand Screws 8 EA M4 X 20 See p 27 0 Power Cord ...

Page 16: ...tion I I Turns the power on or off INPUT Changes the input source SETIINGS Accesses the main menus or saves your input and exits the menus OK0 Selects the highlighted menu option or confirms an input Adjusts the volume level v 1 Scrolls through the saved channels Intelligent sensor Adjusts the image quality and brightness based on the surrounding environment 2 All of the buttons are touch sensitiv...

Page 17: ... Power md1cator Turns the power on or off Changes the input soume Description Accesses the main menus or saves your input and exits the menus Selects the highlighted menu option or confirms an input Adjusts the volume level Scrolls through the saved channels Intelligent sensor Adjusts the image quality and brightness based on the surrounding environment I ...

Page 18: ...tion I I Turns the power on or off INPUT Changes the inputsou e SETTINGS Accesses the main menus or saves your input and exits the menus OK0 Selects the highlighted menu option or confirms an input Adjusts the volume level v 1 Scrolls through the saved channels 1 Intelligent sensor Adjusts the image quality and brightness based on the surrounding environment 2 All of the buttons are touch sensitiv...

Page 19: ...sses the Home menu or saves your input and exits the menus OK Selects the highlighted menu option or confirms an input I Adjusts the volume level I I f v 1 Scrolls through the saved channels J 1 Intelligent sensor AdJusts the image quality and brightness based on the surrounding environment 2 All of the buttons are touch sensitive and can be operated through simple touch w ith your finger I ...

Page 20: ...efore moving or lifting the TV disconnect the power cord and all cables When holding the TV the screen should face away from you to avoid damage Hold the top and bottom of the TV frame firmly Make sure not to hold the transparent part speaker or speaker grill area X X When transporting a large TV there should be at least 2 people When transporting the TV by hand hold the TV as shown in the followi...

Page 21: ...E Remove the stand before installing the TV on a wall mount by performing the stand attachment in reverse 2 LL CAUTION When attaching the stand to the TV set place the screen facing down on a cushioned table or flat surface to protect the screen from scratches LL CAUTION Make sure that the screws are fastened completely If they are not fastened securely enough the TV may tilt forward after being i...

Page 22: ...down on a cushioned table or flat surface to protect the screen from scratches I i j I I 1 I I 1 I I 1 I I I i 1 4EAU I I i M4 X 20 Q i I I I 1 11 1 El I l CAUTION Make sure that the screws are fastened completely If they are not fastened securely enough the TV may tilt forward after being installed Do not fasten the screws with too much force otherwise they may be worn out and get loosened ...

Page 23: ... attaching the stand to the TV set place the screen facing down on a cushioned table or flat surface to protect the screen from scratches IT4EA M4 X 14 6 CAUTION j jl ii ii I I I I Make sure that the screws are fastened completely If they are not fastened securely enough the TV may tilt forward after being installed Do not fasten the screws w ith too much force otherwise they may be worn out and g...

Page 24: ..._ CAUTION When attaching the stand to the TV set place the screen facing down on a cushioned table or flat surface to protect the screen from scratches Lt_ CAUTION Make sure that the screws are fastened completely If they are not fastened securely enough the TV may tilt forward after being installed Do not fasten the screws with too much force otherwise they may be worn out and get loosened ...

Page 25: ...e the screen facing down on a I cushioned table or flat surface to protect l the screen from scratches For 22LS3500 22LS3510 l2EA P4 X 16 For 26LS3500 26LS3510 2 EA M4 X 14 CAUTION Make sure that the screws are fastened completely If they are not fastened securely enough the TV may tilt forward after being installed Do not fasten the screws with too much force otherwise they may be worn out and ge...

Page 26: ...ing the stand to the TV set place the screen facing down on a cushioned table or flat surface to protect the screen from scratches I I I I I ___ _ ___ if CAUTION Make sure that the screw s are fastened completely If they are not fastened securely enough the TV may tilt forward after being installed Do not fasten the screw s with too much force otherwise they may be worn out and get loosened i ___ ...

Page 27: ...7 2 CAUTION When attaching the stand to the TV set place the screen facing down on a cushioned table or flat surface to protect the screen from scratches CAUTION Make sure that the screws are fastened completely If they are not fastened securely enough the TV may tilt forward after being installed Do not fasten the screws with too much force otherwise they may be worn out and get loosened ...

Page 28: ...n on a cushioned table or flat surface to protect the screen from scratches ONOTE This will protect the opening from accumulating dust and dirt When installing the wall mounting bracket use the Protection cover 0 NOTE _ For 32LS3450 When removing the Protection Cover from bottom of TV insert your fingers into hole of cover Hold firmly and pull upwards towards you to remove ...

Page 29: ...e TV watch out for your fingers Personal injury may occur if hands or fingers are pinched If the product is tilted too much it may fall causing damage or injury ASSEMBLING AND PREPARING 29 For 32CS460 32CS461 42CS530 32 37 42CS560 32 42LS3400 32LS341 0 32 42LS3450 32LS3500 32LS351 0 47LS4500 Fix the TV to a table to prevent from tilting forward damage and potential injury Mount the TV on a table a...

Page 30: ...at children do not climb on or hang on the TV ONOTE Use a platform or cabinet that is strong and large enough to support the TV securely Brackets bolts and ropes are optional You can obtain additional accessories from your local dealer For 32CS460 32CS461 42CS530 32 37 42CS560 22 26LS3500 22 26LS351 0 The Kensington security system connector is located at the rear of the TV For more information of...

Page 31: ...install the TV Otherwise electric shock may occur If you install the TV on a ceiling or slanted wall it may fall and result in severe injury Use an authorized LG wall mount and contact the local dealer or qualified personnel Do not over tighten the screws as this may cause damage to the TV and void your warranty Use only screws and wall mounts that meet the VESA standard Any damages or injuries by...

Page 32: ...ly to the TV Cable management clip For 22 26LS3500 22 26LS351 0 1 Gather and bind the cables with the cable holder For 32LS3500 32LS351 0 32 42LS3450 47 55LS4500 1 Gather and bind the cables with the cable holder Cable holder 6 CAUTION Do not move the TV by holding the cable management clip or cable holder as the cable holders may break and injuries and damage to the TV may occur ...

Page 33: ... signal input cable to the TV through a DVD recorder or VCR For more information of recording refer to the manual provided with the connected device The external device connection may differ from the model Connect external devices to the TV regardless of the order of the TV port Connecting to an antenna or cable VHF Antenna I I r m J 1 Antenna Coaxial 750 6 CAUTION _ Make sure not to bend the copp...

Page 34: ...gnals from an external device to the TV Connect the external device and the TV with the HDMI cable as shown in the following illustration ONOTE Use the latest High Speed HDMI Cable with CEC Customer Electronics Control function High Speed HDMI Cables are tested to carry an HD signal up to 1080p and higher Choose any HOMI input port to connect It does not matter which port you use t____L rmr tol No...

Page 35: ...ponent cable as shown in the following illustration ONOTE If cables are installed incorrectly it could case the image to display in black and white or with distorted color Check to ensure the cable are matched with the corresponding color connection r CJ I rnJ_ z z 0 0 o u 0 0 0 0 Cll Cll E 0 Y PB PR L R L__VIDEO ____J LAUDIQ J 5Id i iiji Iii DVD I Blu Ray I HD Cable Box I ...

Page 36: ... external device to the TV Connect the external device and the TV with the composite cable as shown in the following illustration NOTE If you have a mono VCR connect the audio cable from the VCR to the AUDIO UMONO jack of the TV CJ I z 0 0 a e 0 0 VIDEO DiiAUDioiJ VCR I DVD I Blu Ray I HD Cable Box ...

Page 37: ...oise is present change the PC output to another resolution change the refresh rate to another rate or adjust the brightness and contrast on the PICTURE menu until the picture is clear The synchronization input form for Horizontal and Vertical frequencies is separate Depending on the graphics card some resolution settings may not allow the image to be positioned on the screen properly HDMI Connecti...

Page 38: ...you use an optional external audio device instead of the built in speaker set the TV speaker feature to off Digital Optical Audio Connection Transmits a digital audio signal from the TV to an external device Connect the external device and the TV with the optical audio cable as shown in the following illustration liD OPTICALAUDIO IN Digital Audio System ...

Page 39: ...MAKING CONNECTIONS 39 Connecting to a USB Connect a USB storage device such as a USB flash memory external hard drive or a USB memory card reader to the TV USB I I ...

Page 40: ...e remote control Make sure to point the remote control toward at the remote control sensor on the TV r ENERGY POWER SAVING RATIO INPUT l POWER Turns the TV on or off etZJ ENERGY SAVING Adjusts the brightness of the screen to reduce energy consumption TV Returns to the last TV channel AVMODE Selects an AV mode INFO D Views the information of the current program and screen ORATIO Resizes an image EJ...

Page 41: ... l Clears all on screen displays and returns to TV viewing vaL Adjusts the volume level FAV Accesses your favorite channel list mPLinK Accesses the AV devices connected to the TV Opens the SIMPLINK menu p A G t MUTE llil E r GD I I I I Gil 1 I I I 1 I I L I Mutes all sounds cH scrolls through the saved channels tPAGE Moves to the previous or next screen Color buttons These access special functions...

Page 42: ...me ONOTE You can also access Initial Setting by accessing OPTION in the main menu 3 Follow the on screen instructions to customize your TV settings according to your preferences Language I Selects a language to L___ _ _ _ _ _ __J display Mode Setting ISelects Home Use for ___________ the home environment Time Setting ISelects the time zone L___ _ _ _ _ _ __J_ and daylight saving Auto Tuning J Scan...

Page 43: ...r supply may be interrupted Check if the Auto sleep feature is activated in the Time settings If there is no signal while the TV is on the TV will turn off automatically after 15 minutes of inactivity OPEN SOURCE SOFTWARE NOTICE To obtain the source code under GPL LGPL MPL and other open source licenses that is contained in this product please visit http opensource lge com In addition to the sourc...

Page 44: ...530 UB 32CS560 UE Dimensions With stand 1019 0 x 698 0 x 265 0 mm 795 0 x 568 0 x 207 0 mm W x H x D 40 1 x 27 4 x 10 4 inch 31 2 x 22 3 x 8 1 inch Without stand 1019 0 x 631 0 x 76 5 mm 795 0 x 504 0 x 73 5 mm 40 1 x 24 8 x 3 0 inch 31 2 x 19 8 x 2 8 inch Weight With stand 15 1 kg 33 2 lbs 9 2 kg 20 2 lbs Without stand 13 4 kg 29 5 lbs 8 1 kg 17 8 lbs Current Value I Power consumption 1 7AI170W 1...

Page 45: ... 11 8 kg 26 0 lbs Weight Without stand 6 9 kg 15 2 lbs 10 7 kg 23 51bs Current Value I Power consumption 0 9AI60W 1 3 Al90 W Power requirement AC1 00 240 V 50160 Hz AC1 00 240 V 50160 Hz 22LS3500 26LS3500 MODELS 22LS350o lJD 26LS3500 UD 22LS3510 26LS3510 I 22LS351Q UA 26LS351Q UA With stand 523 0 x 376 0 x 140 0 mm 627 0 x 442 0 x 162 0 mm Dimensions 20 5 x 14 8 x 5 4 inch 24 6 x 17 4 x 6 3 inch W...

Page 46: ... 655 0 mm x 35 5 mm 1263 0 mm x 754 0 mm x 35 5 mm 42 8 inch x 25 7 inch x 1 3 inch 49 7 inch x 29 6 inch x 1 3 inch 17 0 kg 37 5 lbs 25 2 kg 55 2 lbs 14 9 kg 32 8 lbs 21 9 kg 48 2 lbs 1 2A 1 20W 1 5 A 150W AC100 240 V 50 60Hz AC1 00 240 V 50 60 Hz Vertical Component ports on the TV Frequency Hz 59 94 60 00 59 94 60 00 59 94 60 00 23 976 24 00 29 97 30 00 59 94 60 00 Video output ports on DVD play...

Page 47: ...lace flat panel displays on furniture that can easily be used as steps such as a chest of drawers Remember that children can become excited while watching a program especially on a larger than life flat panel display Care should be taken to place or install the display where it cannot be pushed pulled over or knocked down Care should be taken to route all cords and cables connected to the flat pan...

Page 48: ...need to use the personal computer PC equipped with a CD ROM drive LG Customer Information Center For inquires or comments visit www lg com or call 1 800 243 0000 USA Consumer User 1 888 865 3026 USA Commercial User 1 888 542 2623 CANADA For LS3400 LS3410 LS3450 LS3500 LS4500 series U SA Canada Mexico This product qualif1es fo r ENERGY STAR in the f cto Uohoh Homo u o 9 C hang ing the factory d efa...

Page 49: ... it for future reference P NO SAC35375602 1208 REV09 OWNER S MANUAL LED LCD TV LCD TV LED LCD TV MODELS LCD TV MODELS 32LS3400 42LS3400 32LS3410 32LS3450 42LS3450 22LS3500 26LS3500 32LS3500 22LS3510 26LS3510 32LS3510 32CS460 32CS461 42CS530 32CS560 37CS560 42CS560 47LS4500 55LS4500 ...

Page 50: ... RISK OF FIRE AND ELECTRIC SHOCK DO NOT EXPOSE THIS PRODUCT TO RAIN OR MOISTURE y y Do not use this apparatus near water y y Clean only with a dry cloth y y Do not block any ventilation openings Install in accordance with the manufacturer s instructions y y Do not install near any heat sources such as radiators heat registers stoves or other apparatus including amplifiers that produce heat y y Do ...

Page 51: ...Anti moisture material is harmful if swallowed If swallowed by mistake force the patient to vomit and visit the nearest hospital Additionally vinyl packing can cause suffocation Keep it out of the reach of children y y CAUTION concerning the Power Cord Can differ by country It is recommended that appliances be placed upon a dedicated circuit that is a single outlet circuit which powers only that a...

Page 52: ... not disconnected from the AC power source even if the unit is turned off y y Do not attempt to modify this product in any way without written authorization from LG Electronics Unauthorized modification could void the user s authority to operate this product y y ANTENNAS Outdoor antenna grounding Can differ by country If an outdoor antenna is installed follow the precautions below An outdoor anten...

Page 53: ...ot drop anything onto the screen y y Dot Defect The Plasma or LCD panel is a high technology product with resolution of two million to six million pixels In a very few cases you could see fine dots on the screen while you re viewing the TV Those dots are deactivated pixels and do not affect the performance and reliability of the TV y y Generated Sound Cracking noise A cracking noise that occurs wh...

Page 54: ...at to which the receiver is connected Consult the dealer or an experienced radio TV technician for help This device complies with part 15 of the FCC Rules Operation is subject to the following two conditions 1 this device may not cause harmful interference and 2 this device must accept any interference received including interference that may cause undesired operation of the device Any changes or ...

Page 55: ...CE SOFTWARE NOTICE To obtain the source code under GPL LGPL MPL and other open source licenses that is contained in this product please visit http opensource lge com In addition to the source code all referred license terms warranty disclaimers and copyright notices are available for download LG Electronics will also provide open source code to you on CD ROM for a charge covering the cost of perfo...

Page 56: ...onnecting to the AC DC adapter 36 Turning the TV on for the first time 37 Watching TV 37 Managing channels 37 Setting up channels 38 Using favorite channels 39 Checking current program info 40 Using additional options 40 Adjusting aspect ratio 41 Changing AV modes 41 Using the input list 42 Using the quick menu 43 ENTERTAINMENT 43 Connecting USB storage devices 44 Browsing files 45 Viewing Photos ...

Page 57: ...to a USB 67 SIMPLINK Connection 67 Activating and Using the SIMPLINK menus 68 MAINTENANCE 68 Cleaning Your TV 68 Screen frame cabinet and stand 68 Power cord 68 Preventing Image burn or Burn in on your TV screen 69 TROUBLESHOOTING 71 SPECIFICATIONS 75 IR CODES y y Image shown may differ from your TV y y Your TV s OSD On Screen Display may differ slightly from that shown in this manual y y The avai...

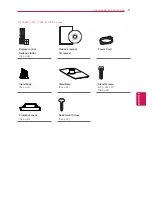
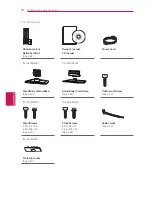
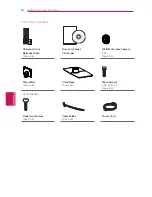
Page 58: ...ake sure all the accessories are included 2 Attach the stand to the TV set 3 Connect an external device to the TV set ASSEMBLING AND PREPARING Unpacking Check your product box for the following items If there are any missing accessories contact the local dealer where you purchased your product The illustrations in this manual may differ from the actual product and item y y Do not use any unapprove...

Page 59: ...For CS460 CS461 LS3400 LS3410 series Remote control Batteries AAA See p 34 Owner s manual CD manual Power Cord Stand Body See p 22 Stand Base See p 22 Stand Screws 8 EA M4 x 20 See p 22 Protection cover See p 29 Desk mount Screw See p 30 ...

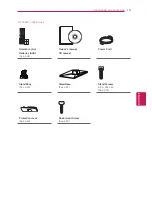
Page 60: ...anual Power Cord for 32LS3450 for 42LS3450 Stand Body Stand Base See p 23 Stand Body Stand Base See p 24 Desk mount Screw See p 30 for 32LS3450 for 42LS3450 Stand Screws 2 EA P4 x 16 4 EA M4 x 20 See p 23 Stand Screws 4 EA P4 x 16 4 EA M4 x 14 See p 24 Cable holder See p 33 for 32LS3450 Protection cover See p 29 ...

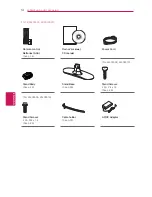
Page 61: ...PARING For CS530 CS560 series Remote control Batteries AAA See p 34 Owner s manual CD manual Power Cord Stand Body See p 25 Stand Base See p 25 Stand Screws 8 EA M4 x 20 See p 25 Protection cover See p 29 Desk mount Screw See p 30 ...

Page 62: ... Remote control Batteries AAA See p 34 Owner s manual CD manual Power Cord For 22LS3500 22LS3510 Stand Body See p 26 Stand Base See p 26 Stand Screws 2 EA P4 x 16 See p 26 For 26LS3500 26LS3510 Stand Screws 2 EA M4 x 14 See p 26 Cable holder See p 33 AC DC Adapter ...

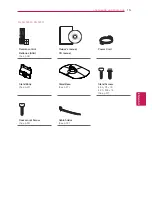
Page 63: ...NG For 32LS3500 32LS3510 Remote control Batteries AAA See p 34 Owner s manual CD manual Power Cord Stand Body See p 27 Stand Base See p 27 Stand Screws 4 EA P4 x 16 4 EA M4 x 14 See p 27 Desk mount Screw See p 30 Cable holder See p 33 ...

Page 64: ...S4500 Remote control Batteries AAA See p 34 Owner s manual CD manual Wall Mount Inner Spacers 4 EA See p 32 Stand Body See p 28 Stand Base See p 28 Stand Screws 8 EA M4 x 20 See p 28 for 47LS4500 Desk mount Screw See p 30 Cable holder See p 33 Power Cord ...

Page 65: ...ed channels 1 Intelligent sensor Adjusts the image quality and brightness based on the surrounding environment 2 All of the buttons are touch sensitive and can be operated through simple touch with your finger USB IN SERVICE ONLY 2 1 IN VIDEO Y PB PR R L VIDEO AUDIO L MONOAUDIO COMPONENT IN AV IN R ANTENNA CABLE IN OK SETTINGS INPUT OK SETTINGS INPUT Speakers Touch buttons2 For CS460 CS461 LS3400 ...

Page 66: ...n input Adjusts the volume level v Scrolls through the saved channels 1 Intelligent sensor Adjusts the image quality and brightness based on the surrounding environment USB IN SERVICE ONLY 2 1 IN VIDEO Y PB PR R L VIDEO AUDIO L MONOAUDIO COMPONENT IN AV IN R ANTENNA CABLE IN OK INPUT SETTING SETTINGS INPUT OK Screen Buttons Power indicator Remote control and intelligent sensors1 Speakers Side Conn...

Page 67: ...ity and brightness based on the surrounding environment 2 All of the buttons are touch sensitive and can be operated through simple touch with your finger USB IN SERVICE ONLY OK SETTINGS INPUT VIDEO Y PB PR VIDEO AUDIO AUDIO COMPONENT IN AV IN R L MONO ANTENNA CABLE IN R L 2 1 IN 2 1 IN VIDEO Y PB PR VIDEO AUDIO AUDIO COMPONENT IN AV IN R L MONO ANTENNA CABLE IN R L DC IN Screen Speakers Touch but...

Page 68: ...ved channels 1 Intelligent sensor Adjusts the image quality and brightness based on the surrounding environment 2 All of the buttons are touch sensitive and can be operated through simple touch with your finger USB IN SERVICE ONLY 2 1 IN VIDEO Y PB PR R L VIDEO AUDIO L MONOAUDIO COMPONENT IN AV IN R ANTENNA CABLE IN OK SETTINGS INPUT OPTICAL DIGITAL AUDIO OUT Touch buttons2 Power indicator Remote ...

Page 69: ...fore moving or lifting the TV disconnect the power cord and all cables y y When holding the TV the screen should face away from you to avoid damage y y Hold the top and bottom of the TV frame firmly Make sure not to hold the transparent part speaker or speaker grill area y y When transporting a large TV there should be at least 2 people y y When transporting the TV by hand hold the TV as shown in ...

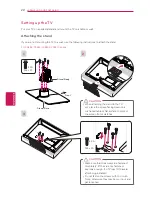
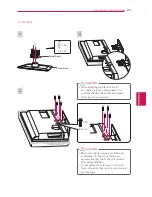
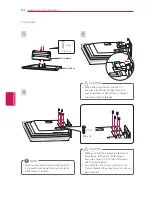
Page 70: ...series 1 4 EA M4 x 20 Stand Body Stand Base Front 3 M4 x 20 4 EA 2 y y When attaching the stand to the TV set place the screen facing down on a cushioned table or flat surface to protect the screen from scratches CAUTION y y Make sure that the screws are fastened completely If they are not fastened securely enough the TV may tilt forward after being installed y y Do not fasten the screws with too ...

Page 71: ...e the screen facing down on a cushioned table or flat surface to protect the screen from scratches CAUTION y y Make sure that the screws are fastened completely If they are not fastened securely enough the TV may tilt forward after being installed y y Do not fasten the screws with too much force otherwise they may be worn out and get loosened CAUTION ...

Page 72: ...N y y Remove the stand before installing the TV on a wall mount by performing the stand attachment in reverse NOTE y y Make sure that the screws are fastened completely If they are not fastened securely enough the TV may tilt forward after being installed y y Do not fasten the screws with too much force otherwise they may be worn out and get loosened CAUTION Stand Base Stand Body P4 x 16 4 EA M4 x...

Page 73: ...set place the screen facing down on a cushioned table or flat surface to protect the screen from scratches CAUTION y y Make sure that the screws are fastened completely If they are not fastened securely enough the TV may tilt forward after being installed y y Do not fasten the screws with too much force otherwise they may be worn out and get loosened CAUTION ...

Page 74: ...ey are not fastened securely enough the TV may tilt forward after being installed y y Do not fasten the screws with too much force otherwise they may be worn out and get loosened CAUTION 2 y y When attaching the stand to the TV set place the screen facing down on a cushioned table or flat surface to protect the screen from scratches CAUTION 1 Stand Body Stand Base 3 For 22LS3500 22LS3510 P4 x 16 2...

Page 75: ...flat surface to protect the screen from scratches CAUTION y y Remove the stand before installing the TV on a wall mount by performing the stand attachment in reverse NOTE y y Make sure that the screws are fastened completely If they are not fastened securely enough the TV may tilt forward after being installed y y Do not fasten the screws with too much force otherwise they may be worn out and get ...

Page 76: ...ing installed y y Do not fasten the screws with too much force otherwise they may be worn out and get loosened CAUTION y y Remove the stand before installing the TV on a wall mount by performing the stand attachment in reverse NOTE M4 x 20 4 EA 2 y y When attaching the stand to the TV set place the screen facing down on a cushioned table or flat surface to protect the screen from scratches CAUTION...

Page 77: ...TION 1 To detach the stand Depending on model y y This will protect the opening from accumulating dust and dirt y y When installing the wall mounting bracket use the Protection cover NOTE 2 3 Protection cover For 32LS3450 y y When removing the Protection Cover from bottom of TV insert your fingers into hole of cover Hold firmly and pull upwards towards you to remove NOTE 4 EA M4 x 20 ...

Page 78: ...t your view 20 20 y y When adjusting the angle of the TV watch out for your fingers Personal injury may occur if hands or fingers are pinched If the product is tilted too much it may fall causing damage or injury CAUTION Securing the TV to a table For 32CS460 32CS461 42CS530 32 37 42CS560 32 42LS3400 32LS3410 32 42LS3450 32LS3500 32LS3510 47LS4500 Fix the TV to a table to prevent from tilting forw...

Page 79: ...r NOTE Securing the TV to a wall optional Depending on model 1 Insert and tighten the eye bolts or TV brackets and bolts on the back of the TV If there are bolts inserted at the eye bolts position remove the bolts first 2 Mount the wall brackets with the bolts to the wall Match the location of the wall bracket and the eye bolts on the rear of the TV 3 Connect the eye bolts and wall brackets tightl...

Page 80: ...move or install the TV Otherwise electric shock may occur y y If you install the TV on a ceiling or slanted wall it may fall and result in severe injury Use an authorized LG wall mount and contact the local dealer or qualified personnel y y Do not over tighten the screws as this may cause damage to the TV and void your warranty y y Use only screws and wall mounts that meet the VESA standard Any da...

Page 81: ...mly to the TV Cable management clip For 22 26LS3500 22 26LS3510 1 Gather and bind the cables with the cable holder Cable holder For 32LS3500 32LS3510 32 42LS3450 47 55LS4500 1 Gather and bind the cables with the cable holder Cable holder y y Do not move the TV by holding the cable management clip or cable holder as the cable holders may break and injuries and damage to the TV may occur CAUTION ...

Page 82: ...ward at the remote control sensor on the TV POWER TV ENERGY SAVING AV MODE INFO LIST SETTINGS OK Q MENU EXIT P A G E MUTE FAV CH VOL FLASHBK RATIO INPUT ꕯ POWER Turns the TV on or off ꕊ ENERGY SAVING See p 50 Adjusts the brightness of the screen to reduce energy consumption TV Returns to the last TV channel AV MODE See p 41 Selects an AV mode INFO See p 39 Views the information of the current prog...

Page 83: ...nfirms your input ꕣ BACK Returns to the previous level EXIT ꕯ Clears all on screen displays and returns to TV viewing VOL Adjusts the volume level FAV See p 38 Accesses your favorite channel list See p 67 Accesses the AV devices connected to the TV Opens the SIMPLINK menu MUTE Mutes all sounds CH Scrolls through the saved channels PAGE Moves to the previous or next screen Color buttons These acces...

Page 84: ... turn the TV on for the first time y y You can also access Initial Setting by accessing OPTION in the main menu NOTE 3 Follow the on screen instructions to customize your TV settings according to your preferences Language Selects a language to display Mode Setting Selects Home Use for the home environment Time Setting Selects the time zone and daylight saving Auto Tuning Scans and saves available ...

Page 85: ...nnels To store channels automatically 1 Press SETTINGS to access the main menus 2 Press the Navigation buttons to scroll to CHANNEL and press OK 3 Press the Navigation buttons to scroll to Auto Tuning and press OK 4 Select Yes to start automatic tuning The TV scans and saves available channels automatically y y If the TV scans and saves channels the previously saved channels will be overwritten NO...

Page 86: ... press ꕣ BACK Selecting a channel on the channel list 1 Press LIST to access the channel list To move to the previous or next page press CH To tune to the CHANNEL menu Channel Edit press Blue button 2 Select a channel you want and press OK Using favorite channels Add the channels that you watch frequently to the favorite list Setting up your favorite list 1 Select a channel to add to the favorite ...

Page 87: ...in TV and HDMI input sources Multilingual ꔥ The program contains two or more audio language services You can change the audio language using the quick menu Caption ꔯ The program contains one or more language caption services You can change the caption language using the quick menu Aspect ratio ꔶ ꔷ The original aspect ratio of the video is 4 3 The original aspect ratio of the video is 16 9 wide Res...

Page 88: ...6 9 NOTE 16 9 Resizes images to fit the screen width Just Scan Displays video images in the original size without cutting off the edges Just Scan y y If you select Just Scan you may see image noises at the edge or edges of the screen y y The input sources DTV Component and HDMI DTV 720p 1080i 1080p support Just Scan NOTE Set By Program Displays images in the same aspect ratio as the original image...

Page 89: ... quality will be optimized for playing games Using the input list Selecting an input source 1 Press INPUT to access the input sources The connected device displays on each input source y y You can also access the input source list by selecting INPUT in the SETTINGS menu NOTE 2 Press the Navigation buttons to scroll to one of the input sources and press OK Input List TV AV Component HDMI1 HDMI2 ꕯ E...

Page 90: ... menus 2 Press the Navigation buttons to scroll through the following menus and press OK Menu Description ꔣ Aspect Ratio Changes the image size ꔨ Picture Mode Changes the image mode ꕞ Sound Mode Changes the sound mode ꕗ Caption Activates or deactivate the subtitles ꕁ Multi Audio Digital signal Changes the audio language ꕁ SAP Analog signal Changes the MTS sound ꔤ Sleep Timer Sets the length of tim...

Page 91: ...al driver y y The recognition speed of a USB storage device may differ depending on the device y y Only use a USB storage device which has normal music or image files y y Use only USB storage devices that are formatted as a FAT 32 or NTFS file system y y You may need to connect a USB storage device to an external power supply with a power adapter y y If the TV does not recognize a connected USB st...

Page 92: ...ce 4 GB DriveA Title Duration ꕗ 00 00 05 22 Up Folder ꔂ Move ꔉ Popup Menu Move Page ꕐ Option ꘂ Mark ꕯ Exit 1 2 3 4 5 6 No Description 1 Moves to the upper level folder 2 Preview Displays the thumbnail folder name of the file in the selected folder 3 Current page Total pages 4 Total number of marked files 5 Contents under the folder focused on 1 6 Available buttons on the remote control Tips for us...

Page 93: ... file OK Views the highlighted file or enters the mark mode CH Moves to the previous or next page FAV Enters the mark mode Menu Description View Views the selected photo Mark All Selects all files Unmark All Clears all of your selections Close Exits the Mark Mode y y Non supported files are displayed using this graphic NOTE 7 The following options are available while viewing photos ꔊ 2 13 ꔋ ꔠ Slid...

Page 94: ...ange Audio presets Refer to AUDIO Settings on p 53 Listening to music 1 Press SETTINGS to access the main menus 2 Press the Navigation buttons to scroll to USB and press OK 3 Press the Navigation buttons to scroll to Music List and press OK 4 Select DriveA to access the connected USB storage device 5 Press the Navigation buttons to scroll to a folder file you want and press OK 6 Play music by usin...

Page 95: ... previous menu screen Q MENU options for music list 1 Press Q MENU A pop up window will appears 2 Press the Navigation buttons to scroll to music list option and press OK 3 Press the Navigation buttons to scroll to one of the following options and press OK y y Option value changed in Photo List and Music List are changed likewise in Photo List and Music List NOTE Set Audio Allows you to change Aud...

Page 96: ...ished press EXIT CHANNEL PICTURE AUDIO TIME OPTION LOCK INPUT USB PICTURE See p 50 Adjusts the image size quality or effect AUDIO See p 53 Adjusts the sound quality effect or volume level TIME See p 54 Sets the time date or Timer feature USB See p 43 Displays photo and play music content stored on your USB INPUT See p 41 Views the input sources with their labels OPTION See p 55 Customizes the gene...

Page 97: ...press OK To return to the previous level press ꕣ BACK 4 When you are finished press EXIT The available channel settings are described in the following Setting Description Auto Tuning Tunes and stores all available channels through antennas or cable inputs See p 37 Manual Tuning Tunes and stores the channels you want manually See p 37 Channel Edit Adds or deletes channels on the channel See p 38 OK...

Page 98: ...y saving feature will turn off automatically y y To reset changes made by Picture Wizard operate Picture Reset when Picture Mode is on Expert1 NOTE Energy Saving Reduces the power consumption by adjusting the screen brightness y y When selecting Auto or Maximum Backlight will not work NOTE Option Auto The backlight is adjusted automatically corresponding to the surroundings when selecting Auto usi...

Page 99: ... settings for video experts as well as general viewers y y If you select Intelligent Sensor the option of the Energy saving feature will switch to Auto automatically NOTE Basic Image Options Setting Description Backlight Adjusts the brightness of the screen by controlling the LCD backlight If you decrease the brightness level the screen becomes darker and the power consumption will be reduced with...

Page 100: ...gh The reflection of the screen gets brighter Motion Eye Care Adjusts the brightness of the screen to prevent the screen from being too bright Dims extremely bright pictures Film Mode Makes video clips recorded in film look more natural by eliminating judder effect Color Gamut Maximizes the utilization of color to increase color quality Standard Displays standard set of colors Wide Increase number...

Page 101: ...eset sound modes or customizes options in each mode Mode Standard Select when you want standard quality sound Music Select when you listen to music Cinema Select when you watch movies Sport Select when you watch sports events Game Select when you play games y y If the Clear Voice II feature is on Infinite Surround will not be activated NOTE Option Infinite Surround Infinite Surround is a patented ...

Page 102: ...ignal which includes time information provided by the broadcasting station If not set the time and date manually Off Time On Time Sets the time to turn on or off the TV automatically To use this function you should set the current time and date in advance y y If you do not press any button within 2 hours after the TV turns on by the On Time feature the TV enters the Standby mode automatically y y ...

Page 103: ... through HDMI CEC Caption Sets whether to display captions and customize your option in each mode Mode CC 1 4 Closed Captioning Displays the audio portion of a TV program as text on the TV screen CC1 is the most common mode in use Field 1 data channels two Captions CC1 CC2 and two Text T1 T2 Field 2 data channels two Captions CC3 CC4 and two Text T1 T2 Text 1 4 Service 1 6 This is only available f...

Page 104: ...f you forget your password press 0 3 2 5 on the remote control NOTE Setting Language Selects a desired language Mode Setting Selects Home Use for the home environment Selects Store Demo for the retail environment Selects Demo Mode to set to show special features of the TV You can cancel the demo mode by pressing any buttons y y When selecting Store Demo Demo Mode will be activated NOTE Time Settin...

Page 105: ...on the TV and contain inappropriate contents based on the Motion Picture Association of America MPAA rating Rating G General audiences All ages admitted PG Parental guidance suggested Some material may not be suitable for children PG 13 Patents strongly cautioned Some material may be inappropriate for children under 13 R Restricted Under 17 requires accompanying parent or adult guardian NC 17 No o...

Page 106: ...g material that are unsuitable for younger children TV 14 Parents strongly cautioned containing material that are unsuitable for children age 14 and under TV MA Mature audience only unsuitable for children age under 17 Dialog suggestive dialogue TV PG or TV 14 Language coarse language TV PG TV 14 or TV MA Sex sexual situation TV PG TV 14 or TV MA Violence TV PG TV 14 or TV MA Downloadable Rating T...

Page 107: ...refer to the manual provided with the connected device y y The external device connection may differ from the model y y Connect external devices to the TV regardless of the order of the TV port NOTE Connecting to an antenna or cable Connect an antenna cable or cable box to watch TV while referring to the following The illustrations may differ from the actual items and a RF cable is optional ANTENN...

Page 108: ...as shown on the following illustration 2 Check the connection type of the external device 3 Go to the appropriate illustration and check the connection details HD Receiver DVD VCR Speaker USB PC Gaming device y y If you connect a gaming device to the TV use the cable supplied with the gaming device y y Refer to the external equipment s manual for operating instructions NOTE ...

Page 109: ...audio signals from an external device to the TV Connect the external device and the TV with the HDMI cable as shown in the following illustration y y Use the latest High Speed HDMI Cable with CEC Customer Electronics Control function y y High Speed HDMI Cables are tested to carry an HD signal up to 1080p and higher NOTE DVD Blu Ray HD Cable Box HD STB 2 1 IN Choose any HDMI input port to connect I...

Page 110: ...d Component Connection Transmits the analog video and audio signals from an external device to the TV Connect the external device and the TV with the component cable as shown in the following illustration y y If cables are installed incorrectly it could case the image to display in black and white or with distorted color y y Check to ensure the cable are matched with the corresponding color connec...

Page 111: ...rnal device and the TV with the composite cable as shown in the following illustration y y If you have a mono VCR connect the audio cable from the VCR to the AUDIO L MONO jack of the TV NOTE VIDEO MONO AUDIO L R VIDEO Y PB PR R L VIDEO AUDIO L MONOAUDIO COMPONENT IN AV IN R YELLOW BLUE BLUE YELLOW RED RED Not Provided VCR DVD Blu Ray HD Cable Box ...

Page 112: ...ness If noise is present change the PC output to another resolution change the refresh rate to another rate or adjust the brightness and contrast on the PICTURE menu until the picture is clear y y The synchronization input form for Horizontal and Vertical frequencies is separate y y Depending on the graphics card some resolution settings may not allow the image to be positioned on the screen prope...

Page 113: ...ional external audio device instead of the built in speaker set the TV speaker feature to off Digital Optical Audio Connection Transmits a digital audio signal from the TV to an external device Connect the external device and the TV with the optical audio cable as shown in the following illustration OPTICAL AUDIO IN OPTICAL DIGITAL AUDIOOUT Not Provided Digital Audio System ...

Page 114: ...ENGLISH 66 MAKING CONNECTIONS Connecting to a USB Connect a USB storage device such as a USB flash memory external hard drive or a USB memory card reader to the TV USB IN USB ...

Page 115: ... title of the disc appears at the bottom of the screen 3 Controls the connected VCR 4 HDD recordings playback Controls the recording stored in HDD 5 Changes the audio output between Home theater speaker and TV speaker for the connected HTS only A check mark appears in front of the selected device Available devices display in a bright color Unavailable devices display in grey 3 Control the selected...

Page 116: ... scratches on the screen and image distortions y y Do not use any chemicals such as waxes benzene alcohol thinners insecticides air fresheners lubricants as these may damage the screen s finish and cause discoloration y y Do not spray liquid onto the surface If water enters the TV it may result in fire electric shock or malfunction CAUTION Power cord Remove the accumulated dust or dirt on the powe...

Page 117: ...ed service center in your local area Cannot connect external devices y y Refer to the Connection Overview and connect an external device The TV turns off suddenly y y Check the power control settings The power supply may be interrupted y y Check if the Auto sleep feature is activated in the Time settings Refer to the Sleep Timer y y If there is no signal while the TV is on the TV will turn off aut...

Page 118: ... brightness and contrast in the menu option No Signal appears on the screen y y Check if the signal cable is connected between the TV and products properly y y Check the selected input source by pressing INPUT Black spots appear on the screen y y Several pixels in red green white or black may appear on the screen that can attribute to the characteristics of the panel y y This is normal The display...

Page 119: ...UB 32CS560 32CS560 UE Dimensions W x H x D With stand 1019 0 x 698 0 x 265 0 mm 40 1 x 27 4 x 10 4 inch 795 0 x 568 0 x 207 0 mm 31 2 x 22 3 x 8 1 inch Without stand 1019 0 x 631 0 x 76 5 mm 40 1 x 24 8 x 3 0 inch 795 0 x 504 0 x 73 5 mm 31 2 x 19 8 x 2 8 inch Weight With stand 15 1 kg 33 2 lbs 9 2 kg 20 2 lbs Without stand 13 4 kg 29 5 lbs 8 1 kg 17 8 lbs Current Value Power consumption 1 7 A 170...

Page 120: ...635 0 x 212 0 mm 38 2 x 25 0 x 8 3 inch Without stand 738 0 x 438 0 x 86 0 mm 29 0 x 17 2 x 3 4 inch 972 0 x 571 0 x 86 0mm 38 2 x 22 4 x 3 4 inch Weight With stand 7 5 kg 16 5 lbs 11 8 kg 26 0 lbs Without stand 6 9 kg 15 2 lbs 10 7 kg 23 5 lbs Current Value Power consumption 0 9 A 60 W 1 3 A 90 W Power requirement AC100 240 V 50 60 Hz AC100 240 V 50 60 Hz MODELS 22LS3500 22LS3500 UD 26LS3500 26LS...

Page 121: ...ELS 47LS4500 47LS4500 UD 55LS4500 55LS4500 UD Dimensions W x H x D With stand 1089 0 mm x 730 0 mm x 270 0 mm 42 8 inch x 28 3 inch x 10 5 inch 1263 0 mm x 833 0 mm x 330 0 mm 49 7 inch x 32 8 inch x 12 9 inch Without stand 1089 0 mm x 655 0 mm x 35 5 mm 42 8 inch x 25 7 inch x 1 3 inch 1263 0 mm x 754 0 mm x 35 5 mm 49 7 inch x 29 6 inch x 1 3 inch Weight With stand 17 0 kg 37 5 lbs 25 2 kg 55 2 ...

Page 122: ... 00 29 97 30 00 59 94 60 00 Component port connecting information Component ports on the TV Y PB PR Video output ports on DVD player Y PB PR Y B Y R Y Y Cb Cr Y Pb Pr Component supported mode Resolution Horizontal Frequency KHz Vertical Frequency Hz 720x480i 15 73 15 73 59 94 60 00 720x480p 31 47 31 50 59 94 60 00 1280x720p 44 96 45 00 59 94 60 00 1920x1080i 33 72 33 75 59 94 60 00 1920x1080p 26 9...

Page 123: ...e control Button 1E FAV Remote control Button D4 COMPONENT2 Discrete IR Code Component2 Input Selection 40 Remote control Button 41 v Remote control Button 07 Remote control Button CE HDMI1 Discrete IR Code HDMI1 Input Selection 06 Remote control Button 44 OK Remote control Button CC HDMI2 Discrete IR Code HDMI2 Input Selection 28 ꕣ BACK Remote control Button 79 RATIO Remote control Button E9 HDMI...

Page 124: ...The model and serial number of the TV is located on the back and one side of the TV Record it below should you ever need service MODEL SERIAL LG Life s Good ...

Page 125: ... http www lg com P NO SAC35375602 1208 REV09 Copyright 2012 LGE All Rights Reserved 32LS3400 42LS3400 32CS46 32LS3410 32CS4 61 32LS3450 42CS530 42LS3450 32CS560 22LS3500 37CS560 26LS3500 42CS560 32LS3500 47LS4500 22LS3510 55LS4500 26LS3510 32LS3510 ...

Page 126: ...quick and easy Thank you for purchasing an LG product We hope you are enjoying your new product and look forward to sharing some insider tips and tricks with you soon Registering your LG product is simple and also serves as a verification of ownership if your product is stolen or lost In addition you ll receive the following benefits and many more Helpful emails on how to make the most of your pro...

Page 127: ... 0 Mr 0 Mrs 0 Ms _ 0 Miss First name Initial Last name Street Apt City State I Province ZIP I Postal Code Email address 2 Telephone number 4 Model number 3 Date of purchase 5 Serial number I I Month Day Year 6 Name of store where purchased www lgusa com privacy Failure to return this card will not diminish your warranty rights Copyright 2011 All Rights Reserved ...

Page 128: ...UFACTURER NOR ITS U S DISTRIBUTOR SHALL BE LIABLE FOR ANY INCIDENTAL CONSEQUENTIAL INDIRECT SPECIAL OR PUNITIVE DAMAGES OF ANY NATURE INCLUDING WITHOUT LIMITATION LOST PROFITS LOST OR CORRUPTED PROGRAMMING OR DATA OR ANY OTHER DAMAGE WHETHER BASED IN CONTRACT TORT OR OTHERWISE Some states do not allow the exclusion or limitation of incidental or consequential damages or limitations on how long an ...

Page 129: ...a reserve deposit to the LGE Service Center using a credit card number as surety for advanced shipment Your credit card will not be charged if you return the defective unit within 10 working days If a replacement unit is received please use the carton and packaging from that unit in returning the defective unit to the LGE Service Center Parts and service in accordance with the LGE warranty is our ...

Reviews: