- 5 -
Connection Options
Connection Options
W
W
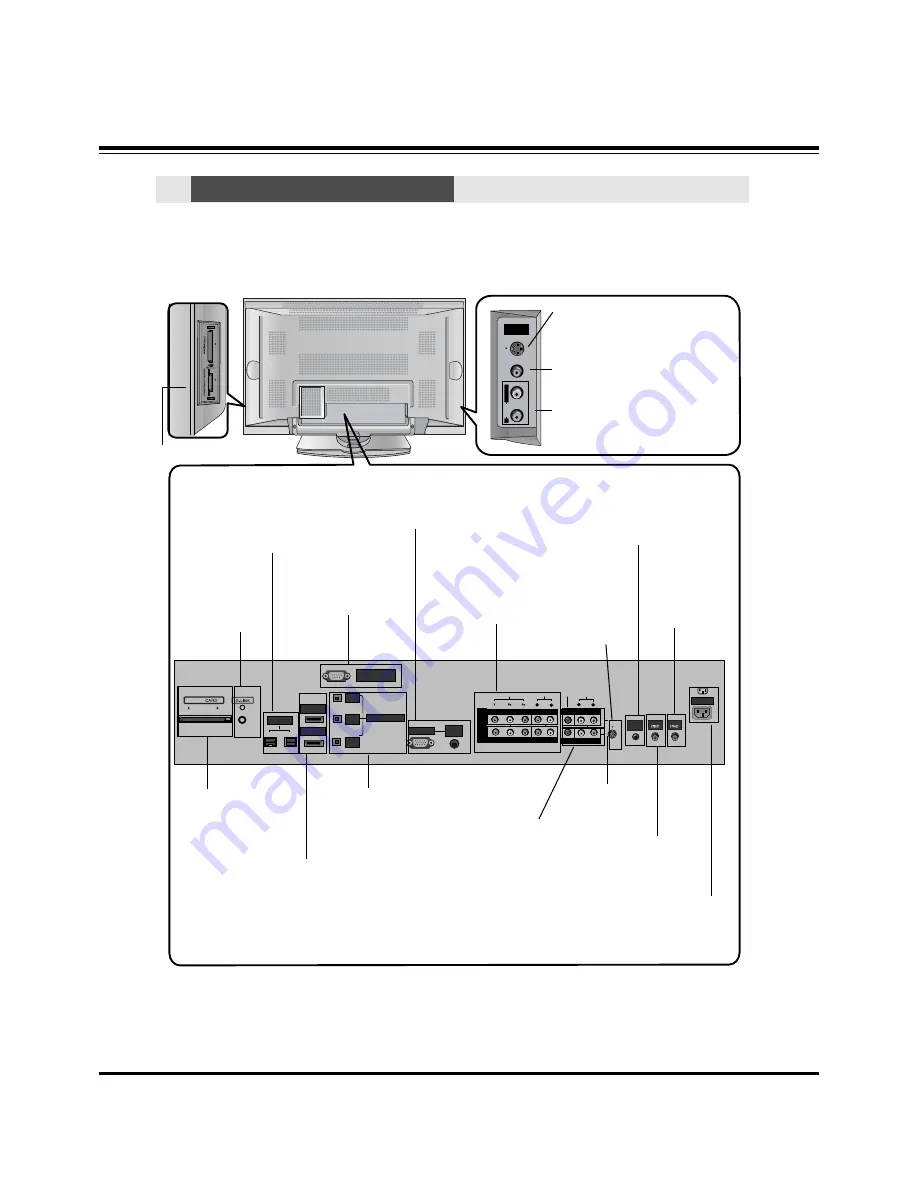
This is a back panel of 50PX4DR series TVs.
RS-232C INPUT
(CONTROL/SERVICE)
AUDIO
R
L
DIGITAL AUDIO (OPTICAL)
DVI
INPUT
COMPONENT2
INPUT
OUTPUT
AUDIO
INPUT
RGB INPUT
VIDEO
HDMI 2
HDMI1/DVI
COMPONENT INPUT 1
R
L
(MONO)
CABLE
ANTENNA
AC INPUT
DVD
/DTV
INPUT
IEEE-1394
COMPONENT INPUT 2
MONITOR OUTPUT
A/V INPUT
VIDEO
AUDIO
S-VIDEO
REMOTE
CONTROL
S-VIDEO
FRONT
A/V INPUT
V
ID
E
O
L
/
M
O
N
O
A
U
D
IO
R
Cable
S-VIDEO Input
A connection is available to provide
better picture quality than the video
input.
Memory Card Slots
G-LINK
TM
Connect an IR
controller to this
jack.
CableCARD™
Used for
CableCARD™
received from Cable
Service Provider.
VIDEO Input
Connects the video signal from a
video device.
AUDIO Input
Connections are available for listening
stereo sound from an external device.
Antenna Input
Connect over-the-
air signals to this
jack.
RGB/AUDIO INPUT
Connect the monitor output
connector from a PC to the
appropriate input port.
Digital Audio (DVI: Digital
Visual
Interface/Component2)
Input/
Digital Audio Output
Connect digital audio from
various types of equipment.
Note: In standby mode,
these ports will not work.
DVD/DTV Input
(Component 1-2)
Connect a component
video/audio device to
these jacks.
Monitor Output
Connect a second
TV or Monitor.
Remote Control Port
Connect your wired
remote control here.
S-Video Input
Connect S-
Video out from
an S-VIDEO
device to the S-
VIDEO input.
CABLE Input
Connect cable signals to this
jack, either directly or through
a cable box.
RS-232C INPUT (CON-
TROL/SERVICE) PORT
Connect to the RS-232C
port on a PC.
HDMI1/DVI, HDMI 2
Connect a HDMI sig-
nal to HDMI1/DVI or
HDMI2. Or connect a
DVI(Video) signal to
HDMI1/DVI.
Audio/Video Input
Connect audio/video
output from an
external device to
these jacks.
Power Cord Socket
This TV operates on an AC power. The voltage
is indicated on the Specifications page. Never
attempt to operate the TV on DC power.
IEEE1394
Connect DVHS or
MicroMV to IEEE1394
Connector.
Back Connection Panel
Back Connection Panel
Note:
- After removing the cover, you can insert the CableCARD™ or connect to the G-LINK jack.
DESCRIPTION OF CONTROLS
Summary of Contents for 50PX4DR
Page 18: ... 18 PRINTED CIRCUIT BOARD MAIN DIGITAL TOP ...
Page 19: ... 19 PRINTED CIRCUIT BOARD MAIN DIGITAL BOTTOM ...
Page 20: ... 20 PRINTED CIRCUIT BOARD MAIN ANALOG TOP ...
Page 21: ... 21 PRINTED CIRCUIT BOARD MAIN ANALOG BOTTOM ...
Page 23: ... 23 BLOCK DIAGRAM ...
Page 24: ... 24 BLOCK DIAGRAM ...
Page 25: ... 25 BLOCK DIAGRAM ...
Page 38: ......
Page 39: ......
Page 40: ......
Page 41: ......
Page 42: ......
Page 43: ......


