7
ENGLISH
INSTALLING ACP BACnet
INSTALLING ACP BACnet
Installing ACP BACnet
This chapter describes how to install the ACP BACnet to use.
In order to use the ACP BACnet, the installation should be performed by the following order.
STEP 1.
Check the cautions during the ACP BACnet installation
Before installing the ACP BACnet, check the cautions.
STEP 2.
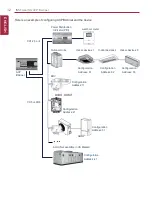
Study the cable connections diagram of the entire system
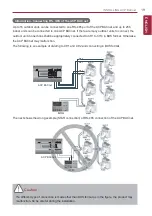
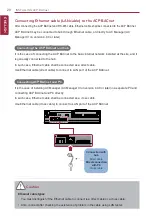
Study the cable connection diagram of the site where the ACP BACnet is installed.
STEP 3.
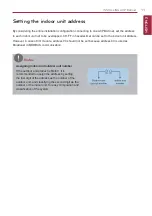
Set the indoor unit address
Do not duplicate IDU addresses.
STEP 4.
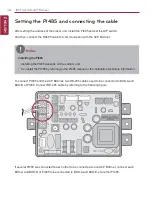
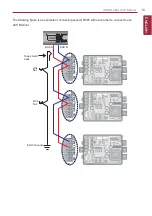
Set PI485 and connect cables
Set DIP switch of PI485 correctly, and connect RS-485 communication cable.
STEP 5.
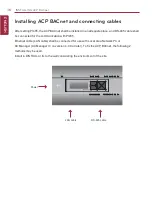
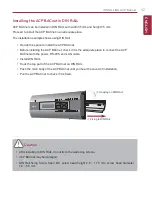
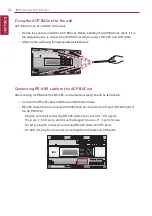
Install ACP BACnet and connect cables
Install the ACP BACnet, and set network and other settings.
STEP 6.
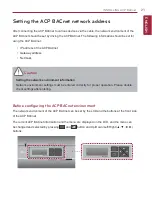
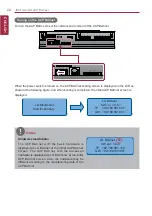
Set ACP BACnet network address
Set the network address to be able to access the ACP BACnet Via local ethernet subnet.
STEP 7.
Set ACP BACnet functions
Set language, peak/demand, etc.
STEP 8.
Set User Interface access environment
Set the Network Environment.
STEP 9.
Input indoor unit and ERV information
Create database of Indoor Units, etc.
STEP 10.
Verify and check ACP BACnet installation
Verify and check whether the ACP BACnet is properly installed.
Summary of Contents for BECON HVAC BACnet PQNFB17C0
Page 2: ......
Page 10: ...viii ENGLISH MEMO ...
Page 48: ...38 ENGLISH INSTALLING ACP BACnet E may be changed ...


