background image

2

Precautions & 

Plug wiring

Information

Position your VCR so that no bright light or

sunlight falls directly onto it.

Care should be taken not to expose your

VCR to any unnecessary vibration,

moisture, dust or heat.

During electrical storms it is advisable to unplug both
the aerial cable and mains plug to prevent accidental
damage to your VCR and TV.

Do not operate your VCR if it is damaged. 
Your VCR should not be repaired by anyone
except qualified service personnel.

Never remove the top cover of your VCR as this can
expose you to very high voltage and other
hazards. If your VCR does not operate properly,
please check the Troubleshooting Check List on page
32. If your VCR still does not operate properly, unplug
it and call your dealer.

Ensure that your VCR is placed in a position to
allow a free flow of air. 

This product is manufactured to comply

with the radio interference requirements
of EEC DIRECTIVE 89/336/EEC,

93/68/EEC and 73/23/EEC.

This appliance is supplied with BS 1363 approved 13
Amp fused mains plug. When replacing the fuse
always use a 5 Amp BS 1362 approved type.
Never use this plug with the fuse cover omitted. To
obtain a replacement fuse cover contact your
supplying dealer or LG Electronics U.K. LTD.

If the mains sockets in your home differ, or are not
suitable for the type of plug supplied then the plug
should be removed and a suitable type fitted.
If the mains plug becomes severed from the mains
lead it must be destroyed. A mains plug with bared
wires is hazardous if engaged in a mains output line
socket.
If a 13 Amp BS 1363 plug is not suitable or any other
type of plug used, then this appliance must be
protected by a 5 Amp fuse.
Should you need to change the plug

The wires in this mains lead are coloured in accordance
with the following codes
BLUE ~ Neutral
BROWN ~ Live
GREEN & YELLOW ~ No connection to be made
As the colours of the wires in the mains lead of this
appliance may not correspond with the coloured markings
identifying the terminals in your plug proceed as follows :
The wire which is coloured BLUE must be connected to the
terminal which is marked with the letter N or coloured
BLACK.
The wire which is coloured BROWN must be connected to
the terminal which is marked with the letter L or coloured
RED.
DO NOT connect the wire which is coloured GREEN &
YELLOW or GREEN.

Summary of Contents for BN200IB

Page 1: ...MANUAL MODEL BN200IR BN200IG BN200IB PAL Before connecting operating or adjusting this product please read this instruction booklet carefully and completely FOR THE GUARANTEE TERMS CONDITIONS PLEASE REFER TO BACK COVER OF THIS MANUAL ...

Page 2: ...a 5 Amp BS 1362 approved type Never use this plug with the fuse cover omitted To obtain a replacement fuse cover contact your supplying dealer or LG Electronics U K LTD If the mains sockets in your home differ or are not suitable for the type of plug supplied then the plug should be removed and a suitable type fitted If the mains plug becomes severed from the mains lead it must be destroyed A main...

Page 3: ...ly 11 Tuning in TV Stations Manually 12 13 Changing the order of TV Stations 14 Deleting Selecting TV Stations 15 Basic Operations 16 19 Playing a tape 16 17 Setting the Colour System 18 Setting the Clock Manually 19 Advanced Operations 20 28 Instant Timer Recording ITR 20 21 Timer Recording using On Screen Display 22 23 Energy Saving 24 On Screen Display 24 Tape Counter Memory Stop 25 Child Lock ...

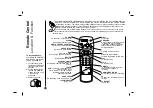
Page 4: ...r POWER EJECT CLK CNT REC ITR 1 2 3 4 5 6 7 8 9 TV VCR C LOCK LP AV 0 CM SKIP CLEAR OK i P STILL STOP PLAY REW FF ez REPEAT ezPOWEROFF POWER Switches the VCR on and off CLEAR Reset tape counter to zero OK CLOCK TAPE COUNTER Calls the on screen display PAUSE STILL Switches to a still picture REW Rewinds the tape Reverse high speed picture play REC ITR Starts instant recording Numbered buttons To se...

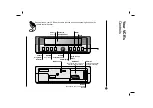
Page 5: ...1 AUDIO VIDEO AERIAL RF OUT V I D E O CASSETTE REC O R D E R Power ON OFF Mains Lead EURO AV1 Connect to your TV set or another video recorder RF OUT Connect to your TV using this socket VCR Display AERIAL Connect the aerial using this socket Channel Programme Selectors REC ITR Instant Record PLAY REW FF Stop Tape Eject Cassette Compartment Remote Control Sensor ...

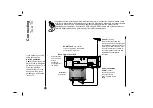
Page 6: ...unplugged from the mains SCART Lead not supplied If you use a SCART lead picture quality will be improved Back view of your VCR Television not supplied If you connect your VCR using the supplied Aerial Connection Cable 75 Ohms you will have to tune in a dedicat ed channel on your TV in order to view video tapes Further on in the book you will be given guidance on how to tune in your TV Aerial Conn...

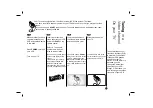
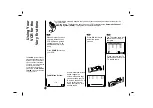
Page 7: ...rrectly installed your VCR as described earlier in this book Press POWER to turn on your VCR Turn on your TV Insert a pre recorded video tape into your VCR and press PLAY on the remote control Select a TV channel number on which you wish to watch videos Don t worry if you don t have a video tape to play at this stage If you switch your VCR on and continue stages 3 4 instead of seeing video playbac...

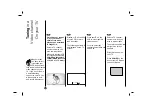
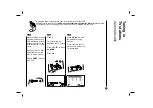
Page 8: ...ress D or E on the VCR to select another video channel You may select any channel number between 22 and 68 Select a TV channel number on which you wish to watch videos Tune this channel so that a bright blue screen appears Store this channel on your TV Press POWER on the front of your VCR when you have finished 8 Tuning in a Video channel On your TV i RF CHANNEL 22 PR Make sure that you have corre...

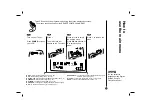
Page 9: ...al tuning setting see p 12 to 13 O ACMS ACMS Automatic Channel Memory System see p 11 O TIME DATE Date clock setting see p 19 O SYSTEM To set the Colour System see p 18 O ABC OSD To change the language setting for OSD see right O DR To check a problem with your VCR see p 27 O OSD ON OFF To switch the display of operational mode of your VCR ON or OFF see p 24 O 16 9 4 3 To select the aspect ratio o...

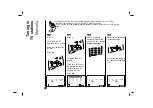
Page 10: ...or the following steps we assume that you have just connected your video recorder for the very first time To make tuning TV stations an easy task your VCR incorporates the Automatic Channel Memory System ACMS This system will automatically tune CLK CNT CLEAR OK i P STILL LECT REW AV 02 C33 00 PR 02 03 C23 00 PR 03 04 C30 00 PR 04 05 C35 00 PR 05 06 07 08 01 C26 00 PR 01 PR OK i DELETE MOVE 01 C26 ...

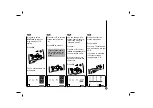
Page 11: ... stations and remove the TV station table Tuning in TV stations Automatically The guidance given on the opposite page is for first time use of your VCR Should you wish to perform the Automatic Channel Memory System ACMS again please follow the guidance given on this page You may tune up to 80 TV stations into your VCR POWER CLK CNT CLEAR OK i P STILL POWER EJECT REC SYS TEM OPR OSD ON OFF OSD f 16...

Page 12: ...V stations Manually In certain areas of the country broadcast signals may be too weak for your VCR s automatic tuning process to find or assign TV stations correctly You must tune in these weaker broadcast stations manually in order for your VCR to store them POWER EJECT CLK CNT CLEAR OK i P STILL RET AV PR CH MFT STATION 06 i C PR PR CH MFT STATION 01 00 BBC1 C26 PR i PR CH MFT STATION 06 00 i C4...

Page 13: ...t Press i again Your new TV station has now been tuned into your VCR If you wish to manually tune other stations repeat stages 1 8 CLK CNT CLEAR OK i PAUSE PR CH MFT 06 00 PR C40 BORDE ANGLI ITV BBC2 BBC1 CH TV WEST GRANA i OK If your station name isn t on the list do not press OK but go to stage 7 POWER EJECT CLK CNT CLEAR OK i PR CH MFT STATION 06 00 C40 PR i OK CH TV CLK CNT CLEAR OK i P STILL ...

Page 14: ... stations into your VCR you may wish to change the order in which they are stored without having to retune them again The instructions given on this page will show you how you can simply move them into your desired order POWER EJECT CLK CNT CLEAR OK i P STILL RET AV PR CH MFT STATION 01 00 BBC1 C26 PR i CLK CNT CLEAR OK i PAUSE 02 C33 00 BBC2 03 04 C30 00 CH4 05 C35 00 CH5 06 C40 00 CH TV 07 08 01...

Page 15: ...Selecting stored TV stations Stored TV stations can be selected in either of two ways Press D or E to select different stations that are tuned into your VCR You may also directly select stations using the numbered buttons on the remote control POWER EJECT CLK CNT CLEAR OK i P STILL RET AV PR CH MFT STATION 06 i C PR CLK CNT CLEAR OK i PAUSE 02 C33 00 BBC2 03 C23 00 ITV 04 C30 00 CH4 05 C35 00 CH5 ...

Page 16: ...cross them this is quite normal and doesn t mean that there is anything wrong with your VCR Tapes can be paused for up to 5 minutes After 5 minutes your VCR will stop playing the tape to prevent damaging the tape or your VCR 16 Playing a tape You will only be able to load and eject video cassettes when your VCR is plugged into the mains Your VCR may also play back recordings from NTSC tapes on PAL...

Page 17: ...another programme material Repeatedly press CM SKIP to skip material 1 Press 30 seconds 2 Press 60 seconds 3 Press 90 seconds 4 Press 120 seconds 5 Press 150 seconds 6 Press 180 seconds OPR Optimum Picture Response This feature automatically improves playback picture quality by adjusting your VCR to the condition of the tape Press i Press F or G to select OPR Press OK Press D or E repeatedly to se...

Page 18: ...18 Setting the colour system Your VCR is equipped with dual colour standard you can play back a tape in PAL and MESECAM During playback your VCR detects the colour system automatically It there are some colour problem please select the colour system manually REC i OPR 16 9 4 3 Pr 12 ACMS PSET R 1 2 TIME DATE SYS TEM OSD ON OFF OSD f AUTO PAL MESECAM SYS TEM DR VCR A B C OSD POWER EJECT CLK CNT CLE...

Page 19: ...01 2 as 02 etc The day of the week will appear automatically when you enter the date If you make a mistake press F or G and enter the correct details Press i Your new clock settings are stored 19 Setting the clock Manually The clock in your VCR controls time day and date settings for your VCR HH MM DD MM YY 00 1 01 00 SAT i 1 2 TIME DATE 8 ENR DEP 1 2 3 4 5 6 7 8 9 TV VCR 0 CM SKIP HH MM DD MM YY ...

Page 20: ...cket press AV 20 Instant Timer Recording ITR Your VCR allows you to make recordings using a variety of simple methods Instant Timer Recording ITR start recording immediately for a set period of time or until the video cassette runs out Timer Recording you may record at a later time up to 1 month from the present Up to 7 of these automatic recordings may be set If you do not wish to record on a tap...

Page 21: ...r VCR Press STOP to end recording Press EJECT EJECT will appear on the TV screen for a few seconds If the end of the tape is reached your VCR will stop recording automatically rewind stop eject the tape and place itself into power off Remember you can record one programme while watching another by starting your ITR recording press TV VCR to select TV mode and then select a different channel on you...

Page 22: ...umbers 1 9 press 0 first then the programme number for example PR NO 1 as 01 You may also select programme numbers by pressing or Once selected press G If you want to record from the SCART socket press AV 22 You may set up to seven timer record events within one month of the current date PLEASE NOTE before setting the timer make sure that you have set the VCR clock correctly and you know which cha...

Page 23: ... s display while your VCR waits to make the recording If at a later date you wish to delete or change any of the settings in timer event memory you may do so without having to enter all the timer event information again Simply display the timer event screen Press D or E to select the event that you wish to delete or change Press F to delete the event Press OK to change then press F or G to select ...

Page 24: ... again to remove all displays from the TV screen 24 Your VCR has an Energy Save feature which if set will place your VCR into an economic power save where the clock display will disappear If you have programmed a recording this feature will not work Energy Saving On Screen Display You may easily display the current time or tape counter and amount of tape left day month year day of week programme c...

Page 25: ...he buttons on the front of your VCR will work except STOP EJECT Press C LOCK again to switch off the child lock SAFE will disappear on the TV screen Tape Counter Memory Stop Child Lock 25 The Digital Tape Counter can be displayed on your TV screen instead of the time by pressing OK CLK CNT on the remote control The Digital Tape Counter indicates the relative positions of recordings on the tape CLK...

Page 26: ... you must connect your VCR to the TV using a SCART cable 26 Your VCR can record and play back wide screen aspect ratio programmes 16 9 To record a wide screen format programme successfully the correct type of wide screen signal must be broadcast by the TV station POWER EJECT CLK CNT CLEAR OK i P STILL RET AV CLK CNT CLEAR OK i P STILL LECT REW AV REC i OPR Pr 12 ACMS 1 2 TIME DATE SYS TEM OSD ON O...

Page 27: ...imer recording NEXT TIMER PROGRAMME OBBC1 26 10 00 11 00 Shows the current status of timer recording Press i Automatic Memory Power Shut Off Video Doctor Self Diagnosis Automatic Memory Power Shut Off This feature of your VCR enables you to switch off your VCR automatically after tape rewind has been completed Video Doctor Self Diagnosis This feature informs you that there is a problem with your V...

Page 28: ... is replayed twice automatically Pressing ez REPEAT again during repeat play will return to normal play ez easy power off The sequence of Stop Rewind Eject Power Off is operated automatically by pressing ez POWER OFF ez easy repeat By pressing holding ez REPEAT during play back the holding section is replayed twice automatically STOP REWIND EJECT POWER OFF 7 8 9 TV VCR C LOCK ez POWER OFF ez REPEA...

Page 29: ... Approx 16 Watts Energy saving mode 3 Watts Video Head System Rotary 2 heads helical scanning Tape speed 23 39 mm sec SP mode 11 69 mm sec LP mode Tape format Tape width 12 7 mm 0 5 inch Maximum recording 4 hours SP mode E 240 tape time 8 hours LP mode E 240 tape Rewind time Approx 180 sec E 180 tape Dimensions 360 x 94 x 270 mm W x H x D Weight 3 4 Kg Operating temperature 5o C 35o C Operating hu...

Page 30: ...to insert the cassette the right way round Is the mains plug plugged in and switched on Is the VCR switched on Check the batteries in remote control Is the video cassette damaged have you tried using another one Adjust the horizontal control on your TV Check aerial is it plugged into VCR Check aerial is the lead broken or damaged Check for local interference Make sure that you are using a video TV...

Page 31: ...cted to the dealer from whom the equipment was originally purchased The dealer may before carrying out service under guarantee require a receipted account as evi dence of the date of purchase D We respectfully point out that your dealer is not obligated to replace batteries if they become exhausted or worn in use E Aerial alignment and consumer control adjustments are not covered by this guarantee...

Reviews: