background image

DirectCD

TM 

v2.5b(s)

Installation

7

Before

Installation

Removing

the

Computer

Cover

Installing the Drive

Before installing the drive, please note the following points.

You will need the following:

•  A screw driver of a suitable size to fit the securing screws for

the drive unit.

•  The manual for the computer, so you can find the mounting

positions for the IDE controller.

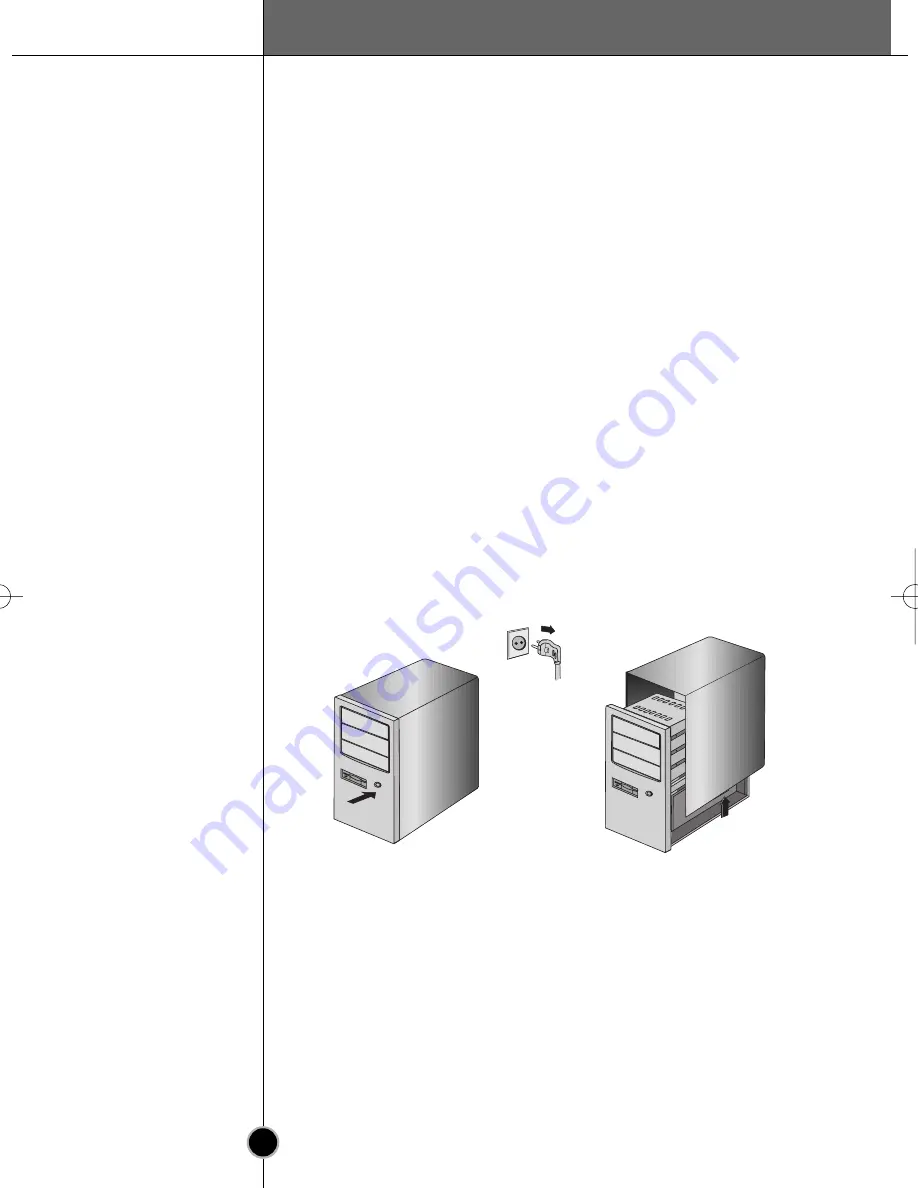
Turn off all peripheral appliances of the computer and the
computer itself, and disconnect their power cords from the wall
sockets.

Discharge any static electricity on your person by touching the
computer covers, etc.

Make sure all peripheral devices of the computer and the computer
itself are turned off, and then remove the cover. Refer to the manual
for the computer for details about removing the cover.

NOTE : There may be sharp edges inside the computer so take care
to avoid injury.

Computer OFF.

8042B EES GUIDE-eng  5/12/89  3:07 PM  Page 7

Summary of Contents for CED-8041B

Page 1: ...c 235 Super ior Blvd Mississauga Ontar io Canada LG Electronics Deutschland GMBH Jakob Kaiser Str aße 12 D 47677 Willich Germany LG Electronics U K Ltd LG House 264 Bath Road Slough Ber kshire SL1 4DT United Kingdom LG Goldstar F rance SARL 12 Rue Lech Walesa Z I Pariest 77185 Lognes France LG Electronics Italia S P A Centro Direzione IL Quadr ate Via Modigliani 20090 Segrate MI Italy LG Electroni...

Page 2: ...ture PC DOS is a trademark of IBM Inc Adaptec and the Adaptec logo are trademarks of the Adaptec Corporation MS DOS Windows and Windows 95 are trademarks registered in the United States and other countries by the Microsoft Corporation The company names and product names written in this manual are trademarks or registered trademarks of the respective companies This unit uses CD RW discs with the fo...

Page 3: ... in a particular installation If this equipment does cause harmful interference to radio or television reception which can be determined by turning the equipment off and on the user is encouraged to try to correct the interference by one or more of the following measures Reorient or relocate the receiving antenna Increase the separation between the equipment and receiver Connect the equipment into...

Page 4: ...LE LASER RADIATION WHEN OPEN AVOID EXPOSURE TO BEAM VARNING OSYNLIG LASERSTRÄLNING NÄR DENNA DEL ÄR ÖPPNAD STRÄLEN ÄR FARLIG iii CLASS 1 LASER PRODUCT KLASSE 1 LASER PRODUKT LUOKAN 1 LASER LAITE KLASS 1 LASER APPARAT ...

Page 5: ...Function of Controls 5 Installing the Drive 7 Device Drivers 13 How to Use the Discs 15 Troubleshooting 16 Specifications 17 Warranty 18 CED 8041B allows reliable writing at 2X speed only CED 8042B allows reliable writing at 2X and 4X speeds Writing speed depends on capabilities of discs As a result you should checked ReWritable 4X speed discs ...

Page 6: ...ansfer rate and write data at 4X speed 600KB sec data transfer rate The recorded CD RW media can be played in a DVD player or a multiread CD ROM Player maintaining future compatibility Supports UDF for easy writing to CD RW discs Continuously monitors the signal level during recording and adjusts the laser power to compensate when the disc is dirty insuring a flat signal Item Quantity Internal CD ...

Page 7: ...ust mechanical vibration direct sunlight We recommend using the drive in a horizontal position Do not use it in a tilted or vertical position Don t move the drive suddenly from a cold place to a warm one or raise the room temperature suddenly Condensation may occur causing abnormal operation Make sure to remove the disc before moving the drive The disc may be damaged causing data loss Be careful t...

Page 8: ...e supplied CD Recording Software before using this unit 100MHz or faster Pentium for 4x speed 166MHz or faster recommended Windows 98 95 32MB or greater Windows NT Workstation Ver 4 0 32MB or greater 64MB or over recommended Hard disk with average access time of 19 msec or less and data transfer speed of 600KB sec or greater 75MB or more free space The free space needed for writing depends on the ...

Page 9: ...again will open the tray 3 Play Skip button When an Audio CD is in the disc drawer pressing this button will start playing Audio CDs from the first track If an Audio CD is playing pressing this button will skip to the next track 4 Volume control Adjust the output volume of the headphone jack with this control It can t be used to adjust the output volume for the audio output connectors on the rear ...

Page 10: ...ay 2 IDE Interface Connector Connect to the IDE Integrated Device Electronics Interface using a 40 pin flat IDE cable NOTE Do not connect or disconnect the cable when the power is on as this could cause a short circuit and damage the system Always turn the power OFF when connecting or disconnecting the cable 3 Jumper Connector This jumper determines whether the drive is configured as a master or s...

Page 11: ...g positions for the IDE controller Turn off all peripheral appliances of the computer and the computer itself and disconnect their power cords from the wall sockets Discharge any static electricity on your person by touching the computer covers etc Make sure all peripheral devices of the computer and the computer itself are turned off and then remove the cover Refer to the manual for the computer ...

Page 12: ...his is a general installation guide If your PC hardware appears different please consult your hardware manual for installing peripheral devices Connect the power cable from the computer s power supply to the socket on the drive unit fitting the connector firmly into the power in connector If there is no spare power cable available in the computer you will have to purchase a splitter cable of a sui...

Page 13: ...ER D R C S M S L A G L G 39 1 5 12 GND 40 2 AUDIO AUDIO Pin1 Red edge If the computer is using a sound card the drive is connected to the sound card with an audio cable The supplied analog audio cable fits most sound cards or one can be purchased at a local computer store Refer to the manual for the sound card for detailed information regarding connection DIGITAL ANALOG INTERFACE POWER D R C S M S...

Page 14: ...DIGITAL ANALOG INTERFACE POWER D R C S M S L A G L G 39 1 5 12 GND 40 2 AUDIO AUDIO C S M S L A G L 39 40 CS Cable Select CSEL SL Slave MA Master NOTE Only one jumper should be installed on the jumper connector If more than one jumper is installed the drive may malfunction or be damaged Master Slave setting is determined by jumper installation on the Jumper Connector The following table shows the ...

Page 15: ...o install the drive as a Master the jumper can be left as supplied from the factory DIGITAL ANALOG INTERFACE POWER D R C S M S L A G L G 39 1 5 12 GND 40 2 AUDIO AUDIO Master drive Booting hard disk Primary connector Secondary connector Master drive CD R RW drive Motherborad OR DIGITAL ANALOG INTERFACE POWER D R C S M S L A G L G 39 1 5 12 GND 40 2 AUDIO AUDIO DIGITAL ANALOG INTERFACE POWER D R C ...

Page 16: ...hard disk Slave drive CD R RW drive DIGITAL ANALOG INTERFACE POWER D R C S M S L A G L G 39 1 5 12 GND 40 2 AUDIO AUDIO DIGITAL ANALOG INTERFACE POWER D R C S M S L A G L G 39 1 5 12 GND 40 2 AUDIO AUDIO Master drive Booting hard disk Primary connector Slave drive CD R RW drive Secondary connector Master drive Other IDE drive OR Replacing the Computer Cover When the installation of the drive unit ...

Page 17: ... re boot PC to ensure the change will be implemented For non Windows 95 98 NT and OS 2 Warp 3 Installation The INSTALL program performs the following functions Allows the user to select the target drive and directory in DOS Unless modified by the user the INSTALL program searches the target drive for the directory CDROM if this is not found the directory will be created Copies the CD R RW device d...

Page 18: ...OM 32 bit is displayed in Control Panels System Performance If the drive is not recognized by your computer please check the following items If a indicator is displayed on the IDE controller in Control Panels System Devices Manager Hard Disk Controller you will need to contact your PC s manufacturer or the motherboard s manufacturer and get the appropriate IDE controller driver Run Add New Hardwar...

Page 19: ...tage NOTE Don t use this feature except in an emergency 1 Turn the power to OFF 2 Poke a fine tipped object such as a straightened heavy duty paper clip into the small hole above the eject button The front door will pop open and the disk tray will come partway out 3 Pull the front door to open it all the way then grip the disc tray between thumb and forefinger and gently pull it straight out NOTE ...

Page 20: ...ould be See system environment page 4 Does the CD R or CD RW disc have dirt or scratches Did a screen saver or other application operate while writing to the disc Is there enough free space on the CD R RW disc Does writing fail even using the simulation test Is the disc loaded in the drive with the read write surface facing the right direction label up Is the drive installed in the correct orienta...

Page 21: ...1 x 41 5 mm Width depth height 10 12 bits or less 120 000 hours Power On Hours Duty Cycle 10 Within 30 minutes Line out 0 8 Vrms at 47 kohm Headphone 0 6 Vrms at 32 ohm Type Interface Data buffer memory Disc diameter Data Transfer Rate Average access time Mounting direction Compatible formats Loading system Power Weight Dimensions Error Rate MTBF MTTR Audio Output Level Environmental Conditions Te...

Page 22: ...arranty is applicable to this product THE DURATION OF ANY IMPLIED WARRANTIES INCLUDING THE IMPLIED WARRANTY OF MERCHANTABILITY IS LIMITED TO THE DURATION OF THE EXPRESS WARRANTY HEREIN LG ELECTRONICS U S A INC SHALL NOT BE LIABLE FOR THE LOSS OF THE USE OF THE PRODUCT INCONVENIENCE LOSS OR ANY OTHER DAMAGES DIRECT OR CONSEQUENTIAL ARISING OUT OF THE USE OF OR INABILITY TO USE THIS PRODUCT OR FOR A...

Reviews: