background image

4

12. BOTÓN CAPTION (algunos modelos)

Para seleccionar el modo de Subtítulos.
Refiera a la 

"Función de Subtitulaje"

.

13. BOTÓN SLEEP

Para fijar el tiempo de apagado, si desea dormir.

14. BOTÓN MEMORY/ERASE (algunos modelos)

Para memorizar o borrar el canal deseado. 

15. BOTÓN PICTURE (algunos modelos)

Para exhibir los modos de imagen uno por uno.

16. BOTÓN MTS (algunos modelos)

Para escuchar sonido MTS.

17.

(algunos modelos)

No funciona.

Nota: 

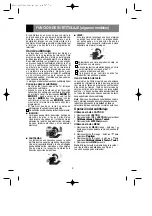
Colocación de las baterías a la unidad de 

control remoto

• Abra  la  tapa  del  compartimiento  de  las  baterías  en

la  parte  posterior  e  instale  las  baterías  con  la
polaridad correcta.

• Utilice dos baterías de 1.5V tipo AAA. No mezcle las

baterías usadas con la baterías nuevas.

SLEEP

MUTE

TV/VIDEO

EYE/

PICTURE

REVIEW

POWER

1

2

3

4

5

6

7

8

9

0

ENTER 

FCR

APC

A.PROG

MEMORY/ERASE

CAPTION

MTS

MENU

VOL

VOL

CH

CH

13

10

2

4

5

16

15

9

11

12

6

8

1

3

7

14

Conexión del Panel Frontal

-

BOTÓN ENCENDIDO (ON/OFF)

Refierase al 

"Encendido / Apagado del TV".

-    INDICADOR MODO DE ESPERA

Se  ilumina  en  color  rojo  cuando  el  televisor  esta  en  modo  de  espera.
Refierase al 

"Encendido / Apagado del TV"

.

-     SENSOR DEL CONTROL REMOTO

-     BOTÓN TV/VIDEO (

A

) (algunos modelos)

Para seleccionar el modo TV, VIDEO o
COMPONENT.

-

BOTÓN MENU

Para exhibir en la pantalla los menús.

-     BOTONES CH (

D

/

E

)

• Para seleccionar el canal deseado.
• Para seleccionar el item del menú deseado cuando el menú está

exhibido en la pantalla.

BOTONES VOLUMEN (

F

/

G

)

• Para incrementar o disminuir el nivel del volumen.
• Para  entrar  o  ajustar  el  menú  seleccionado  cuando  el  menú  está

exhibido en la pantalla.

17

Summary of Contents for CW81A

Page 1: ...su televisor Conserve el manual para futuras consultas Anote el número de modelo y serie del aparato Anote la información de la etiqueta ubicada en el panel posterior su distribuidor se la pedirá en caso de cualquier solicitud de servicio Internet Home Page http www lge com P N MFL42505209 CW81A B 0804 REV02 ...

Page 2: ...es que se colocan en la pared o en los anaqueles y utilice el soporte aprobado por el fabricante Las ranuras en la parte superior atrás y abajo del televisor son para ventilación y aseguran un buen funcionamiento del aparato evitando que se sobrecaliente Estas ranuras no deben ser bloqueadas o cubiertas Las ranuras nunca deben ser bloqueadas colocando la unidad en una cama sofa alfombra o superfic...

Page 3: ...onado cuando el menú está exhibido en la pantalla BOTÓN ENTER A Para salir del Menú exhibido Para memorizar el Menú ajustado Para volver al modo de TV Solamente por control remoto 6 BOTÓN FCR Revisión de Canal Favorito Para seleccionar sus canales favoritos Refierase a Memoria de canales favoritos 7 BOTÓN AUTO PRG A PROG Auto program Para memorizar los canales por medio de la auto programación 8 B...

Page 4: ...as con la baterías nuevas SLEEP MUTE TV VIDEO EYE PICTURE REVIEW POWER 1 2 3 4 5 6 7 8 9 0 ENTER FCR APC A PROG MEMORY ERASE CAPTION MTS MENU VOL VOL CH CH 13 10 2 4 5 16 15 9 11 12 6 8 1 3 7 14 Conexión del Panel Frontal BOTÓN ENCENDIDO ON OFF Refierase al Encendido Apagado del TV INDICADOR MODO DE ESPERA Se ilumina en color rojo cuando el televisor esta en modo de espera Refierase al Encendido A...

Page 5: ...toma lugar en la pantalla con un menu de operacion Los pasos que se requieren para la activacion de los botones se describen a continuación Seleccion del Menú 1 Presione el botón MENU y enseguida presione el botón D E para desplegar cada menú 2 Presione el botón G y luego el botón D E hasta seleccionar el menú 3 Presione el botón de G en la pantalla del sub menú o el de jalar hacia abajo 4 Cambia ...

Page 6: ...ed puede entonces seleccionar los canales por medio de el botón D E Utilizando el botón AUTO PRG A PROG Usted puede convenientemente realizar una PROGRAMACION AUTOMATICA utilizando el botón AUTO PRG A PROG en el control remoto 1 Presione el botón AUTO PRG A PROG 2 Presione el botón AUTO PRG A PROG o G La PROGRAMACION AUTOMATICA empieza inmediatamente Si quiere detener la programación automática pr...

Page 7: ...bir señal el televisor cambiará a modo standby automáticamente 1 Presione el botón MENU y luego el botón D E hasta que el menú aparezca como se muestra a la derecha 2 Presione el botón G y luego el botón D E para seleccionar Auto off 3 Presione el botón G y luego el botón D E para seleccionar On o Off 4 Presione el botón MENU para salir JUEGO algunos modelos Usted puede disfrutar de un video juego...

Page 8: ...d haya seleccionado STEREO o SAP El sonido mono es reproducido automáticamente en caso de transmisión mono aún cuando STEREO o SAP haya sido seleccionado Seleccione MONO si desea escuchar el sonido mono durante una transmision Estéreo SAP Control Automático de Sonido Usted puede disfrutar de un magnífico sonido sin la necesidad de ajustes Este TV automáticamente ajusta el sonido apropiado al tipo ...

Page 9: ...on causados cuando la señal del Televisor se separa y sigue dos trayectorias Una es la trayectoria directa y la otra es reflejada desde edificios altos montañas u otros objetos Puede mejorar la recepción cambiando la dirección o posición de la antena A NIEVE Si su receptor se localiza en una zona marginal en donde la señal es débil su imagen puede ser estropeada por la aparición de puntos pequeños...

Page 10: ...el equipo VCR DVD Videocámara a estas entradas Presione el botón TV VIDEO para seleccionar VIDEO 1 o VIDEO 2 IN 2 JACKS Conecte las salidas del equipo VCR DVD Videocámara a estas entradas Presione el botón TV VIDEO para seleccionar VIDEO 2 o S VIDEO 3 OUT JACKS Salida de conectores Conecte las entradas de un equipo externo VCR Amplificador de Audio a estas salidas para grabar o monitorear el progr...

Page 11: ... de su TV 2 Seleccione el canal en su televisor 3 Fije el VCR para grabar Grabando un programa de otro equipo algunos modelos 1 Conecte las salida del VCR reproductor en la entrada IN 1 de su TV 2 Conecte las entradas del VCR de grabado a las salidas A V del TV 3 Presione TV VIDEO para seleccionar VIDEO 1 o VIDEO Si conecta a la entrada IN 2 VIDEO 2 4 Presione el botón PLAY en el VCR reproductor y...

Page 12: ...nizar el canal deseado VERIFIQUE ESTOS PASOS Y TRATE DE HACER EL AJUSTE Asegúrese que el cable de alimentación está enchufado Asegúrese que el televisor está encendido Verifique las baterías del Control Remoto Intente otra estación Problemas de transmisión Verifique la conexión de la antena Puede ser interferencia a nivel local Ajuste la antena Ajuste el control de imagen MemoriceloscanalesporPROG...

Page 13: ...read this manual carefully before operating your set Retain it for future reference Record model number and serial number of the set See the label attached on the back cover and quote this information to your dealer when you require service ...

Page 14: ... receiver Wall or shelf mounting should follow the manu facturer s instructions and should use a mounting kit approved by the manufacturer Slots and openings in the cabinet and the back or bottom are provided for ventilation and to insure reliable operation of the television receiver and to protect it from overheating These openings must not be blocked or covered The openings should never be block...

Page 15: ...t the selected menu when menu is displayed on the screen ENTER A BUTTON To exit from the displayed menu To memorize the adjusted menu To recall the current TV mode by remote control only 6 FCR Favorite Channel Review BUTTON To select the favorite channel Refer to Favorite channel memory 7 AUTO PRG A PROG Auto program BUTTON To memorize channels by AUTO PROGRAM 8 EYE BUTTON some models To switch on...

Page 16: ...d batteries with new batteries SLEEP MUTE TV VIDEO EYE PICTURE REVIEW POWER 1 2 3 4 5 6 7 8 9 0 ENTER FCR APC A PROG MEMORY ERASE CAPTION MTS MENU VOL VOL CH CH 13 10 2 4 5 16 15 9 11 12 6 8 1 3 7 14 Front Panel Information POWER BUTTON or ON OFF Refer to Turning on off the TV STAND BY INDICATOR Illuminates red when the TV is in standby mode Refer to Turning on off the TV REMOTE CONTROL SENSOR TV ...

Page 17: ...own menu with F G or D E You can move to the higher level menu with ENTER A or F button and to move to the lower level menu press the G button CH Move Next Back DASP Turbo Snd AVL Balance Treble Bass Sound CH Move Next Back Clock Off_timer On _timer Auto _off Timer Channel Memory Fine Manual CH Auto prog Manual Favorite channel Channel CATV 95 _____ _____ _____ _____ _____ _____ _____ Favorite CH ...

Page 18: ... PROGRAM AUTO PROGRAM searches and memorizes all the active channels in your area then you can select the desired channel with the D E buttons Using the AUTO PRG A PROG button You can conveniently perform AUTO PROGRAM using the AUTO PRG A PROG button on the remote control 1 Press the AUTO PRG A PROG button 2 Press the G or AUTO PRG A PROG button The AUTO PROGRAM starts now If you want to stop auto...

Page 19: ...nutes 1 Press the MENU button and then use the D E button the until the menu is displayed as shown right 2 Press the G and then use the D E button to select Auto off 3 Press the G and then use the D E button to select On or Off 4 Repeatedly press the MENU button to exit Game some models You can enjoy the TV game with this set Key Lock The TV can be set so that the remote control is needed to contr...

Page 20: ... you have selected STEREO or SAP Mono sound is automatically received if the broadcast is only in Mono even though STEREO or SAP has been selected Select MONO if you want to listen to mono sound in remote fringe areas during stereo SAP broadcasting Auto Sound Control You can enjoy the best sound without any special adjustment because this TV set automatically adjusts the sound appropriate to viewi...

Page 21: ...he TV signal splits and follows two paths One is the direct path and the other is reflected off tall buildings hills or other objects Changing the direction or position of the antenna may improve reception A SNOW If your receiver is located at the weak fringe area of a TV signal your picture may be marred by small dots It may be necessary to install a special antenna to improve the picture An old ...

Page 22: ...puts VCR LASER DISC CAMCORDER to these inputs Press the TV VIDEO button to select VIDEO1 or VIDEO 2 IN 2 JACKS Connect external equipment outputs VCR LASER DISC CAMCORDER to these inputs Press the TV VIDEO button to select VIDEO2 or S VIDEO 3 OUT JACKS Connect external equipment inputs VCR Audio amplifier to these outputs for recording or monitoring the selected program 4 EARPHONE JACK some models...

Page 23: ...he recording VCR to record Recording a program from con necked other equipment some models 1 Connect the output jacks of the playback VCR to the IN 1 A V jacks on the side or back of TV 2 Connect the input jacks of the recording VCR to the OUT A V jacks on the back of TV 3 Press the TV VIDEO button to select VIDEO1 or VIDEO If you connect it to the IN 2 A V jacks on the side of TV you should selec...

Page 24: ...le images Remote control does not work Cannot tune desired channel CHECK THESE THINGS Is power cord plugged in Is television turned on Check batteries in remote control Try another channel station trouble Check antenna connectings Check for local interference Adjust the antenna Adjust the picture control Program channel using AUTO PROGRAM ...

Reviews: