

13
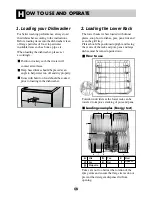
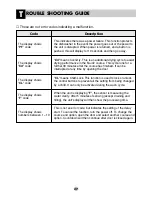
EFORE USING FOR THE FIRST TIME
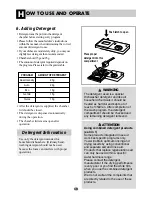
B
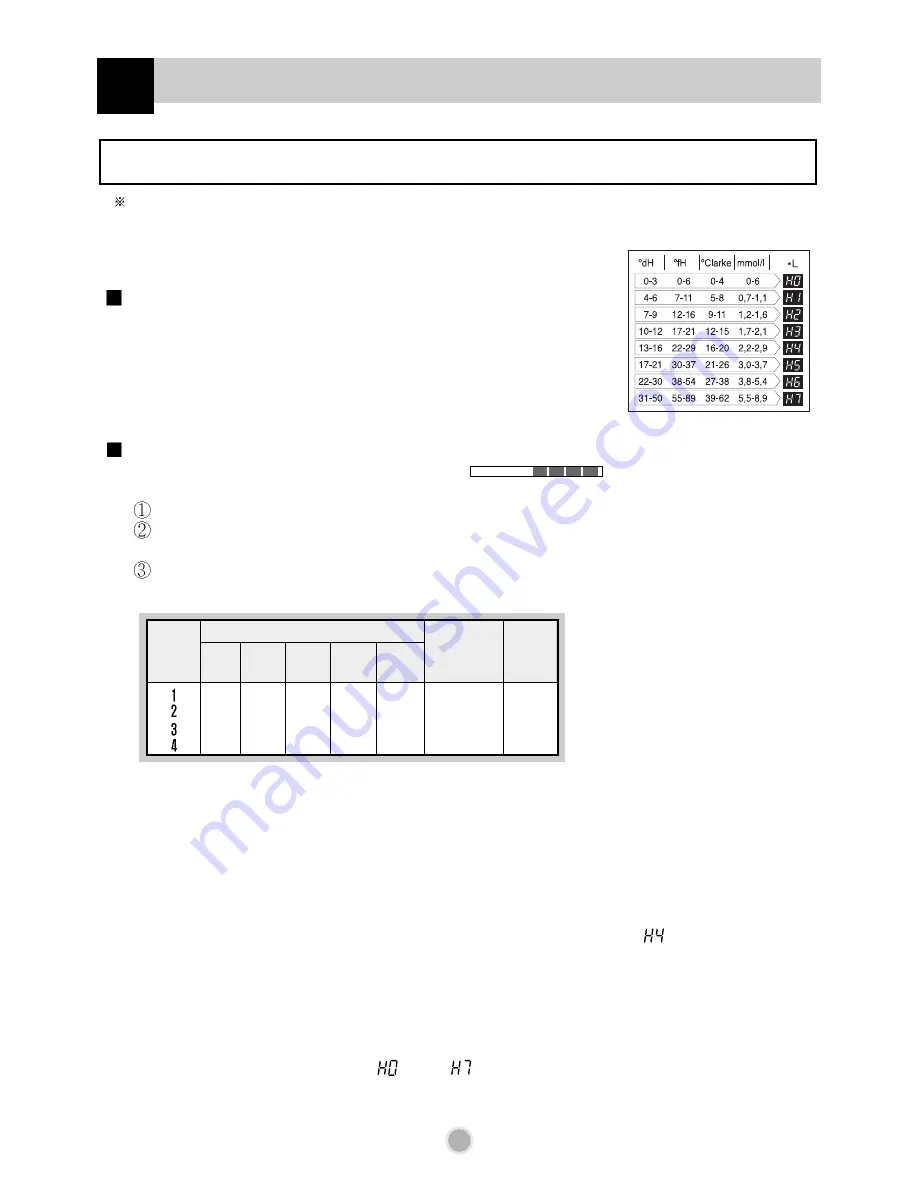
Adjust the water softener to the setting to the corresponding hardness of the water in your area.
The water softener has 8 adjustment levels.
The dishwasher is programmed at the factory for a water hardness level of “ ”.
This can be checked and altered by using the buttons on the control panel.
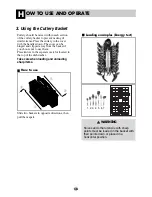
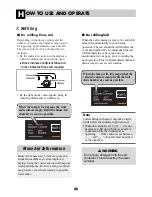
1. First, ensure the dishwasher is switched off.
2. Press
Half load
and
Power
button simultaneously and keep them pressed.
3. To change the setting:
Simply press the
Half load
button, then the figure will change one by one.
The display will change between “ ” and “ ”.
4. Once the hardness setting is correctly adjusted, press the
Delay Start
button.
The hardness setting is then saved.
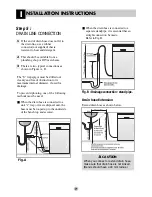
Step 2. Setting up the softening system level of your dishwasher
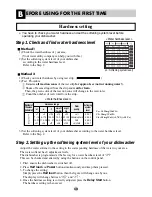
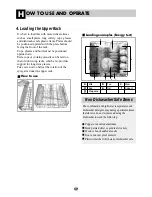
Step 1. Check and find water hardness level
Method 1
1) Check the water hardness of your area.
(Your water utility company can help you with this.)
2) Set the softening system level of your dishwasher
according to the water hardness level.
Refer to the Step 2.
Method 2
1) Check your water hardness by using test strip. ( )
2) Test Procedure
Immerse
all reaction zones
of the test strip
for approx.1sec (not in running water!)
.
Shake off excess liquid from the strip and
wait for 1min
.
Then, the green color of the reaction zone will change to the red-violet.
Count the number of red-violet from the strip.
3) Set the softening system level of your dishwasher according to the water hardness level.
Refer to the Step 2.
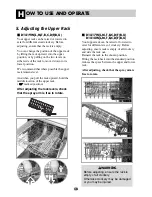
You have to check your water hardness and set the softening system level before
operating your dishwasher.
Hardness range
< Water hardness level >
°
d
Number of
the areas
(red-violet)
°
e
°
f
mmol/l
(Ca+Mg)
mg/l
Ca
Water
quality
Softening
system
level
1
°
e = 14.25 mg/l CaCO
3
1
°
f = 10 mg/l CaCO
3
1
°
d = 10 mg/l CaO (=1,78
°
f) (=1,25
°
e)
<7
7 - 14
14 - 21
>21
<9
9 - 17,5
17,5 - 26
>26
<12,5
12,5 - 25
25 - 37
>37
<1,3
1,3 - 2,5
2,5 - 3,8
>3,8
<50
50 - 100
100 - 150
>150
soft
moderately hard
hard
very hard
H0, H1
H2, H3
H4, H5
H6, H7
Hardness setting
< Water hardness level >
(*L : Softening system level)
Summary of Contents for D1417WBB
Page 11: ...11 ...
Page 29: ...29 EMO M ...
Page 30: ...EMO M 30 ...
Page 31: ...31 EMO M ...
Page 32: ...You may also find user manual in video version at following link www guidelg com dishwasher ...


