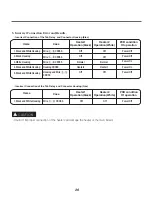
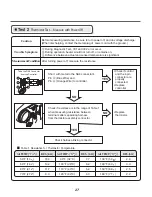
background image

12

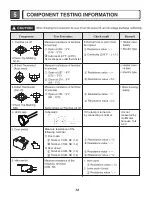
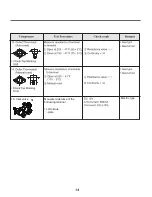
Auto reset -31°F (-35°C)

Same shape as outlet thermostat.

4. LED Lamp

Schematic:

If the lamp is turned on

by connecting is normal.

It is not 

measured by

multimeter

because V  is

3.2V

th

Measure resistance of the

following  terminal
1) Door open

Terminal: COM - NC (1-3)
Terminal: COM - NO (1-2)

2) Door closed

Terminal: COM - NC (1-3)
Terminal: COM - NO (1-2)

Summary of Contents for DLEX7700*E

Page 1: ...PRGHO GOH 33 H GOJ 34 H ...

Page 2: ...GTU CPF JCPFU ECP IGV ECWIJV KP VJG FQQT CPF ECWUG KPLWT KH VJG FQQT FTQRU HQTYCTF WPGZRGEVGFN Q PQV RNCEG JGCX KVGOU QP QT NGCP CICKPUV VJG VQR QH VJG FQQT YJGP KV KU QRGP Q PQV CVVGORV VQ RWNN VJG JCORGT FQQT QRGP OQTG VJCP FGITGGU 6JG T GT EQWNF VKR HQTYCTF ECWUKPI KPLWT QT FCOCIG 9 40 0 9 6 61 1 17 5 5 2146 06 5 6 016 4 100 6 4170 0 8 5 2146 06 Q PQV VT VQ NKIJV C OCVEJ QT EKICTGVVG QT VWTP QP...

Page 3: ...1111111111111111111111111111111111111111111111111111111111111111111111111111111111111111111111111111111111111111111111 93 491 49041 44 45 48 49 4 4 4 4 53 53 54 55 56 57 5 5 5 63 64 65 66 67 69 85 8 9 9 9 9 3 4 4905041 4905051 4906041 4906051 ...

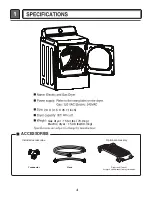
Page 4: ...page 6 of this manual for usage instruction Dryer rack 1 each ACCESSORIES Y connector Hose Included accessories Optional accessory 5 6418 7814 lqfk Jdv gu hu 48916 oev 31 nj Hohfwulf gu hu 4851 oev 9 16 nj 13 ...

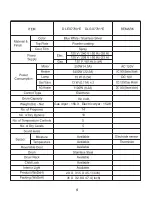
Page 5: ...5 DLEX7700 E DLGX7701 E 9 0 cu ft 10 3 29 X 31 5 X 45 1 inch 31 X 32 8 X 47 4 inch Gas dryer 156 3 Electric dryer 152 8 13 ...

Page 6: ...6 ...

Page 7: ...NG RQQHFW WKH QHXWUDO ZLUH ZKLWH RI WKH SRZHU FRUG WR WKH FHQWHU WHUPLQDO EORFN VFUHZ RQQHFW WKH UHG DQG EODFN ZLUHV WR WKH OHIW DQG ULJKW WHUPLQDO EORFN VFUHZV RQQHFW WKH JURXQG ZLUH JUHHQ RI WKH SRZHU FRUG WR WKH H WHUQDO JURXQG VFUHZ 5HPRYH WKH QHXWUDO JURXQG ZLUH RI DSSOLDQFH DQG FRQQHFW LW WR FHQWHU VFUHZ 0DNH VXUH WKDW WKH VWUDLQ UHOLHI VFUHZ LV WLJKWHQHG DQG WKDW DOO WHUPLQDO EORFN QXWV DUH...

Page 8: ...GLQDQFHV GR QRW DOORZ WKH FRQQHFWLRQ RI D IUDPH JURXQGLQJ FRQGXFWRU WR WKH QHXWUDO ZLUH XVH WKH LQVWUXFWLRQV XQGHU 5GEVKQP 1RVKQPCN YKTG EQPPGEVKQP RQQHFW WKH QHXWUDO ZKLWH RU FHQWHU ZLUH WR WKH FHQWHU VLOYHU FRORUHG VFUHZ DQG WLJKWHQ VHFXUHO RQQHFW WKH RWKHU WZR SRZHU FRUG ZLUHV UHG DQG EODFN WR WKH OHIW DQG ULJKW WHUPLQDO EORFN VFUHZV DQG WLJKWHQ VHFXUHO 7LJKWHQ WKH VWUDLQ UHOLHI VFUHZV VHFXUHO ...

Page 9: ...9 ...

Page 10: ...10 21 8 150 800 800 Connect Inlet Hose ...

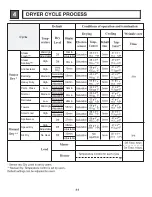
Page 11: ...High No Heat Low Low Steam Fresh Steam Sanitary Antibacterial Bedding Heavy Duty Perm Press Normal Delicates Towels Small Load Sportswear Speed Dry Air Dry Normal Dry Normal Dry Normal Dry Normal Dry Normal Dry Normal Dry Normal Dry Adjustable Adjustable Adjustable Adjustable Adjustable ...

Page 12: ...mp Schematic If the lamp is turned on by connecting is normal It is not measured by multimeter because V is 3 2V th Measure resistance of the following terminal 1 Door open Terminal COM NC 1 3 Terminal COM NO 1 2 2 Door closed Terminal COM NC 1 3 Terminal COM NO 1 2 ...

Page 13: ...GTOKPC VQ VGTOKPCN 1RGP CV u CZKOWO NQUG CV u 6JGTOKUVQT GCUWTG TGUKUVCPEG QH VGTOKPCN VQ VGTOKPCN 6GORGTCVWTG EQPFKVKQP QVQT Ŗ 5GG 2CIG CU XCNXG 4GUKUVCPEG XCNWG 4GUKUVCPEG XCNWG 4GUKUVCPEG XCNWG 4GUKUVCPEG XCNWG Ŗ NGEVTKE V RG Ŗ GCVGT ECUG K NKOKV Ŗ NGEVTKE V RG Ŗ CU V RG Ŗ CU V RG Ŗ CU V RG 4GUKUVCPEG XCNWG HQT 4GUKUVCPEG XCNWG 4GUKUVCPEG XCNWG 4GUKUVCPEG XCNWG 4GUKUVCPEG XCNWG XCNXG XCNXG RPSR...

Page 14: ...14 Ω Ω Electric type 15 Inlet valve Measure resistance of the Following terminal Left picture plate ...

Page 15: ...TKHWICN 5YKVEJ 470 1 QVQT QRGTCVGU 5612 1 9JGP QVQT FQGU PQV QRGTCVG QVQT Ω Ω Ω Ω 7HUPLQDO 1R 0RGH HQWULIXJDO VZLWFK HQWULIXJDO VZLWFK 3XOO ULYH IRUZDUG 5HVLVWDQFH 5HPDUN 0RWRU 6723 0RWRU 581 QVQT GCVGT NGEVTKE QFGNU GCVGT NGEVTKE QFGNU CU 8CNXG CU QFGNU CU 8CNXG CU QFGNU ...

Page 16: ...16 ...

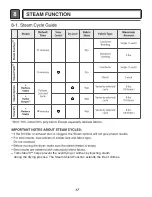
Page 17: ...17 38 TurboSteam helps prevent the overdrying of clothes by injecting steam during the drying process The Steam Shield Function extends the life of clothes ...

Page 18: ...18 ...

Page 19: ...19 ...

Page 20: ...20 ...

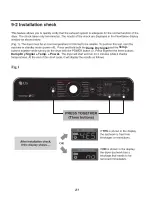
Page 21: ...21 Damp Dry Signal Temp Damp Dry Signal Temp Power ...

Page 22: ...22 ...

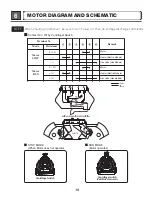
Page 23: ...and Less Time simultaneously in 0 5 seconds U Main PGM Display PGM Thermistor open Thermistor shorted ELECTRIC TYPE Mist Valve on Motor Heater1 Heater2 off GAS TYPE Mist Valve on Motor Gas Valve off Water Supply Valve Loads off 000 Water Level Sensor Mist Valve d tE ...

Page 24: ...NVCIG OGCUWTGF DGVYGGP EQPPGEVQT QT 9 NCEM 9KTG NKPMGF VQ VJG QPVTQNNGT CPF 9JKVG 9KTG U 8 JGEM KH VJG QPVTQNNGT YKTG KU FKUEQPPGEVGF JGEM KH 6GTOKPCN NQEM CPF 2QYGT QTF CTG EQPPGEVGF JGEM 2NWI QGU 2QYGT QTF 0 0CVWTCN NKPG OCVEJ VQ 6GTOKPCN GPVGT 0 0CVWTCN NKPG 4GRNCEG EQPVTQ NGT Ŗ 4GEQPPGEV VJG EQPVTQNNGT Ŗ JGEM KH 2QYGT QTF KU RTQRGTN EQPPGEVGF Ŗ JGEM VJG HWUG QT EKTEWKV DTGCMGT 5 01 01 01 5 5 N...

Page 25: ...25 GAS ELEC TAP RELAY 1 TAP RELAY 2 ...

Page 26: ... 2II 2II 1RUPDO HDWHU 2II 2II 2II 1RUPDO HDWHU 2II 2II 2II 3RZHU 2II 3RZHU 2II 3RZHU 2Q 3RZHU 2Q 3RZHU 2II 3RZHU 2II GCVGT 1RGTCVKQP DNCEM GCVGT 1RGTCVKQP DNCEM GCVGT 1RGTCVKQP 9JKVG GCVGT 1RGTCVKQP 9JKVG 2 EQPFKVKQP 1H QRGTCVKQP 2 EQPFKVKQP 1H QRGTCVKQP QFRUUHFW RQQHFWLRQ UURU DQG 5HVXOWV PEQTTGEV QPPGEVKQP QH VJG 6CD 4GNC CPF QPPGEVQT QWUKPI NGE PEQTTGEV QPPGEVKQP QH VJG 6CD 4GNC CPF QPPGEVQT QW...

Page 27: ...JG TGUKUVCPEG 5JQTV YKVJ OGVCN VQ VJG 0 EQPPGEVQTŏU 2KP NWG 9KTG CPF 2KP 1TCPIG 9KTG VQ EQPVTQNNGT Ŗ JGEM KH EQPVTQN CPF VJG RKP EQPPGEVQT CTG RTQRGTN EQPPGEVGF Ŗ 4GRNCEG EQPVTQNNGT Ŗ 4GRNCEG VJGTOKUVQT JGEM KH TGUKUVCPEG KU KP VJG TCPIG QH 6CDNG YJGP OGCUWTKPI TGUKUVCPEG DGVYGGP VGTOKPCNU CHVGT UGRCTCVKPI JCTPGUU HTQO VJGTOKUVQT CUUGODN EQPPGEVQT JGEM JCTPGUU NKPMKPI EQPPGEVQT 6CMG VJG 0 QPPGEVQT...

Page 28: ... EQPVTQNNGT EQPPGEVQT Ŗ 4GRNCEG QWVNGV Ŗ 6JGTOQUVCV 4GHGT VQ ŎEQORQPGPVŏ Ŗ JGEM FNGT CUUGODN Ŗ TWO DGNV EWVU QHH Ŗ TWO DGNV VCMGU QHH HTQO QVQT RWNNG Ŗ 4GRNCEG FNGT UYKVEJ U TGUKUVCPEG DGNQY Ω DGVYGGP EQPPGEVQT 9JKVG YKTG CPF 9 GNNQY YKTG GCUWTG YJKNG FQQT KU ENQUGF U TGUKUVCPEG DGNQY Ω DGVYGGP EQPPGEVQT 9 GNNQY YKTG CPF 9 TQYP YKTG U TGUKUVCPEG DGNQY Ω DGVYGGP VGTOKPCNU QH QWVNGV VJGTOQUVCV CVVCE...

Page 29: ...TGUKUVCPEG KP GNGEVTKE NQCF KU TGUKUVCPEG DGNQY Ω Ŗ JGEM GNGEVTQ QCF CPF JCTPGUU EQPPGEVQT Ŗ JGEM JCTPGUU NKPMKPI EQPPGEVQT Ŗ 4GRNCEG EQPVTQN CPF EJGEM 9JGP EQPVCEVKPI ENQVJ VQ GNGEVTQ NQCF U VJG OGCUWTGOGPV YKVJKP VJG TCPIG QH 6CDNG FWTKPI KCIPQUVKE 6GUV U VJG OGCUWTGOGPV YKVJKP VJG TCPIG QH 6CDNG YJGP OGCUWTKPI VJG XQNVCIG KP VJG 0 EQPPGEVQTŏU 2KP 1TCPIG YKTG CPF 2KP NWG YKTG 0QTOCN QPFKVKQP 0 T...

Page 30: ...EJ EJGEM 4GHGT VQ EQORQPGPV VGUVKPI Ŗ JGEM NCOR 9JGP QRGPKPI NCOR TGRNCEG VJGP OGCUWTG CICKP Ŗ QQT UYKVEJ EJGEM 4GHGT VQ EQORQPGPV VGUVKPI Ŗ QQT UYKVEJ EJGEM 4GHGT VQ EQORQPGPV VGUVKPI Ŗ QQT UYKVEJ EJGEM 4GHGT VQ EQORQPGPV VGUVKPI GCUWTG YJKNG FQQT KU QRGP JGEM KV TGUKUVCPEG KU Ω DGVYGGP 9JKVG YKTG CPF NCEM YKTG QPPGEVQT 9 CHVGT VCMKPI 9 QWV HTQO EQPVTQNNGT GCUWTG YJKNG FQQT KU QRGP JGEM KV TGUKUV...

Page 31: ...NQY Ω DGVYGGP VGTOKPCN CPF CV 470 EQPFKVKQP 5 01 Ŗ JGEM OQVQT CPF TGRNCEG KV U TGUKUVCPEG DGVYGGP JGCVGT VGTOKPCN CPF DGNQY Ω U TGUKUVCPEG DGVYGGP JGCVGT VGTOKPCN CPF DGNQY Ω U TGUKUVCPEG DGVYGGP JGCVGT VGTOKPCN CPF DGNQY Ω 5 01 Ŗ 4GRNCEG JGCVGT JGEM KH VJG XCNWG QH OGCUWTGF TGUKUVCPEG KU DGNQY Ω DGVYGGP VGTOKPCN 6 5CHGV VJGTOQUVCV 5 01 Ŗ 4GRNCEG 6 5CHGV VJGTOQUVCV CPF 6 K KOKV VJGTOQUVCV JGEM KH ...

Page 32: ...CIG XCNWG KU OQTG VJCP 8 UGE CHVGT IPKVGT QHH 9JGP OGCUWTKPI VGTOKPCN TGUKUVCPEG QP XCNXG CPF XCNXG XCNXGU CTG OQTG VJCP MΩ GCUWTG CHVGT QHH H XCNXG CPF XCNXG CTG WPFGT 8 XCNXGU CTG 1HH Ŗ CTPGUU EJGEM Ŗ QPVTQNNGT EJCPIG Ŗ JGEM VJGTOQUVCV JK NKOKV UCHGV Ŗ JGEM IPKVGT HTCOG FGVGEV Ŗ JGEM ICU EQPPGEVKQP QT ICU UWRRN Ŗ JCPIG XCNXG Ŗ JCPIG XCNXG 5 5 5 5 5 01 01 01 01 01 01 8CNXG 127 KHQ WKH JDV YDOYH R...

Page 33: ... 47mm for Propane Gas Conversion Label Instruction Sheet NCU PCK Remove 2 screws Disassemble the pipe assembly Replace Natural Gas orifice with Propane Gas orifice Opened Closed Orifice Initially j G G G G G G G G G G G V G UGj G G G G G G G U Warning The burner is set for natural gas at the factory The propane orifice conversion kit is sold as a service part to autherized servicers only Part numb...

Page 34: ...34 hs lGX pnup ly hs lGY mshtl kl lj uv uv lz lz 6 7ᖙ 4 3ᕏ ...

Page 35: ... ELECTRIC 1 Remove 1 screw 2 Pull out the cover 3 Remove 3 screws 4 Disassemble terminal block and wire from panel rear 1 Remove one screw for removing safety cover 2 Remove 3 screws remained on the panel rear 3 Lift out the panel rear ...

Page 36: ...cratch to the surface Gently lift each corner of the back panel then roll it forward so it rests on top of the dryer 3 With a flat blade screwdriver press the tabs on the side of the PWB PCB box and gently pry it open 4 Disconnect the wiring from the PWB PCB board 5 Disassemble the control panel assembly from top cover ...

Page 37: ...37 CONTROL PANEL 1 The knob will be taken out if pulled forward 2 Remove 7 screws from control panel assembly 3 Separate PCB from control panel ...

Page 38: ...38 How to change top cover 1 Remove the 4 screws 2 Disassemble terminal block with power cord 3 Disassemble rear panel and both side screws ...

Page 39: ...and housing from the PCB 4 Disassemble 2 screws on the front panel Be careful with the marked hook not to be broken when removing the front panel 6 Please push the 2 spots hooks by using paddle between top cover and door cabinet ...

Page 40: ...remove the hook using a flathead screwdriver 2 The Damper and Lid Assembly must be removed Pull the Damper at this time 3 Pull to the side while pushing the hinge as the figure using a thin flathead screwdriver G G G G Gs Gh SG G G G G G G G G G Gs G UGp G G G G G G G U ...

Page 41: ...41 4 The Lid Assembly can be separated if pulled gently ...

Page 42: ... connector to the hose is disassembled while holding down the area marked 2 Remove the 7 screws from the Cover Rear 3 Pull out the Tub Rear that is hanging on a hook while lifting up 4 Replace the hose and assemble the cable tie holder in Tub Rear ...

Page 43: ...ce the inlet hose 5 Remove the hose in generator 6 Remove the cable tie holder in Tub Rear 7 Replace the hose and assemble the cable tie holder in Tub Rear 8 After assembling the hose and generator assemble the clamp ...

Page 44: ... in generator 2 Remove the thermistor screw in generator 3 Remove the steam harness cable tie holder in Tub Rear 4 Replace the steam harness and assemble the cable tie holder in tub rear 5 Assemble the steam harness 6 Assemble the thermistor and screw in generator ...

Page 45: ...et 1 Remove the décor guard screw 2 If you are decomposing the generator and Tub Rear lifting the generator on Tub Rear 5 Assemble the décor guard and screw 3 Remove the bracket in generator 4 Replace the generator or bracket and assemble them ...

Page 46: ...46 ...

Page 47: ...47 Remove the Top cover Hold the lamp in place while pressing lamp both side Replace the new lamp ...

Page 48: ...5 100 6 6 4 4 41 65 64 5722 61 4 7 6 4 5 1 2 4510 0 74 4 61 0 7564 4 1 0 5 6 241 74 5 0 7 0 6 75 1 10 5 8 18 5 0 5 6 55 5 74 61 1 19 1 6 5 6 9 40 0 0 6 07 17 4 57 6 0 2412 46 2 4510 0 74 14 6 XU 4 4 756 0 8 7 7 3 8 7 7 3 8 7 7 3 YTYU YTXU ZTXU ZTYU ...

Page 49: ...49 2 ...

Page 50: ...T 4GOQXG VJG HKNVGT CPF UETGYU KUCUUGODNG VJG VQR RNCVG 4GOQXG VJG ECDKPGV EQXGT CPF VWD FTWO TQPV 4GOQXG VJG FTWO CUUGODN CPF VWD FTWO 4GCT KUEQPPGEV VJG CKT FWEV HTQO VJG VWD FTWO TQPV 4GOQXG VJG CKT FWEV 4GOQXG VJG TQNNGT HTQO VJG VWD FTWO TQPV CPF VWD FTWO 4GCT ...

Page 51: ...51 Φ Φ Φ Φ Two large screws Two small screws twelve screws Hole plug interlock button ...

Page 52: ...52 ...

Page 53: ...53 twelve screws Hole plug interlock button ...

Page 54: ...54 4 3 While pushing the handle push the button ...

Page 55: ...s removed in step 3 screwdriver being careful not to scratch the paint Rotate the hinge cover 180 degrees and install it on the opposite side where the upper hinge was attached THE DRYER DOOR IS VERY LARGE AND HEAVY Failure to follow the instructions below can result in damage to the dryer property damage or personal injury The edges of the door cover may be sharp Take care when handling or wear g...

Page 56: ...re you removed the screw behind the hinge bracket in step 6 8 Install the hinge bracket removed in step 6 on the bottom left side 9 With the door laid inside facing up on a protected surface remove the Φ5 screw 10 Remove the four screws on the door cover that secure The door strike and the blank cover Switch the door strike and the blank cover installing them on the opposite sides from which they ...

Page 57: ...inge bracket by lifting the top end of the rod and sliding it toward the top of the door The spring should remain attached to the lock rod Set the lock rod aside 13 Make sure to remove the spring with the interlock button and to keep the two together Set the interlock button aside Do not confuse with interlock buttons from the top of the outer door 14 Remove the top lock rod and set it aside a Sli...

Page 58: ...he door 17 Rotate the top lock rod removed in step 14 180 degrees end for end from its original position and reinstall it The spring should now be to the right of center with the spring on the side of the rod facing the top of the door Insert the right end of the lock rod into the right hinge assembly Make sure the rod is aligned with the guides in the door panel When released the lock rod should ...

Page 59: ... snap it back onto the FRONT of the hinge bracket facing in the opposite direction e Mount the lower hinge bracket and the fi ller on the left side of the door with the screw removed in step a 20 Flip the side lock rod over and install it on the opposite side Insert the lower end into the left hinge and lower the rod into the guides on the door while compressing the spring inside the recess Make s...

Page 60: ...screws removed in step 9 NOTE Please check again if the spring is well assembled into the Outer Door Panel 23 While supporting the door install the four hinge screws removed in step 2 Test the swing of the door to make sure the hinges and latch are properly aligned and that the door opens closes and latches properly in both directions If the door doesn t operate smoothly remove the door and then t...

Page 61: ...61 4V HO7334E 侳8 58 VWV ...

Page 62: ...62 ...

Page 63: ...63 ...

Page 64: ...64 ...

Page 65: ...65 ...

Page 66: ...66 ...

Page 67: ...67 ...

Page 68: ...68 Laundry Status Run Cycle Again Using LG Smart Laundry DW application ...

Page 69: ...69 ...

Page 70: ...67 16 16 1 Control Panel and Plate Assembly A150 A130 A140 A110 A215 A211 A570 A120 A220 A230 A225 A210 A700 ...

Page 71: ...8 16 2 1 A800 A212 A590 A500 A212 A610 A600 A520 A530 A525 A400 A311 A300 A475 A320 A330 A360 A314 A360 A310 A540 A460 A450 A430 A410 A431 A420 A305 A131 A850 A441 A440 A380 A315 A315 A315 A325 A390 A370 ...

Page 72: ...100 K130 K140 K336 K250 K251 K350 K240 F130 F110 F120 F140 K540 K515 K510 K520 K250 K251 K320 K335 K310 K330 K550 K560 K600 K651 K650 K640 K655 K530 K660 K610 K620 F200 K742 K743 K741 K340 K210 K720 K730 K509 K502 K221 K505 F150 ...

Page 73: ...MFL62119986 ...
Reviews: