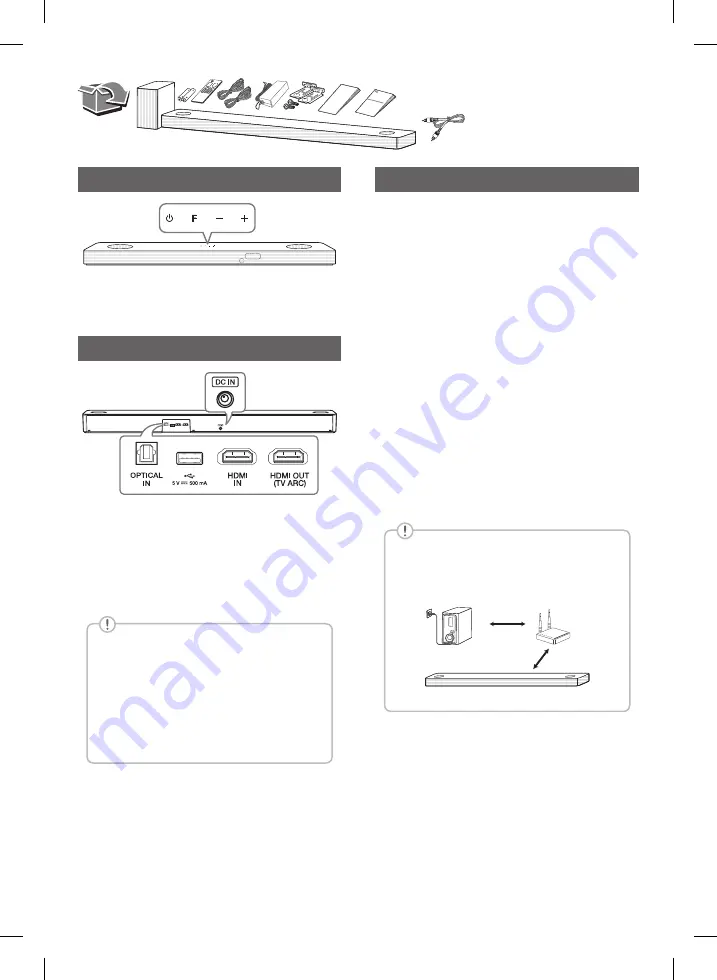
Front Panel
1
(Standby) · · · · · · · · · ·Switches the unit ON or OFF.
F
(Function) · · · · · · · · · · · · · · · · · · · · · · · ·Selects function.
p
/
o
(Volume) · · · · · · · · · · · · · · · · · · · · Adjusts volume.
Rear Panel
DC IN
· · · · · · · · · · · · · · · · · · · · · Connect to the AC adapter.
OPTICAL IN
· · · · · · · · · · · · Connect to an optical device.
USB Port · · · · · · · · · · · · · · · · · · · ·Connect to a USB device.
HDMI IN
· · · · · · · · · ·Connect to device with HDMI OUT.
HDMI OUT (TV ARC)
· · · · · · · · · · · · · · · Connect to a TV.
•
It is recommended that you purchase
a USB gender separately for the
convenience of USB insertion and
extraction. (Recommended USB gender
type : USB 2.0 extension cable)
•
Make sure to properly align and connect
the optical cable; improper alignment may
cause damage to the jack.
Subwoofer Connection
Place the wireless subwoofer near the sound bar and
follow steps below.
a
Connect the power cord of the sound bar and the
wireless subwoofer to the outlet.
b
Turn on the sound bar.
•
The sound bar and wireless subwoofer will be
automatically
connected. The subwoofer's
green LED turns on.
Manual Subwoofer Connection
If the subwoofer does not make sound, try to
connect manually.
a
Press
PAIRING
on the rear of the wireless
subwoofer.
•
The green LED on the rear of the wireless
subwoofer blinks quickly.
(If the green LED does not blink, press and
hold the
PAIRING
.)
b
Turn on the sound bar.
•
Pairing is completed. The green LED on the
rear of the wireless subwoofer turns on.
Keep the sound bar and the subwoofer
away from the device (ex. wireless router,
microwave oven, etc.) over 1 m to prevent
wireless interference.
!
1 m
SN7Y.DDEULLK_SIM_ENG_MFL71672216.indd 2
2020-04-09 11:26:37


