background image

10

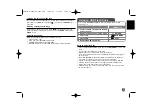
Adjust the settings - more you can do

When you turn on for the first time (optional)

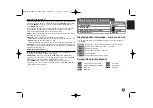
The menu for a language selection will appear when you turn on the unit for the
first time. You must select a language to use the unit. Use 

vV b B 

to select a

language then press 

ENTER 

and the confirm menu will appear. Use 

b B 

to

select [Enter] then press 

ENTER

.

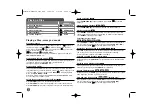
Adjust the language settings  

Menu Language – 

Select a language for the Setup menu and on-screen 

display. 

Disc Audio/Subtitle/Menu – 

Select a language for the Disc Audio/Subtitle/

Menu. 

[Original]: Refers to the original language in which the disc was recorded.
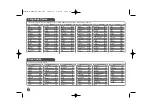
[Other]: To select another language, press number buttons then 

ENTER

to

enter the corresponding 4-digit number according to the language code list.
(see page 16) If you make a mistake while entering number, press 

CLEAR

to

delete numbers then correct it.
[Off] (for Disc Subtitle): Turn off Subtitle.

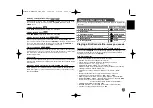
Adjust the display settings  

TV Aspect – 

Select which screen aspect to use based on the shape of your TV

screen. 

[4:3]: Select when a standard 4:3 TV is connected.
[16:9]: Select when a 16:9 wide TV is connected.

Display Mode – 

If you selected 4:3, you’ll need to define how you would like

widescreen programs and films to be displayed on your TV screen. 

[Letterbox]: This displays a widescreen picture with black bands at the top
and bottom of the screen.
[Panscan]: This fills the entire 4:3 screen, cropping the picture as necessary.

Adjust the audio settings  

Dolby Digital / DTS / MPEG – 

Selects the type of digital audio signal when

using the DIGITAL AUDIO OUT jack.

[Bitstream]: Select this when you connect this unit’s DIGITAL AUDIO 
OUT jack to an amplifier with a built-in Dolby Digital, DTS or MPEG decoder.
[PCM] (for Dolby Digital / MPEG): Select this when you connect this unit’s
DIGITAL AUDIO OUT jack to an amplifier without a built-in Dolby Digital or
MPEG decoder.
[Off] (for DTS): Select this when you connect this unit’s DIGITAL AUDIO OUT
jack to an amplifier without a built-in DTS decoder.

Sample Freq. (Frequency) –

Selects the sampling frequency of the audio 

signal. 

[48 KHz]: The audio signals are always converted to 48 kHz.
[96 KHz]: The audio signals are output in their original format.

DRC (Dynamic Range Control) –

Make the sound clear when the volume is

turned down (Dolby Digital only). Set to [On] for this effect.

Vocal –

Set to [On] only when a multi-channel karaoke DVD is playing. 

The karaoke channels on the disc mix into normal stereo sound.

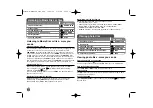
Adjust the settings

1 Display setup menu:

SETUP

2 Select a desired option on the first level: 

v

v  V

V

3 Move to second level: 

B

B

4 Select a desired option on the second level: 

v

v  V

V

5 Move to third level: 

B

B

6 Change the setting:

v

v  V

V

/ ENTER

ON REMOTE

DV4S2H-N.BCANLLK_5920_ENG  10/20/08  3:55 PM  Page 10

Summary of Contents for DV4S2H-N

Page 1: ...As an ENERGY STAR Partner LG has determined that this product or product models meet the ENERGY STAR guidelines for energy efficiency ENERGY STAR is a U S registered mark http www lg ca DV4S2H N BCANLLK_5920_ENG 10 20 08 3 55 PM Page 1 ...

Page 2: ...pecified herein may result in hazardous radiation exposure To prevent direct exposure to laser beam do not try to open the enclosure Visible laser radiation when open DO NOT STARE INTO BEAM CAUTION The apparatus should not be exposed to water dripping or splashing and no objects filled with liquids such as vases should be placed on the apparatus CAUTION concerning the Power Cord Most appliances re...

Page 3: ...n electrician for replacement of the obsolete outlet 10 Protect the power cord from being walked on or pinched particularly at plugs convenience receptacles and the point where they exit from the apparatus 11 Only use attachments accessories specified by the manufacturer 12 Use only with the cart stand tripod bracket or table specified by the manufacturer or sold with the apparatus When a cart is ...

Page 4: ...or disassembly is prohibited CONSUMERS SHOULD NOTE THAT NOT ALL HIGH DEFINITION TELEVISION SETS ARE FULLY COMPATIBLE WITH THIS PRODUCT AND MAY CAUSE ARTIFACTS TO BE DISPLAYED IN THE PICTURE IN CASE OF 525 PROGRESSIVE SCAN PICTURE PROBLEMS IT IS RECOMMENDED THAT THE USER SWITCH THE CONNECTION TO THE STANDARD DEFINITION OUTPUT IF THERE ARE QUESTIONS REGARDING OUR TV SET COMPATIBILITY WITH THIS MODEL...

Page 5: ...tected discs can be played back If the disc is copy protected it will be displayed at the 480p or 480i resolution Depending on your TV some of the resolution settings may result in the picture disappearing or an abnormal picture appearing In this case press RESOLUTION repeatedly until the picture re appears Digital Audio Output Connection Connect one of the unit s DIGITAL AUDIO OUT COAXIAL jack to...

Page 6: ...tes per second one connector instead of several cables and connectors and communication between the AV source and AV devices such as DTVs Notes on HDMI connection If your TV is not capable of handling 96 kHz sampling frequency set the Sampling Freq option to 48 kHz on the setup menu See page 10 If your TV is not equipped with Dolby Digital and MPEG decoder set the Dolby Digital and MPEG options to...

Page 7: ...as show below Wall Mounting If you want to you can mount the unit on a wall You need to have hooks available that snugly fit into the hanging holes in the back of the unit Screw your hooks into the wall Ensure that the unit locks onto the hooks and that the hooks are strong enough to support the weight before releasing the hand Wall 76 mm less than 8 mm less than 3 mm Hooks Cable Cover DV4S2H N BC...

Page 8: ...olution depending on your TV Put the battery into the Remote Control Pinch the battery holder clip together then pull the tab to remove the battery holder Insert the battery with the facing in the same direction as the on the battery holder Replace the battery holder with battery into the Remote Control unit making sure that it is fully inserted Replace Remote Control unit battery with 3V micro li...

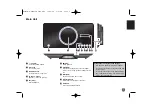
Page 9: ...evious chapter track or file h Skip Go to next chapter track or File i Display window Shows the current status of the unit j USB Port Connect an USB Flash Drive USB a b c d e f g h i j Precautions in using the touch buttons Use the touch pad with clean and dry hands Do not press the buttons on the touch pad with too much force Do not touch the button on the touch pad with any conductive material s...

Page 10: ... a widescreen picture with black bands at the top and bottom of the screen Panscan This fills the entire 4 3 screen cropping the picture as necessary Adjust the audio settings Dolby Digital DTS MPEG Selects the type of digital audio signal when using the DIGITAL AUDIO OUT jack Bitstream Select this when you connect this unit s DIGITAL AUDIO OUT jack to an amplifier with a built in Dolby Digital DT...

Page 11: ...ers settings B L E Black Level Expansion To select the black level of playback pictures Set your preference and monitor s ability DivX R VOD We provide you with the DivX VOD Video On Demand registration code that allows you to rent and purchase videos using the DivX VOD service For more information visit www divx com vod Press ENTER when Select icon is highlighted and you can view the registration...

Page 12: ...yback Playing repeatedly Press REPEAT repeatedly to select an item to be repeated The current title chapter or track will be played back repeatedly To return to normal playback press REPEAT repeatedly to select Off Fast forward or fast reverse Press SCAN m or M to play fast forward or fast reverse during playback You can change the various playback speed by pressing SCAN m or M repeatedly Press PL...

Page 13: ...o Changing the character set to display DivX subtitle correctly Press and hold SUBTITLE for 3 seconds during playback The language code will appear Press b B to select another language code until the subtitle is displayed properly and then press ENTER DivX file requirement DivX file compatibility with this player is limited as follows Available resolution size 1280x720 W x H pixel The file names o...

Page 14: ...ormation NO ID3 TAG appears on the screen MP3 WMA music file requirement MP3 WMA compatibility with this unit is limited as follows File extensions mp3 wma Sampling frequency within 8 48 kHz MP3 within 32 48kHz WMA Bit rate within 8 320kbps MP3 within 32 192kbps WMA CD R RW DVD R RW Format ISO 9660 Maximum Files Disc Less than 600 total number of files and folders Viewing photo files more you can ...

Page 15: ...the USB device in operating Regular back up is recommended to prevent data loss If you use an USB extension cable or USB HUB the USB device might not be recognized Music files MP3 WMA photo files JPEG and DivX files can be played For details of operations on each files refer to relevant pages This unit is not supported when the total number of files is more than 600 The USB function of this unit d...

Page 16: ... 8377 Sanskrit 8365 Scots Gaelic 7168 Serbian 8382 Serbo Croatian 8372 Shona 8378 Sindhi 8368 Singhalese 8373 Slovak 8375 Slovenian 8376 Spanish 6983 Sudanese 8385 Swahili 8387 Swedish 8386 Tagalog 8476 Language Code Tajik 8471 Tamil 8465 Telugu 8469 Thai 8472 Tonga 8479 Turkish 8482 Turkmen 8475 Twi 8487 Ukrainian 8575 Urdu 8582 Uzbek 8590 Vietnamese 8673 Volapük 8679 Welsh 6789 Wolof 8779 Xhosa ...

Page 17: ...vel Point the remote control at the remote sensor of the unit Operate the remote control closer to the unit No power The power is on but the unit does not work No picture No sound The unit does not start playback The remote control does not work properly Designs and specifications are subject to change without prior notice Cause General Power requirements AC 120 V 60 Hz Power consumption 8W Dimens...

Reviews: