

15
EN
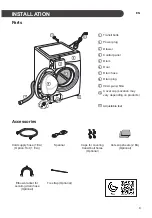
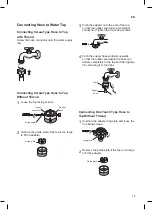
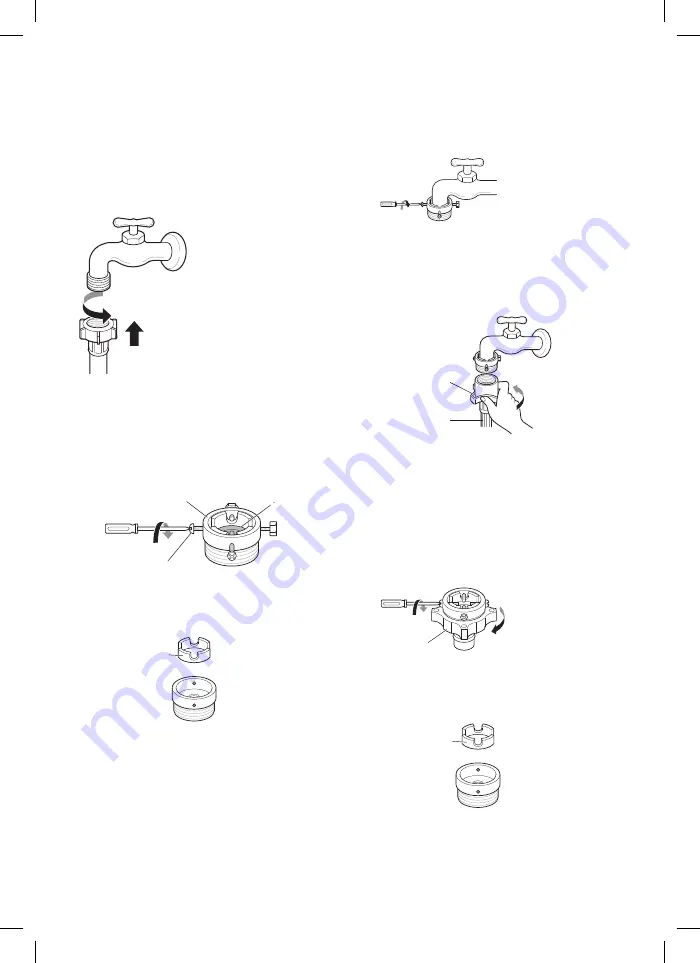
Connecting Hose to Water Tap
Connecting Screw-Type Hose to Tap
with Thread
Screw the hose connector onto the water supply
tap.
Connecting Screw-Type Hose to Tap
Without Thread
1
Loose the four fixing screws.
Upper
connector
Rubber
seal
Fixing screw
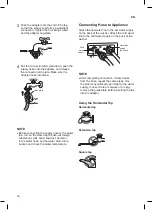
2
Remove the guide plate if the tap is too large
to fit the adapter.
Guide plate
3
Push the adapter onto the end of the tap
so that the rubber seal forms a watertight
connection. Tighten the four fixing screws.
4
Push the supply hose vertically upwards
so that the rubber seal within the hose can
adhere completely to the tap and then tighten
it by screwing it to the right.
Plate
Supply
hose
Connecting One Touch Type Hose to
Tap Without Thread
1
Unscrew the adapter ring plate and loose the
four fixing screws.
Ring plate
2
Remove the guide plate if the tap is too large
to fit the adapter.
Guide plate


