background image

DVD KARAOKE SYSTEM

OWNER’S MANUAL

MODEL : KD250KZ

Please read this manual carefully before operating your set.
Retain it for future reference.

Designs and specifications are subject to change without
notice for improvement.

ALMATY_KD200_JA6KLLK_(KD250KZ)_ENG_MFL39518840

R

USB

Summary of Contents for KD250KZ

Page 1: ...ODEL KD250KZ Please read this manual carefully before operating your set Retain it for future reference Designs and specifications are subject to change without notice for improvement ALMATY_KD200_JA6KLLK_ KD250KZ _ENG_MFL39518840 R USB ...

Page 2: ...al to be certain Do not overload wall outlets Overloaded wall outlets loose or damaged wall outlets extension cords frayed power cords or damaged or cracked wire insulation are dangerous Any of these conditions could result in electric shock or fire Periodically examine the cord of your appliance and if its appearance indicates damage or deteriora tion unplug it discontinue use of the appliance an...

Page 3: ...eatures 17 Title Menu 17 Disc Menu 17 Camera Angle 17 Changing the Audio Language 17 Changing the Audio Channel 17 Subtitle 17 Operation with Audio CD and MP3 WMA File 18 Playing an Audio CD and MP3 WMA File 18 Pause 18 Moving to another Track 18 Repeat Track All Off 18 Search 18 Operation with JPEG Disc 19 Viewing a JPEG disc 19 Slide Show 19 Moving to another File 19 Still Picture 19 To rotate p...

Page 4: ... audio level may be heard from the analog stereo output To avoid possible damage to the audio system turn down the volume before playing back such discs adjust the vol ume gradually and keep the volume level low To enjoy DTS Digital SurroundTM playback an external 5 1 chan nel DTS Digital SurroundTM decoder system must be connected to the digital output of the unit Disc related terms Title DVD onl...

Page 5: ...s depends on the operating environment For details please contact your nearest dealer About Symbols About the symbol display may appear on the TV screen during operation This icon means the function explained in this owner s manual is not available on that specific disc About the disc symbols for instructions A section whose title has one of the following symbol is applicable only to the disc repr...

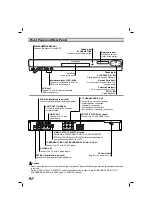
Page 6: ...t to an amplifier receiver or stereo system VIDEO OUT Connect to a TV with video inputs AC Power Cord Plug into the power source S VIDEO OUT Connect to a TV with S Video inputs COMPONENT VIDEO OUT PROGRESSIVE SCAN Y Pb Pr Connect to a TV with Y Pb Pr inputs 5 1 CHANNEL AUDIO OUT Connect to a 5 1 channel receiver center speaker connection subwoofer connection front speakers connections rear surroun...

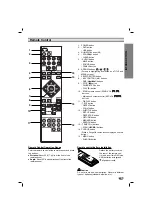
Page 7: ...KER SEARCH ZOOM RETURN REPEAT A B DISPLAY FEMALE CHORUS POWER ENTER SELECT ECHO VOL MIC VOL DVD USB 1 POWER button 2 DVD button USB button 3 NUMERIC buttons 0 9 4 PROGRAM button CLEAR button 5 AUDIO button MALE button SOUND button FEMALE button 6 ARROW buttons For use in highlighting a selection on a TITLE and MENU screen 7 SELECT ENTER button 8 KEY CONTROL b buttons SKIP buttons 9 STOP x button P...

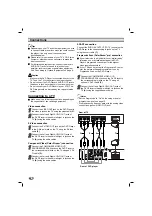
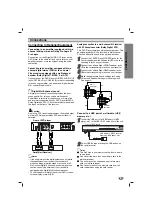
Page 8: ... and Right AUDIO OUT jacks of the DVD Player to the audio left right in jacks on the TV A using the audio cables Component Video Color Stream connection 1 Connect the COMPONENT VIDEO OUT PROGRESSIVE SCAN jacks on the DVD Player to the corresponding in jacks on the TV using an Y Pb Pr cable C 2 2 Connect the Left and Right AUDIO OUT jacks of the DVD Player to the audio left right in jacks on the TV...

Page 9: ...pped with a Digital Multi channel decoder To see the audio format of the current DVD in the on screen display press AUDIO Analog connection to a multi channel A V receiver with 6 Channel connector Dolby Digital DTS This DVD Player contains a multi channel decoder This enables playback of DVDs recorded in Multi channel Surround without the need for an optional decoder 1 Connect the CENTER and WOOFE...

Page 10: ... signals by making them seem larger The Matrix mode may also find use in auto systems where the fluctuations from poor FM stereo reception can otherwise cause disturbing surround signals from a logic decoder The ultimate cure for poor FM stereo reception may be simply to force the audio to mono BYPASS Outputs the sound from the front left and right speakers and subwoofer Sound Mode You can enjoy s...

Page 11: ... ENTER to execute the set ting Temporary Feedback Field Icons Repeat title Repeat sequence Resume play from this point Action prohibited or not available Notes Some discs may not provide all of the features on the on screen display example shown below If no button is pressed for 10 seconds the on screen display disappears A B Title Items Title Number Chapter Number Time search Audio language and D...

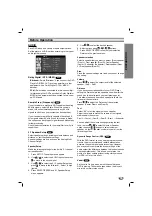
Page 12: ...TV is connected Display Mode Display Mode setting works only when the TV Aspect mode is set to 4 3 Letterbox Displays a wide picture with bands on the upper and lower portions of the screen Panscan Automatically displays the wide picture on the entire screen and cuts off the portions that do not fit Progressive Scan Progressive Scan Video provides higher quality pictures with less flickering If yo...

Page 13: ...onfirm your selection Returns to the previous menu Speaker selection Select a speaker that you want to adjust Front speaker Front L Front speaker Front R Center Speaker Center Subwoofer Subwoofer Rear speaker Rear L Rear speaker Rear R Size Since the speaker settings are fixed you cannot change the setting Volume Press to adjust the output level of the selected speaker 5dB _ 5dB Distance If you ha...

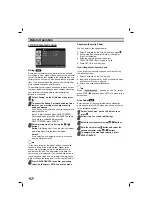
Page 14: ...nes are not played unless an alternate scene is available on the disc The alternative must have the same rating or a lower one If no suitable alternative is found playback stops You must enter the 4 digit pass word or change the rating level in order to play the disc 4 Press SELECT ENTER to confirm your rating selection then press SETUP to exit the menu Password Security Code You can enter or chan...

Page 15: ...layback does not start press PLAY In some cases the disc menu might appear instead If a menu screen is displayed The menu screen may be displayed first after loading a DVD which contains a menu Use the buttons to select the title chap ter you want to view then press SELECT ENTER to start Press TITLE or MENU to return to the menu screen Notes If parental control is set and the disc is not within th...

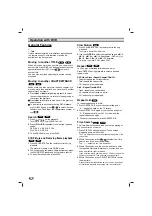
Page 16: ...USE mode 2 Use the FF GG to select the required speed t 1 2 t 1 4 t 1 8 or t 1 16 backward DVD only or T 1 2 T 1 4 T 1 8 or T 1 16 forward 3 To return to normal PLAY press PLAY Repeat You can play a title chapter all track on a disc Press REPEAT during playback to select a desired repeat mode DVD Video Discs Repeat Chapter Title Off Chapter repeats the current chapter Title repeats the current tit...

Page 17: ... Press to select the Marker number that you want to erase 3 Press CLEAR The Marker number will be erased from the list 4 Repeat steps 2 and 3 to erase additional Marker numbers 5 To remove the MARKER SEARCH menu press SEARCH Special DVD Features Checking the contents of DVD Video discs Menus DVDs may offer menus that allow you to access special features To use the disc menu press MENU Then press t...

Page 18: ...Press FF or GG during playback The player will now go into SEARCH mode 2 Press m or M repeatedly to select the required speed mX2 mX4 mX8 backward or MX2 MX4 MX8 forward 3 To exit SEARCH mode press PLAY WMA MP3 CD WMA MP3 CD WMA MP3 CD WMA MP3 CD WMA MP3 CD Program List Track1 Track2 Track3 Track4 Track5 Track6 Track7 Track8 0 00 00 1 12 Audio CD Program List 0 00 00 1 104 MUSIC PHOTO MOVIE Music2...

Page 19: ...ill Picture 1 Press PAUSE STEP during slide show The player will now go into PAUSE mode 2 To return to the slide show press PLAY or press PAUSE STEP again To rotate picture Press during showing a picture to rotate the picture clockwise or counter clockwise Zoom The Zoom function allows you to enlarge or reduce the video image 1 Press ZOOM repeatedly Zoom on y Zoom off 2 Use the buttons on the Zoom...

Page 20: ...eat mode TRACK repeats the current track ALL repeats all the tracks on a disc Off No display does not play repeatedly Erasing a Track from Program List 1 Use to select the track that you wish to erase from the Program list 2 Press CLEAR Or select Delete icon then Press SELECT ENTER to place the selected track on the Program list Repeat to erase additional tracks on the list Erasing the Complete Pr...

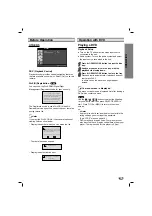
Page 21: ...guage code until the subti tle is displayed properly Display Press DISPLAY during playback General playback status can be displayed on the TV screen DivX DivX disc compatibility with this player is limited as follows Available resolution size of the DivX file is under 720x576 W x H pixel The file name of the DivX subtitle is available by 20 40 characters differs from language If there is impossibl...

Page 22: ...ay not be executed To Adjust MIC Volume Press the Microphone volume control MIC VOL button on the remote control clockwise to increase the volume or counterclockwise to decrease it 0 15 steps To Adjust ECHO Volume You can give an echo effect to the sound from the microphones Press the ECHO volume control ECHO VOL button on the remote control clockwise to increase the echo or counterclockwise to de...

Page 23: ...tedly during singing to play faster Press TEMPO repeatedly during singing slower Shadow Function If some CD caption and the song s subtitle are mixed up the song s subtitle may be invisible In this case to highlight the song s subtitle press SHADOW It will be highlighted by background shadow image Karaoke MENU Playback Preparation Press MENU on the karaoke mode The main MENU appears on the screen ...

Page 24: ...ger you want by pressing the in the SONG LIST and SINGER LIST menu and press SELECT ENTER 2 Select the singer you want by pressing the and press SELECT ENTER 3 Select the song title of the singer you want by pressing the and press SELECT ENTER ote To move the previous mode select the by pressing the then press SELECT ENTER Press to move to the previous or next page 1 2 A B C D E F iSYNC 2 UNLIMITE...

Page 25: ...press SELECT ENTER 3 Select the song title of the composer you want by pressing the and press SELECT ENTER ote To move the previous mode select the by pressing the then press SELECT ENTER Press to move to the previous or next page A B C D E F G H A B C D E F G H 3802 ABOUT FOREIGN LAN 3803 AIR HOLBERG 3804 ALMOST TOO SERIOU 3805 ANDANTE RONDO C 3806 ANITRA S DANCE P 3807 ARABESKE OP 18 3808 ARABES...

Page 26: ...ress SELECT ENTER 3 3 Select by pressing and select one of 60 70 80 or 90 by pressing to select success score then press SELECT ENTER 4 Select by pressing then press SELECT ENTER It appears as below 5 Select number you want by pressing and press SELECT ENTER Sing along with the accompaniment 6 Repeat step 4 5 Change the team of red team or blue team alternately 7 When reaching the targeted winning...

Page 27: ...yelorussian 6669 Cambodian 7577 Catalan 6765 Chinese 9072 Corsican 6779 Croatian 7282 Czech 6783 Danish 6865 Dutch 7876 English 6978 Esperanto 6979 Estonian 6984 Faroese 7079 Fiji 7074 Language Code Finnish 7073 French 7082 Galician 7176 Georgian 7565 German 6869 Greek 6976 Greenlandic 7576 Guarani 7178 Gujarati 7185 Hausa 7265 Hebrew 7387 Hindi 7273 Hungarian 7285 Icelandic 7383 Indonesian 7378 I...

Page 28: ...eive DVD sig nal output The video cable is not connected securely The equipment connected with the audio cable is not set to receive DVD signal output The power of the equipment connected with the audio cable is turned off The AUDIO options are set to the wrong position An unplayable disc is inserted The rating level is set The remote control is not pointed at the remote sensor on the DVD player T...

Reviews: