background image

ENGLISH

LAC2800.DRUSLLR_ENG_8902

MODEL : LAC2800

The working life of this product is 7 years since the date of purchase.

êìëëäàâ

Summary of Contents for LAC2800

Page 1: ...ENGLISH LAC2800 DRUSLLR_ENG_8902 MODEL LAC2800 The working life of this product is 7 years since the date of purchase êìëëäàâ ...

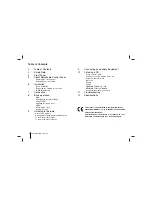
Page 2: ...radio Auto search memory Storing and recalling broadcast frequencies To scan the preset stations To tune in the preset stations 9 Connecting an Auxiliary Equipment 10 Listening a CD Pause or restart a CD Search for a section within a track file Skip to another track file Intro scan Repeat Shuffle MP3 WMA TRACK 10 10 MP3 WMA Folder UP DOWN See information about your music 11 Troubleshooting 12 Spec...

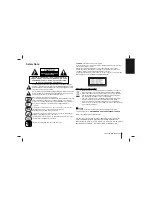
Page 3: ...CAUTION RISK OF ELECTRIC SHOCK DO NOT OPEN CAUTION This product uses a Laser System To ensure proper use of this product please read this owner s manual carefully and retain it for future reference Should the unit require maintenance contact an authorized service center Performing controls adjustments or carrying out procedures other than those specified herein may result in hazardous radiation ex...

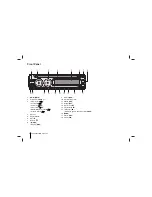
Page 4: ... Preset Scan u u PS MP3 WMA Track 10 10 U U u u Folder Up Down U U u u 4 Disc slot 5 Display Window 6 Eject Z 7 Release 8 MENU Display DISP 9 AUX In AUX 10 Preset Station 1 6 11 Shuffle SHF 12 Repeat RPT 13 Intro Scan INT 14 Play Pause B X 15 Equalizer EQ Extreme Dynamic Sound System XDSS 16 BAND 17 Source SRC 18 Select SEL ...

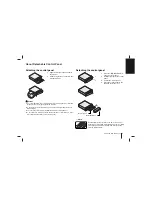
Page 5: ...ner or insecticides to come into contact with the surface of the control panel Detaching the control panel 1 2 3 4 Protective Case Control panel Periodically wipe the contacts on the back of the control panel with a cotton swap moistened with alcohol For safety turn off the ignition before cleaning and remove the key from the ignition switch 1 Align the left side of the panel with the stopper 2 Pu...

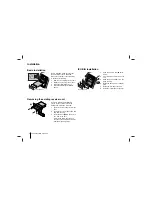
Page 6: ...N frame 2 Fit screws removed from the old unit 3 Slide the unit and frame into the dash opening 4 Install the dash panel or adapter plate 5 Install the trim ring to the unit 6 Install the control panel to the unit Removing the existing receiver unit ISO DIN Installation Before installing make sure that the ignition switch is set to OFF and remove the terminal of the car battery to avoid short circ...

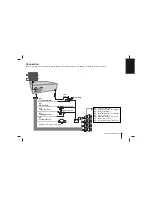
Page 7: ... 4 5 6 7 8 B A 1 2 3 B 1 Violet Rear Right B 2 Violet Black Stripe Rear Right B 3 Gray Front Right B 4 Gray Black Stripe Front Right B 5 White Front Left B 6 White Black Stripe Front Left B 7 Green Rear Left B 8 Green Black Stripe Rear Left A 5 PowerAntenna Blue A 6 Dimmer Pink A 7 To Ignition Red A 4 ToBattery Yellow A 8 Ground Black Power Antenna ControlRelay Ignition Switch Dimmer Switch A1 A2 ...

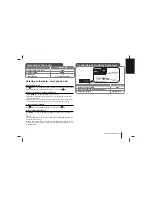
Page 8: ...to a source BEEP 2ND ALL BEEP 2ND The beep is generated when a key is long pressed 1 sec BEEP ALL The beep is generated when any key is pressed Using the EQ EQ is to increase or decrease the signal strength of audio frequencies The func tion helps you to enjoy sound more plentifully Press XDSS EQ repeatedly The indicator lights up in the following order POP t CLASSIC t ROCK t OFF Not displayed Not...

Page 9: ...y To scan the preset stations Press u u PS Each preset station appears To cancel press u u PS To tune in the preset stations Press BAND to select the desired band and press the desired preset button 1 6 Note Up to 24 stations 6 for each of three FM bands and 6 MW AM stations can be stored in the memory When a station is stored on the preset numbers on which another station of the same band has alr...

Page 10: ...der During playback press u u to go back 10 tracks and press U U to go forward 10 tracks MP3 WMA Folder UP DOWN If there are more than two folders During playback press u u to go back to the previous folder and press U U to go forward to the next folder See information about your music MP3 WMA files often come with tags The tag gives the Title Artist or Album Press DISP repeatedly during MP3 WMA C...

Page 11: ...ausing the built in microprocessor to operate incorrectly Cables are not connected correctly This unit is not firmly secured The disc is dirty The loaded disc is of a type this unit cannot play Confirm once more that all connections are correct Rectify the problem that caused the fuse to blow and then replace it Be very sure to install the correct fuse with the same rate Turn the unit off and then...

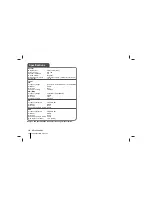
Page 12: ...5 108 MHz S N Ratio 55 dB Distortion 0 7 Usable Sensitivity 12 dBµV AM MW Frequency Range 520 1720 or 522 1620 kHz S N Ratio 50 dB Distortion 1 0 Usable Sensitivity 28 dBµV CD Frequency Response 20 Hz 20 kHz S N Ratio 80 dB Distortion 0 12 Channel Separation 1kHz 55 dB AUX Frequency Response 20 Hz 20 kHz S N Ratio 80 dB Distortion 0 12 Channel Separation 1kHz 45 dB Max Input Level 1kHz 1 2V 35KΩ D...

Reviews: