background image

Summary of Contents for LAC7700RS

Page 1: ...CAR CD MP3 WMA Receiver OWNER S MANUAL MODEL LAC7700RS Please read this instruction booklet carefully and completely before installing operating or adjusting this product LAC7700RS_ENG ENGLISH ...

Page 2: ...t remove the cover or back of this product There are no user serviceable parts inside Refer servicing to qualified service personnel To reduce the risk of fire or electric shock do not expose this product to dripping or splashing water rain or moisture The temperature of unit s outside can be extremely high please use the unit after proper installation in your vehicle CAUTION This product uses a L...

Page 3: ... swap moistened with alcohol Bluetooth wireless technology is a system which allows radio contact between electronic devices within a max range of 10 meters Connecting individual devices under Bluetooth wireless technology does not incur any charges A mobile phone with Bluetooth wireless technology can be operated via the Cascade if the connection was made via Bluetooth wireless technology Operati...

Page 4: ...l and electronic products should be disposed of separately from the municipal waste stream via designated collection facilities appointed by the government or the local authorities 3 The correct disposal of your old appliance will help prevent potential negative consequences for the environment and human health 4 For more detailed information about disposal of your old appliance please contact you...

Page 5: ... of the control panel to part D of the unit while pushing the control panel to right 3 Close the front panel Caution When detaching or attaching the control panel do not press the display or control buttons The control buttons may not work properly if the control panel is not attached properly If this occurs gently press the control panel Do not leave the control panel in any area exposed to high ...

Page 6: ...E Power PWR 5 Traffic Announcement TA Programme Type PTY 6 Equalizer EQ Extreme Dynamic Sound System XDSS Bass Reverb Blaster BRB 7 Display DISP 8 Release Eject 9 AUX In AUX 10 Preset Station 1 6 11 Shuffle SHF 12 Repeat RPT 13 Intro Scan SCAN 14 Play Pause B X 15 BAND 16 MENU Select SEL 17 Bluetooth B T WMA MP3 WMA MP3 1 2 4 6 7 9 15 3 17 14 13 12 11 10 8 16 5 ...

Page 7: ...f time Do not leave the product in a hot or humid place Do not handle the battery with metallic tools Do not store the battery with metallic materials 1 Power POWER Mute 2 Select MENU SEL 3 Source SRC 4 Play Pause B X 5 Intro Scan SCAN 6 Shuffle SHF 7 MP3 Track 10 Folder Up U U 8 CD Skip Search m m Seek Tune m m 9 BAND 10 Volume Up Down 11 Number 12 Repeat RPT 13 Number 0 9 14 CD Skip Search M M S...

Page 8: ... existing receiver unit If there is already an installation sleeve for the receiver unit in the dashboard it must be removed 1 Remove the rear support from the unit 2 Remove the control panel and trim ring from the unit 3 Insert the lever A into the hole on one side of the unit Perform the same operation on the other side and pull the unit out from the mounting sleeve ISO DIN Installation 1 Slide ...

Page 9: ... MUTE ORANGE DIMMER PINK TO IGNITION RED GROUND BLACK POWER ANTENNA BLUE TO BATTERY YELLOW 1 2 3 4 5 6 7 8 1 2 3 4 5 6 7 8 B A A A A A A A A 1 2 4 5 6 7 8 1 2 3 4 5 6 7 8 A A B B C C Microphone Plug B 1 1 Violet Rear Right B 2 2 Violet Black Stripe Rear Right B 3 3 Gray Front Right B 4 4 Gray Black Stripe Front Right B 5 5 White Front Left B 6 6 White Black Stripe Front Left B 7 7 Green Rear Left ...

Page 10: ...o the battery back up terminal from which power is always supplied BLUE This lead is for the power antenna connection BLUE WHITE This lead is for the remote amplifier on connection L L R R 1 2 3 4 5 6 7 8 REAR REAR FRONT FRONT C C Speaker Connections Amplifier To AUDIO IN To AUDIO IN To AUDIO OUT FL Front Left FR Front Right RL Rear Left RR Rear Right Microphone Plug Microphone With the sun visor ...

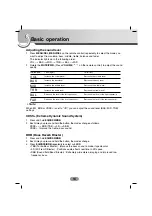
Page 11: ...be loaded automatically after 10 seconds unless you pull out disc from the unit Selecting a source Press SOURCE repeatedly to select a source The indicator lights up in the following order TUNER CD AUX TUNER Note You cannot select a source if is not ready Adjusting the volume Rotate MUTE PWR Press VOLUME on the remote control to adjust the sound level Note When you turn the unit off the current vo...

Page 12: ...or reception no alternative station can be used REG Region ON OFF REG ON The unit switches to another station within the same network broadcasting the same program when the receiving signals from the current station become weak REG OFF The unit switches to another station within the same network when the receiving signals from the current station become weak This mode the program may differ from t...

Page 13: ...tion name while listening to source DEMO OFF Cancels the function BEEP 2ND ALL Sets the beep sound every time a button is pressed BEEP 2ND The beep is generated when a key is long pressed 1 sec BEEP ALL The beep is generated when any key is pressed Using the EQ Equalizer Press EQ XDSS BRB repeatedly The indicator lights up in the following order Pop t Classic t Rock t Jazz t Vocal t Salsa t Samba ...

Page 14: ... left speaker s Decrease the level of the right speaker s FAD Decrease the level of the front speaker s Decrease the level of the rear speaker s Note When EQ BRB or XDSS is set to Off you can adjust the sound level BAS MID TRB settings XDSS Extreme Dynamic Sound System 1 Press and hold EQ XDSS BRB 2 Each time you press and hold the button the modes change as follows XDSS t BRB TBB t 3D t SBB XDSS ...

Page 15: ...t connection may operate depending on the type of phone With connection via Bluetooth technology HFP Hands Free Profile is prioritized over HSP Head Set Profile 2 The unit displays the PIN code enter screen PIN 1234 3 The unit may request permission to bond with your phone The indicator flashes To cancel press and hold B T again 4 You can set up a wireless link with Bluetooth phone Refer to your p...

Page 16: ...possible OFF Cancels the function HF VOL Setting range 0 35 After connected it is necessary to adjust the volume of Bluetooth s voice It is possible to adjust the volume using the MUTE PWR button when talking on the phone Connecting a Bluetooth phone After being registered it is necessary to connect your Bluetooth phone from this unit 1 Press B T to enter the Connection menu 2 Press B T to connect...

Page 17: ...r the call 2 Press B T again The Private is displayed If the private mode is selected on the unit press B T to return to the call to hands free mode This feature is only available on phones with Hands free profile Or press and hold B T to return to the call to hands free mode This feature is only available on phones with Headset profile Making a call from the latest call Last call Your phone keeps...

Page 18: ...s on the screen 4 The selected phone number has been stored in memory The next time you press the same preset button the phone number is recalled from memory Making a call from the preset list It is possible to make a call from the preset phone number list 1 Press B T to enter the menu 2 Press the preset button 1 6 the phone number is recalled from memory 3 Press B T to place a call Paring your un...

Page 19: ...ocedure to send a request to an Acceptor ACP such as headphones etc Although this profile specifies signalling transaction procedures between two devices to set up terminate and reconfigure streaming channels using GAVDP alone it is required to use GAVDP in combination with profiles that depend on this profile the AVRCP and the VDP A2DP Mobile phones and devices with A2DP high quality stereo bluet...

Page 20: ...cted radio station frequency has been stored in memory 4 Repeat steps 1 3 to preset other stations The next time you press the same preset button the radio station frequency is recalled from the memory Note Up to 18 FM stations 6 for each of three FM bands and 6 MW AM stations can be stored in the memory When a station is stored on the preset numbers on which another station of the same band has a...

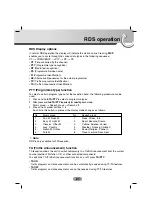
Page 21: ...y for selecting each mode Music group t Speech group t Search off 3 Press one of preset buttons 1 6 Each time this button is pressed the display mode changes as follows Note RDS is only available for FM reception TA Traffic Announcement function TA reception allows the unit to switch temporarily to a Traffic Announcement from the current source another FM station CD or other connected components T...

Page 22: ...le Press briefly I I m m on the remote control after 4 seconds of playing time Search Press and hold I I i i m m M M on remote control for about 1 second during playback and then release at the point you want Intro scan The first 10 seconds of each tracks files SCAN or each files in the current selected folder SCAN on the disc are played 1 Press SCAN SCAN or SCAN appears on the display window Pres...

Page 23: ...title Performer name song title is recorded In a WMA Content information about the file song title Performer name is recorded If there is no information NO TEXT will be shown in the display window Press DISP repeatedly during MP3 WMA CD TEXT file playback To go to a particular quickly 10 10 buttons If there is no folder or one folder Press U U AS U U on remote control to skip to the next 10 track ...

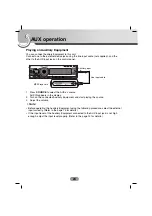
Page 24: ...ing procedure select the external input correctly Refer to the page 13 for details If the input level of the Auxiliary Equipment connected to the AUX input jack is not high enough adjust the input level properly Refer to the page 13 for details Playing an Auxiliary Equipment You can connect Auxiliary Equipment to this unit Connect one to the external device jack using the line input cable not supp...

Page 25: ...is unit is not firmly secured Adjust the volume Secure this unit firmly No sound is heard The volume level will not rise Cables are not connected correctly Connect the cables correctly Leads and connectors are not properly connected The fuse is blown Noise and other factors are causing the built in microprocessor to operate incorrectly Confirm once more that all connections are correct Rectify the...

Page 26: ...t such permission Permission should always be sought from the copyright owner GENERAL Output Power 50W x 4CH Max Power Source DC 12V Speaker impedance 4Ω Ground System Negative Dimensions W x H x D 180 x 51 x 171 mm Without Control Panel Net Weight 2 0 kg CD SECTION Frequency Response 20 Hz 20 kHz S N Ratio 85 dB Distortion 0 05 Channel Separation 1kHz 60 dB RADIO SECTION FM Frequency Range 87 5 1...

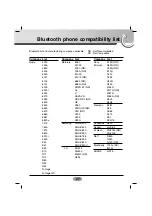
Page 27: ... A780i NR E1000 E1070 NR E680 NR E680i NR KRZR K1 NR L6 L7 RAZA V3i ROKR E2 NR U6 V360 V3ROHS NR V3X NR V500 V525 V600i Samsung SGH D500 SGH D600 SGH D820 SGH D900 SGH E788 SGH E900 SGH X820 SGH Z540V LG KG245 KG800 M4410 NR U890 Company List Sony K750i NR Ericsson K800i NR P990i NR S700i T610 T628 V600i V800 W550i W710i NR W810i W850i NR Z600 Z608 Siemens EF81 S65 SK65 SL75 SX1 SXG75 Panasonic X8...

Page 28: ......

Page 29: ...STEERING REMOTE CONTROL ...

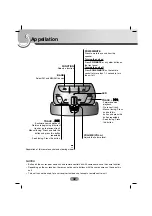
Page 30: ...battery 33 Installation 34 35 Installing the unit on a Left Hand Drive Car 35 Attachment Parts Cover holder Holder Wheel Belt Screw Remote control Specifications Power source 3 V DC Dimensions 31 W X 59 H X 27 6 D mm Weight 45g Wavelength 940 nm 50nm Output type 12 mw sr per Infrared LED Design and specifications are subject to change without notice e d c b a a b c d e ...

Page 31: ...s When disposing of used batteries please comply with governmental regulation or environmental public institution s rules that apply in your country area Always check carefully that you are loading battery with its and poles facing in the proper directions Installation of this unit requires specialized skills and experience Installation of this unit should be entrusted to a dealer from whom you pu...

Page 32: ... Turning the unit on Press PWR MUTE or any other button on the front panel Turning the unit off Press POWER MUTE on the remote control for more than 1 2 second to turn the unit off TRACK Backward search playback Returns to beginning of current track or go to previous track Manual tuning Press and hold this button and press this button repeatedly Seek tuning Press this button TRACK Forward search p...

Page 33: ...not recharge disassemble heat or dispose of the battery in fire Do not handle the battery with metallic tools Do not store the battery with metallic materials In the event of battery leakage wipe the remote control completely clean and install a new battery Always check carefully that you are loading battery with its and poles facing in the proper direc tions Do not eat lithium battery Replacing t...

Page 34: ...rbs driving stability causing a traffic accident Always attach this unit to the inner circumference of steering wheel as shown NOTES Do not install this unit in such a place as may obstruct the driver s view Since inferior layout differs depending on the type of vehicle the ideal installation location for the unit also differ When installing the unit select a location that assures optimum transmis...

Page 35: ...the arrow marked side faces the driver as shown by picture 2 Cut the extra portion of the belt at the center of the cover holder 3 Install holder wheel on the cover hold er and secure with screws Tighten the screw with driver 4 Install the remote control unit in the holder When removing the remote control unit from the holder move the corrugated release section toward the steering wheel as far as ...

Page 36: ...P NO MFL36538228 ...

Reviews: