background image

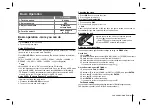
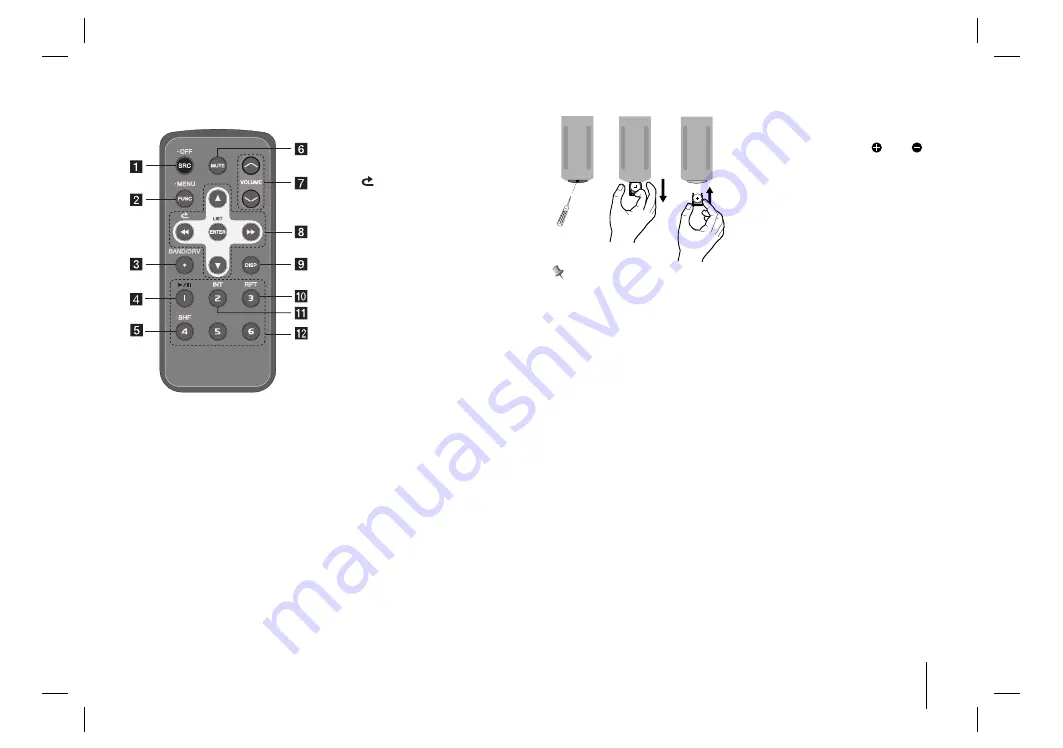
Remote Control (OPTIONAL)

1

Pull out the battery holder with a
sharp product like a ball point pen.

2

Put the battery with  

and 

cor-

rectly on the battery holder.

3

Push the battery holder back into
its original position.

Battery Installation

Note

• Use only one CR2025 (3 V) lithium battery.

• Remove the battery if the remote control is not used for a long period of

time.

• Do not leave the product in a hot or humid place.

• Do not handle the battery with metallic tools.

• Do not store the battery with metallic materials.

a

[

SRC

] Selects function sources. 

[

• OFF

] Power off.

b

[

• MENU

] Activates setting menu

[

FUNC

In each mode, sets playback
items.

c

[

BAND/DRV

• Selects a band.
• Moves to a next USB drive

(OPTIONAL)  

d

[

B/X

]

Plays or pauses playback

e

[

SHF

] Shuffle

f

[

MUTE

Temporarily stops the sound.

g

Adjusts volume level.

h

[

m M

Skip/ Search/ Seek/ Tune
[

]

Returns to the previous step.
[

v V

]

• List up/ down
• Adjusts settings.
• Moves 10 MP3/WMA tracks

backward or forward if there is
no folder or one folder on a CD.

• Moves to the previous or next

folder if there are more than 2
folders on a CD. 

[

ENTER/ LIST

]

• Confirms the settings.
• Checks tracks or files in CD

mode or preset stations in
TUNER mode.

i

[

DISP

• Press it, you can check the

clock time.

• Press and hold it, you can turn

off the display light.

j

[

RPT

] Repeat function

k

[

INT

] Intro scan

l

Numeric buttons

Selects a numbered preset sta-
tion in TUNER.

CAR CD/MP3/WMA Receiver

5

Summary of Contents for LCS300ANS

Page 1: ...S300ANS LCS300ARS LCS500UNS LCS500URS OWNER S MANUAL CAR CD MP3 WMA Receiver Please read this manual carefully before operating your set and retain it for future reference P NO MFL63287345 ENGLISH www lg com mx ...

Page 2: ...splay light Resetting the unit Adjusting general settings 10 11 Listening to a CD Pausing or restarting CD playback Searching for a section within a track file Skipping to another track file Checking information about your music Playing back tracks files in a way you want 11 Listening to music from an external device 12 13 Listening to the radio Storing desired frequencies manually Listening to a ...

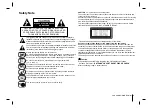
Page 3: ...ION TO REDUCE THE RISK OF ELECTRIC SHOCK DO NOT SPLIT COVER OR BACK NO USER SERVICEABLE PARTS INSIDE REFER SERVICING TO QUALIFIED SERVICE PERSONNEL CAUTION RISK OF ELECTRIC SHOCK DO NOT OPEN CAUTION This product uses a Laser System To ensure proper use of this product please read this owner s manual carefully and retain it for future reference Should the unit require maintenance contact an authori...

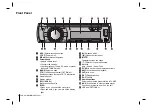
Page 4: ...ay window g EQ XDSS Improves sound quality h DISP Press it you can check the clock time Press and hold it you can turn off the display light i Z Releases a disc j Opens the front panel k MUTE Temporarily stops the sound l Returns to the previous step m b B Skip Search Seek Tune n FUNC In each mode sets playback items o BX Plays and pauses playback p INT Intro scan q RPT Repeat function r SHF Shuff...

Page 5: ...UNC In each mode sets playback items c BAND DRV Selects a band Moves to a next USB drive OPTIONAL d B X Plays or pauses playback e SHF Shuffle f MUTE Temporarily stops the sound g Adjusts volume level h m M Skip Search Seek Tune Returns to the previous step v V List up down Adjusts settings Moves 10 MP3 WMA tracks backward or forward if there is no folder or one folder on a CD Moves to the previou...

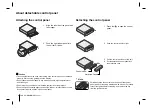
Page 6: ...ne thinner or insecticides to come into contact with the surface of the control panel Detaching the control panel Protective Case Control panel Periodically wipe the contacts on the back of the control panel with a cotton swap moistened with alcohol For safety turn off the ignition before cleaning and remove the key from the ignition switch 1 Align the left side of the panel with the stopper 2 Pus...

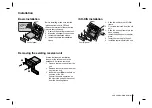
Page 7: ...N frame 2 Fit screws removed from the old unit 3 Slide the unit and frame into the dash opening 4 Install the dash panel or adapter plate 5 Install the trim ring to the unit 6 Install the control panel to the unit Removing the existing receiver unit ISO DIN Installation Before installing make sure that the ignition switch is set to OFF and remove the terminal of the car battery to avoid short circ...

Page 8: ...tion Switch Dimmer Switch A 4 Phone Mute Orange A 3 Remote On Blue White Front Left Front Right Rear Left Sub woofer Left Rear Right Sub woofer Right Sub woofer is optional To Audio out OPTIONAL Amplifier OPTIONAL B 1 Violet Black Stripe Rear Right B 2 Violet Rear Right B 3 Gray Black Stripe Front Right B 4 Gray Front Right B 5 Green Black Stripe Rear Left B 6 Green Rear Left B 7 White Black Strip...

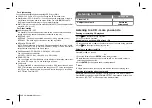
Page 9: ...t off condition press any keys the light is turned on and then off automatically if you don t press it within a few seconds Resetting the unit It resets the unit when it does not operate properly 1 Press and pull out the front panel Refer to page 6 for detaching the control panel 2 Prick the RESET hold with sharp object Adjusting general settings You can adjust sound light and other settings by us...

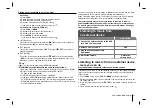
Page 10: ...display to information name func tion name EQ name etc while listening to a source CLK Clock For the model RDS is not supported or even for a RDS supported unit when RDS CT information is not received and then you set CT on the setting menu to OFF you can adjust the time by yourself Refer to the page 10 for setting the CT Clock Time ON OFF Listening to a CD more you can do Pausing or restarting CD...

Page 11: ...r example Direct CD etc it will not be possible to playback MP3 WMA files We recommend that you use Easy CD Creator which cre ates an ISO9660 file system You have to set the disc format option to Mastered in order to make the discs compatible with the LG players when formatting rewritable discs When setting the option to Live File System you cannot use it on LG players Mastered Live File System Di...

Page 12: ... press ENTER 3 Press v or V to set the option and press ENTER 4 If you want to return to the previous step press PTY vrsti programa OPTIONAL It searches the radio stations by program type of FM tuner in a way as follows The program types are displayed as follows PI Programme Identification SOUND MUTE OPTIONAL PI SOUND When the frequency of a tuned station switches to an AF Alternative frequency wi...

Page 13: ... Or the volume knob to check all files 2 Rotate the volume knob on unit or press v or V on the remote control to select a desired file 3 Press ENTER Or the volume knob to start playback Note Press and hold ENTER Or the volume knob to check all folders Then repeat the previous the steps from 1 to 3 for playing a desired file If the USB device is already connected press SRC to select a source to USB...

Page 14: ...14 CAR CD MP3 WMA Receiver STEERING REMOTE CONTROL ...

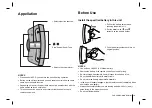
Page 15: ...battery in this unit 1 Pull out the battery holder while pressing the bottom of it 2 Put the battery with and correctly on the battery holder 3 Push the battery holder back into its original position NOTES Use only one CR2025 3 V lithium battery Remove the battery if the remote control is not used for long Do not recharge disassemble heat or dispose of the battery in fire Do not handle the battery...

Page 16: ...bility causing a traffic accident Always attach this unit to the inner circumference of steering wheel as shown NOTES Do not install this unit in such a place as may obstruct the driver s view Since inferior layout differs depending on the type of vehicle the ideal installation location for the unit also differ When installing the unit select a location that assures optimum transmission of signals...

Page 17: ...eel with belt Fit the Cover holder to the steering wheel so that the arrow marked side faces the driver as shown by picture 2 Cut the extra portion of the belt at the center of the cover holder 3 Install the remote control unit in the holder 4 When removing the remote control unit from the holder move the corrugated release section toward the steering wheel as far as possi ble before sliding the r...

Page 18: ... unit is not firmly secured The disc is dirty The loaded disc is of a type this unit cannot play The signal strength of the stations is too weak when tuning in with automatic tuning No station has been preset or preset stations have been cleared when tuning by scanning preset stations Battery power is low Confirm once more that all connections are correct Rectify the problem that caused the fuse t...

Page 19: ...BμV AM MW Frequency Range 520 MHz to 1720 or 522 MHz to 1620 kHz S N Ratio 50 dB Distortion 1 0 Usable Sensitivity 28 dBμV CD Frequency Response 20 Hz to 20 kHz S N Ratio 80 dB Distortion 0 12 Channel Separation 1 kHz 55 dB AUX Frequency Response 20 Hz to 20 kHz S N Ratio 80 dB Distortion 0 1 Channel Separation 1 kHz 45 dB Max Input Level 1 kHz 1 1 V USB Version USB 1 1 Line OUT Frequency Response...

Page 20: ...Av Sor Juana Inés de la Cruz No 555 Col San Lorenzo Tlalnepantla Estado de México CP 54033 Tel 55 5321 1919 Lada sin costo 01 800 347 1919 LG Electronics México S A de C V ...

Reviews: